MollyMia Aspire to Inspire before we Expire

Wednesday 31 July 2019

Mia Bakes: Taiyaki

Due to my recent wedding stuff haul off ezbuy prime, I decided to also pick up something I've always wanted to buy but didn't for fear of incurring ridiculous volumetric shipping fees. 
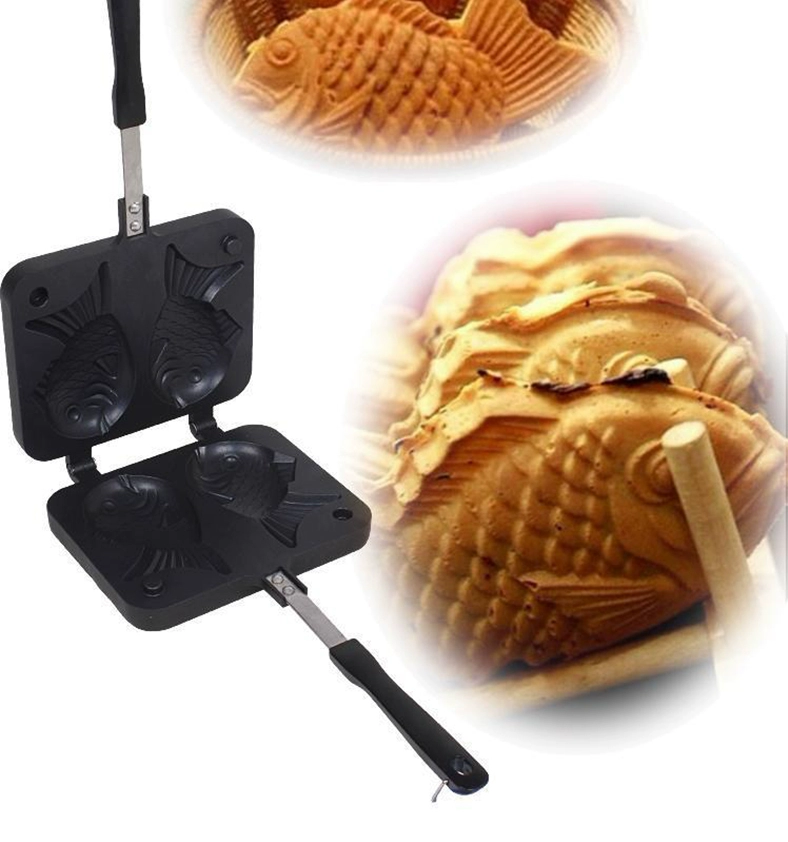
A taiyaki pan!
Well, I also (always) wanted a waffle pan but I decided to test waters on the quality and ease of usage of such pans with a taiyaki one first.


So now let's get over the ingredients so we can get started!
To get 6 (pancakey/chewy) taiyaki, you'll need:

125g all purpose flour
you may use cake flour if you want to get a fluffier, more tender taiyaki
1 egg
160ml milk
(you may need more depending on hydration level of your flour)
20ml honey
1.5 tsp baking powder
1/2 tsp baking soda
a pinch of salt
Fillings of your choice
(I've tried with chocolate chips, ovomaltine spread, PB2 chocolate peanut butter, and mixed cheeses)
Vegetable oil/cooking spray for cooking

Preparation of the batter can't get any simpler. Get a big, clean bowl, add in all your dry ingredients and give it a good whisk to combine. Then, add in your egg, honey and milk and mix under just combined. Check that the consistency of your batter is similar to that of a slightly runny pancake batter, but not totally liquid (eg. not easily pourable).
If your batter is too thick, add more milk bit by bit until you reach the correct consistency.
Then, leave your batter to rest in the fridge for 20 to 30 minutes before making the taiyaki.

To make the taiyaki, first heat up your taiyaki pan on the hob over a small fire until the pan is warm. Then, spray it down with cooking spray or brush the pan with some cooking oil. As my pan is of a non-stick material, I could get away with minimal oiling and my taiyaki didn't stick at all.
Spoon roughly a tablespoon of the batter into each depression and smooth it out to all corners of the mould with the back of your (heat-proof) spoon. Depending on how much or how little filling you are planning to fill your taiyaki with, you may then scoop out the "excess" runny batter at the fish tummy area to create a little more room for your filling to sit in.
Then, fill in the mould with as much or as little of your chosen filling, making sure it's as flat and spread-out as possible.
Spoon another 1 or 2 tablespoonful of the batter over the filling, and do take extra effort to make sure that the batter is covering all (if not, most) of your filling before snapping the pan close and immediately flipping it over.
It's very important to make sure that the batter is covering all of your filling, especially if you're using chocolate or other filling that tends to get melted and viscous when heated, as any tiny gaps in the taiyaki batter will cause the filling to ooze out and your taiyaki will tend to tear apart when you open the pan. I find that I typically need to flip the pan back onto the side when I first added the batter and open the pan in that direction, so that all the gaping chocolate bits will be facing up, and then topping up the chocolate gaps with more batter and cooking it for a few more seconds to patch up the otherwise battered-and-torn looking taiyaki. >.<"

As I'm worried that my taiyaki will burn, I first cook them on small fire for 2.5 minutes on the flipped side, then another 2 minutes on the other side before opening the pan to check for browning.
Then, I will turn up the fire to near medium and cook for an additional 30 seconds to 1 minute to achieve the level of browning I desire.

Having tried 4 different flavours of fillings, I highly recommend that you do not use peanut butter, or at least definitely NOT powdered peanut butter (like PB2), as they tend to dry up into a gritty, mushy "bean paste" texture when the taiyaki is cooked. I envisioned a runny peanut butter filling like a Mr Bean pancake but got *points above* THAT.

But it's alright, because Ovomaltine filling is just pure yumminess! 

And mixed cheeses (grated parmesan, shredded cheddar and mozzarella) was quite yummy too! 

Till then,
Mia Foo

Friday 19 July 2019

VitaRealm Anti-A.G.E. Essence [Sponsored]

After converting to team #eatclean I basically avoid added sugar like it's the bane of my existence. And do you know why? Other than the commonly known added sugar-induced health issue like tooth decay, weight gain and body inflammation, SUGAR CAUSES AGING. 

Yes, you heard it right ladies (and gentlemen).
In fact, the recommended sugar consumption each daily is only 6 teaspoons but just a harmless looking cup of pearl (boba) milk tea will burst your daily intake limit at a whopping 20.5 teaspoons! All these excess added sugar, other than adding on inches to your waistline, will also react with the collagen in our skin in a process called glycation, causing our skin to lose elasticity and volume, hence leading to development of wrinkles, fine lines and dark pigments. 

VitaRealm Anti-A.G.E. Essence contains Youth Revivial Complex, which will reverse the glycation process and fight signs of aging such as wrinkles and fine lines. In addition, the product also contains Rose Extract, which is a strong anti-oxidant, helping to strengthen our skin cells and regenerate our skin tissues, which will thus help to fight aging signs.

I like how the product comes in individual twist-cap tinted bottles, that's pretty handy if you need to bring it out with you, if you choose to drink it in the morning before breakfast instead of at night before bedtime. Taste wise, the drink is absolutely yummy with a fruity sweetness with a slight citrus tang. It'll supposedly taste even better when chilled, but on certain days which I forgot to chill mine, they ended up tasting equally good at room temperature as well.

Before (left) and After (right)

After 2 weeks of consuming the drinks every night before bedtime, I noticed that my skin looks more plump and well-hydrated. 


The fine lines around my eyes also appears to be much less obvious, making me seems a lot more refreshed and radiant. Yayy! :)

The product also comes in two other colours, Pink and Blue and here's how to choose your #mybeautycolour using these simple tips below!

First, identify your beauty colour from your skin concerns.

Blue: Dull skin tone, dry skin, uneven skin tone, dark pigments
Pink: Sensitive skin, troubled skin, acne-prone skin, acne scars, enlarged
pores
Purple: Thin and dry skin, sagging skin, wrinkles and fine lines

Then, simply choose your VitaRealm Beauty Drink based on your beauty colour!

Blue: Whitening Collagen
Helps to brighten skin, even out skin tone, lighten dark pigments
Pink: Skin Perfecting Essence
Balances sebum production, heal acne and scars
Purple: Anti-A.G.E Essence
Hydrates and firms skin, reduces sugar induced skin damages (wrinkles,
fine lines)


Each set of VitaRealm Anti-A.G.E. Essence comes in a box of 8 individual bottles, and is available at VitaRealm's online store (www.vitarealmbeauty.com) at only $39.90 (u.p. $49.90, promotion ends on 31 July) with free islandwide delivery.
Also available at all Watson's stores at the discounted price of $39.90 for a limited time only!

Till then,
Mia Foo

Tuesday 16 July 2019

NZL Travelogue: Waitomo Glowworm Cave, Hobbiton Tour & Rotorua Night Market

And day 6 of our NZL road trip was yet another crazy packed (of driving) day as we're booked for a 2-hour Ruakuri Cave tour at 11am at Waitomo Glowworm Cave and need to reach by 1030am. Oh, did I mention that it's a 3 hours' drive away?

The initial plan was to stop by Pullman Park PDS (20 minutes drive from Maverick's Yard) to topup freshwater / dump greywater before heading to Nikki's Kitchen along the way, which is nearly an hour's drive away from Mount Wellington, to pick up some breakfast and coffee. There was some mixed reviews on their coffee, but the reviews on their pies has been unanimously good.
However, as we're running low on petrol, we decided to head to Mobil Service Station Wiri instead, which was about 10 minutes' drive away, and has a PDS at the back corner of the station. There's also a freshwater tap behind the rubbish bin at pump number 5, but do note that the taps here do not fit the hose provided by Jucy (not sure for other CVs), and you will need to hold the hose in place and be prepared to get a little wet.
And so, to further save up on time (googlemap's estimation of driving time is horribly optimistic at all times), we also picked up some cabinet food and bottled milk coffee at the petrol station for breakfast.
Mammoth Supply Co coffeemilk isn't too bad too!

And by giving a generous 1.5x buffering time to googlemap's estimated driving time, we reached the Waitomo Glowworm Cave ticketing area promptly at 1030am. Now, although the place is commonly called Waitomo Glowworm Cave, there's actually two other caves which you can visit other than THE Waitomo Glowworm Cave (no photography allowed), and that's Ruakuri Cave and Aranui Cave (photography allowed in both caves). And after comparing the main attraction points of all 3 caves, I decided on Ruakuri Cave, which is a 2 hours' walking trail tour and ticket price totaled up to $150.96 NZD for both of us.
For more information on the various tour experiences, updated ticket prices and combo packages, visit their website HERE.

This is my not very happy face after the cave tour, taken right outside the cave, and I shall tell you why.

And so now, here's the best way to dampen my mood and spoil my entire day of excitement (because it was Hobbiton right after the Glowworms, and I can't wait!).
WE WENT FOR THE WRONG CAVE TOUR.

Because I was rushing for a toilet break, I passed the printed e-tickets (reservation slips) to the BF and asked him to go to the ticketing counter first to check in. But who knows, because the reservation slip was done in an e-ticket format, the BF assumed that we need not check in, and didn't tell me that he didn't check in with them. When I came out of the washroom, he simply told me that the reservation slip is already our ticket (because it really looks just like a ticket with barcode and everything) and we should head in. Over at the waiting area, we also showed the staff our "tickets", not once but TWICE. Once to double check that we're waiting at the correct area, which he checked (our slips) and said YES (but in fact, IT WAS NOT!). And the second time to get our "tickets" scanned and enter the cave for the tour.

And it was only upon entering the cave premise, when our guide for the day reminding us of the "no photography allowed" rule, did I start to feel that something was wrong.
Did they change the photography rule without updating their website? 
And then, it was about halfway into the cave when the tour guide mentioned that we will end the 45 minutes tour (like what? I paid for a 2 hours' tour!) with a boat ride did I finally realise (and confirmed) that we have joined the wrong tour that's priced at a fraction of what we've paid for.

And well, it might not be THAT bad if I have just left it like that. Because I was so darn sure that they were the one who messed up (still had no idea that we didn't do proper check in in the first place), I went back to the ticketing counter and informed the staff that they've ushered us to the wrong cave tour, expecting them to give me a refund for the Ruakuri Cave tour.

HAH, in my dreams.
Because the very first thing that the staff asked, was if we've checked in with them at the counter with the slips. And before I could nod my head yes, the BF replied, "No...."
*insert dramatic music*
And so instead of this being their slip-up, it ended up being our own mistake. And they didn't care that their colleague inside at the Glowworm Cave has technically checked our slips TWICE, it's still not their fault and so, NO REFUND FOR US. And not only that, because we've joined the Glowworm Cave tour as well, WE ALSO HAD TO PAY FOR THAT.
So yeah, "2 caves for the price of 1" type of promotion is too common for us. We've got swag, we go for "1 cave for the price of 2" kind of thing, you know?

Sorry for the rant, but even a 9 months' buffering time for this incident hasn't doused a single bit of the annoyance in me for their utter lack of flexibility and unwillingness to put themselves in their patrons' shoes. I felt absolutely no sense of empathy and no form of help from the staff at all. All she cared was to make sure that we paid for the Glowworm Cave tour (which we ended up joining partly due to their slip-up), that's it.

And so, after a miserable 45 minutes Waitomo Glowworm Cave tour that ended up being ridiculously overpriced for us, we set off with a heavy-heart (wasted my money! T.T) for our Hobbiton Tour booked at 430pm.

But before that, since we now have an extra hour's worth of time on hand, we dropped by Rora Street at Te Kuiti for lunch, which was a 20 minutes' drive away. The few eateries that's hot(ter) on the internet radar for this area will probably be Wool Press Cafe, Youngs Seafood & Takeaway and Tu Kuiti Bakery. But after walking down the entire street of cafes & eateries, the BF decided on a random, spacious and simple eatery instead.

And after a hearty, reasonably priced lunch, we hopped back onto our Jucy Chaser and set off on our nearly 2 hours' drive to Matamata, where we're booked for a 430pm 2-hour Hobbiton Movie Set Tour that sets off from The Shire's Rest, which is priced at $84 NZD per pax.

There's a variety of different tours (that sets off from different locations) and combo packages (with meals) for you to choose from, and price adjustment from April 2020 onwards so do check out their updated tour package offers HERE and make your online reservations.

If you're a fan of the LOTR + The Hobbit movie series, you definitely got to make your way down now. I mean, I'm not even THAT big of a fan but I truly enjoyed myself on the tour. Our tour guide for the day has a very strong cheerful vibe and made the tour exceptionally enjoyable despite the fact that the tour group can get a little big (there were 20 over of us?) and with pretty young children among us. Sorry, I'm really not a fan of kids


The guide will also tell us some interesting BTS stories that happened during filming of the movies, and we ended the tour with a complimentary beer/cider/hot drinks (coffee or tea) at The Green Dragon Inn


By the time we're done with the tour and driven back to The Shire's Rest, it was already past 630pm and we quickly hopped back onto our Jucy Chaser, hoping to be able to catch the sunset at Lake Rotorua, which is an hour's drive away.

But we couldn't make it.

So scrape that sunset, we're off to the Rotorua Night Market at Tutanekai Street, which takes place every Thursday night from 5pm to 9pm, for some awesome street food dinner!

The official opening hours as stated was 9pm, but probably due to the pesky rain, many stalls were already closed/closing at 8 plus when we reached the place. I can't be sure if the stalls are always the same every week, but if they happen to be, you really ought to try the BBQ meat skewers!

And after packing back loads of yummies for dinner, we headed back to our Jucy Chaser in the drizzle and decided to scrape the initial plan of staying at Rotorua Family Holiday Park and went for the free campsite at Lakeside Rotorua car park (you can find the location on CamperMate app easily) instead. However, there's only THREE designated parking slots for overnight CV parking (with the CV logo drawn on the ground at the parking lots) and if you're parked on any other parking lots, you're deemed as illegal camping. So you either have to be extremely early (review states before 4pm) to snatch a spot "legally", or you can head down much later at 8 plus, nearly 9pm and wait for the DOC guy/guard to come and "chase" you away. The guard will basically round up all the "illegal parkings" and bring you further to the end of the road, right beside Lake Rotorua, where you'll be allowed to park overnight, but with no form of facilities at all.

We're parked right up to the edge of the lake and it would have been an amazing night if not for the CRAZY NUMBER OF SANDFLIES, OMG.


I'm not sure if it's because it was raining for the entire day, or that area is just home to millions of trillions of sandflies at that time of the year (October), but after opening up the doors of our CV for ventilation to cook up something simple (MyKuali Hokkien Prawn Mee) for our dinner (I took barely 30 minutes, I'm sure), the ENTIRE interior of our CV was filled with sandflies flying around the light sources, sticking on the walls, crawling up my arms, on my tee, in my hair, in my nose, in my mouth....
Yeah, #tmi but you get it. IT WAS PURE NIGHTMARE.

So while you can get really scenic view in the morning, I highly advise you DO NOT open the doors/windows of your CV at night when camping here overnight. Do prepare mosquito nets to stick over any ventilation openings (regardless how tiny, even 1mm) you may need for survival.

Here's our yummy dinner for the night, MyKuali Instant Hokkien Prawn Mee, BBQ skewers, Nutella crepe and blueberry tart!

And here's the amazing view we had the next morning in exchange of our sandflies battle that night.


More amazing shots of our next morning at Lake Rotorua coming up in my next post! So do stick around!

Day 7 is now up! 

Till then,
Mia Foo


Wednesday 10 July 2019

Mia Bakes: Nestum Scones

Nestum cookies were pretty much da bomb earlier this year, weren't they? They've pretty much taken over the spot of cornflakes cookies during CNY this year. And of course, I did purchase a bag of Nestum cereal back then, planning to bake some CNY treats, but just never got down to it.
Looking at the bag of Nestum collecting dust in my mum's dry food cabinet, I felt kind of sorry for it (LOL!) and yet, do not really want to bake the Nestum cookies (yet) as I'm not feeling keen on waiting for my butter to soften.... So, what can I bake with chilled, rock hard butter?


SCONES!

So let's get over with the ingredients to get started!
To get 10 - 12 scones (squares), you'll need:

160g plain flour
30g nestum cereal
80g salted butter (cubed, frozen hard)
20g plain greek yogurt
50g sugar
1 large egg
1 tsp baking powder
1/4 tsp salt
some milk 
100g sultanas & 50g pumpkin seeds
(optional, may add whatever you fancy)

First up, in a large bowl, add in your flour, sugar, baking powder and salt and give it a quick whisk to combine. Then, throw in your cubed, frozen butter and cut them into the dry ingredients either with a pastry cutter or with a knife-and-fork until the mixture is mostly crumbly like wet sand and with bigger pea-sized bits of cold butter throughout the mixture.
Then, add in the nestum, sultanas and pumpkin seeds and give the mixture a quick toss to distribute them throughout the mixture before cracking in the egg and adding in the yogurt.
With a spatula, fold the wet ingredients into the dry until everything just comes together into a dough ball. If the mixture is too dry and doesn't hold together, add in some milk, bit by bit, until your mixture is of the correct consistency to come together. I added just a tbsp of milk to be able to press my mixture into a dough.
Then, transfer your dough onto a piece of clingwrap and you may want to roughly pat it down into a flat square before putting it into the fridge to chill for at least 1 hour (or overnight).

After the dough has been chilled, take it out from the fridge and roll it out to about 1 to 1.5 inches thick and cut them up into your desired sizes. I will recommend cutting them into squares instead of circles, so that you need not re-roll the scraps.

Then, lay them out onto a baking sheet lined with parchment paper and brush the top with some egg wash (egg beaten with some milk or water) if you wish to have your scones with beautiful browned top. Send the scones to bake in an oven pre-heated to 180 degrees Celsius for 20 minutes or until the surface is browned.

I've obviously loaded my scones with the sultanas and pumpkin seeds (the seeds are there, just well camouflaged). 

The addition of greek yogurt not only cut some calories from the butter (if you do not wish to use yogurt, replace it back with butter) but also added more tenderness and moistness to the scones. I've previously tried making scones with a higher yogurt:butter ratio and found the end product too moist for my liking, so I reduced it back for this trial and it's just perfect!
The addition of Nestum also added ALOT of creamy, milky sweet fragrance to the scones that made it sooooooo addictive!

Till then,
Mia Foo