MollyMia Aspire to Inspire before we Expire

Tuesday 19 October 2021

CallApp: Always Know Who's Calling [Advertorial]

Are you still getting bothered by spam calls on a daily basis. Yes, those spam-call syndicates have got nothing on us (come on, why would our SPF or DBS call us and then speak to us in Mandarin by default?) but I seriously do not appreciate even a precious second of my time lost picking up these annoying scam calls. 

Let's not even talk about how disrupting these scam calls are, especially if you're expecting an important (work) call from the new guy whose number is not in your contact list yet. 

So, do I answer this call from this unknown number or not? 

Wouldn't it be nice if we can stop these scam calls from coming in, once and for all? 

But now with CallApp, now you can!

Featured on Google Play, CallApp is a FREE android app that is trusted by more than 100 million users in over 200 countries. It has not only been chosen by Google as one of the top android apps, but also won several awards and is highly recommended by many top-rated tech magazines worldwide.


CallApp's Caller ID function can instantly identify any number that is calling us, even if its not on our contact list. Coupling this with their Call Blocker feature, we can now easily identify phonecalls from spammers and telemarketers, and block all these unwanted numbers to give us a piece of mind, once and for all. 
It also has a feature that automatically blocks numbers that's previously identified by other users as spam. Convenient, right?

Other than these two very important features, CallApp also has call recorder and video ringtone functions, with the latter allowing us to set any video we fancy as a "ringtone" to any/specific contact. 

But my favourite feature of the application has to be this. 

Don't you find it troublesome that you have to specially save a number as a new contact just so you can send over a WhatsApp message? 
Now with CallApp, you don't need to do that anymore! CallApp allows us to WhatsApp to non-contacts, saving us the hassle of needing to add various numbers as "XXX seller" just so to send out that screenshot for our proof of payment. 

These are just a few of the many awesome features CallApp provides, which also includes phone number search, car mode, and even incognito mode! 

As mentioned, the basic version of CallApp is free to download for all android phones, but premium packages can also be purchased on a monthly or lifetime basis from as low as just USD $1 per month for an ad0free experience, unlimited call recordings and access to CallApp plus (which allows you to identify messages from unsaved contacts), unlocks all your profile views & data insights, store items for free and even provides you with premium support and a faster response rate.

What are you waiting for, go download CallApp HERE and free yourselves from those pesky phonecalls! 

Till then,
Mia Foo


Monday 18 October 2021

Thermage FLX at IDS Clinic [Sponsored]


After getting really good results from the IDS skincare line and Pico-Laser treatment during my #IDSTransformMe journey with IDS Skincare, I'm definitely more than happy to be able to return to IDS again to try out the Thermage FLX treatment!

Currently using their 4th generation machine at IDS, Thermage FLX is the global leader in non-invasive skin tightening technology, with 15 years of experience in non-invasive skin tightening, and more than 2 millions treatments performed worldwide! It is also the only FDS-approved non-invasive eye skin tightening treatment, which helps to smooth and tighten skin, decrease wrinkles and hooding in the eye area, for younger-looking, lifted eyes. 

If you're not familiar with Thermage FLX, it utilises a patented radiofrequency to deliver heat safely and uniformly into our deep skin layers to renew our collagen. The gentle heating tightens our existing collagen and stimulates the production of new collagen, resulting in an immediate skin tightening and well-defined 3D skin contour. Results are not meant to be immediate, but our skin will slowly improve after the treatment for up to 6 months, with the effects lasting up to 12 months! Thermage FLX treatment doesn't only work on our faces, but can also be done on our neck, knees and even buttocks! 

So after a quick consultation with Dr. Ben, I was brought to the treatment room to have my face cleansed and to apply the numbing cream. Unlike the previous Pico-Laser treament, which required a waiting time of 20 minutes for the numbing cream to take effects; the numbing cream was left on for an hour to ensure minimal discomfort during the treatment. 

After cleaning the numbing cream off my face, Dr Ben first marked out the area of my face that he wanted to focus on (mainly my smile lines, my cheeks and my jaw lines) then prepped my skin with alcohol wipes and we're good to go! The entire treatment took about 30 to 45 minutes to complete all 600 shots on my face (and jaw/neck).

During the first couple of shots, there was absolutely no feeling of discomfort, just the vibration of the machine. But towards the end of the 300 shots (on each side of my face), the pain slowly escalated to a rather sharp stinging pain, but still bearable though. Overall, the pain factor would be about 5/10. Definitely a negligible price to pay for the sake of beauty. HAH! 

Here is now I look now. I see a slight lifting effect (my face to a tad smaller?) at the lower cheeks and jaw line, if you compare with how I look before, but do note that it would take at least a month for obvious improvement in the skin to show.

What I like most about Thermage FLX is that there is absolutely NO DOWNTIME for this treatment, the slight prickly sensation on my face after the numbing cream effects has wore off aside, there was no redness or any sort of skin peeling. Our skin will also not be exceptionally sensitive to the sun or any kind of active ingredients, so we can just go back to our usual routines after the treatment, and just wait for the skin improvement to show naturally.
Awesome, right?

To know more about Thermage FLX at IDS, check out their website HERE

Saturday 9 October 2021

The Durian Bakery [Sponsored]


Noticing that Singapore lacked a bakery that specialises in baking delicious, rich durian goods, The Durian Bakery was born in 2020, guided by a passion for durian and a passion for greatness. And their response so far? 
Phenomenal.
Rated as one of the 17 best durian cakes in Singapore by bestinsingapore.com, The Durian Bakery is definitely one of the bakeries you ought to check out if you're an avid fan of durian baked goods.

From Durian Black Forest Cakes, to Durian-Oreo Ice Cream Cakes, all of The Durian Bakery innovations are coupled with their very own signature puree, SilkyGold™, which will introduce you to a world of new and rich durian flavours. 


And it's a good thing that they sent over these bundles of goodies during my birthday, so the calories shouldn't count, right? 

Black Forest Cake made from the freshest finest black cherries and dark chocolate, infused with Mao Shan Wang puree. Made with our signature MSW SilkyGold™ Durian Puree – the creamiest, most delicious durian filling you’ve ever tasted, made of 100% Grade A MSW, blended through a special process to make it extra creamy, and just as tasty as the Durian itself!

Made with moist cherry chocolate chiffon sponge cake, layered with black cherry jam and 100% pure MSW puree, then frosted with dark chocolate charcoal butter cream and topped with Holland black cherries that are dusted with edible 24k gold dust. 
Talk about a luxurious birthday cake! 
While the chocolate base flavour of the cake complements the durian flavour pretty well, the tangy black cherry jam helps to further boost the durian taste of the MSW puree. A definite must try if you're not just a fan of durian and chocolate, but also appreciate tangy fruits. 

Other than the whole cake, there was also a Signature Pastries Taster Bundle ($51.90) that comes with the following yummies.

Savory dark chocolate mousse with fresh Musang king durian pureed and whipped into a thick creamy texture. With every mouth, you could taste the natural bitter-sweetness of our signature SilkyGold™ Durian Puree – the creamiest, most delicious durian filling you’ve ever tasted – topped with the sinfully rich dark chocolate.

With a hazelnut palette feuilletine base, filled with creamy MSW mousse and a 100% molten MSW core (picture taken while it was pretty chilled, hence not very molten) and covered with 100% dark chocolate and dusted with 24k gold dust, this is definitely the durian dessert you'd serve to impress. 

While it has been established that durian and chocolate makes a good taste-team, the addition of the feuilletine base added a nice crunch to the overall soft and creamy texture of the mousse cake, hence boosting up the overall mouthfeel of the dessert.

Light airy choux puff pastry filled with a luscious and decadent durian filling thats made using our D24!

Extremely light, soft and airy choux puff pastry that is filled to the brim with creamy D24 durian cream; what's not to love about this? 

“Poink-poink!” Our signature mochi with a soft core filled with purely just D24 Durians!

And last, but not least, everybody say MOCHI-MOCHI~~
These cute little chewy bite-sized balls of mochi are filled generously with a soft centre of D24 durian, a definitely must try for all you mochi lovers! 


For more durian baked goods, check out The Durian Bakery HERE

Till then,
Mia Foo


Sunday 22 August 2021

Media Tasting: A La Carte Buffet Dinner at Ellenborough Market Cafe (Swissotel Merchant Court)


Alright, this is quite a belated update as I've visited the restaurant before we backslid into HA. Well, if you've been following me on IG you should know, and hopefully has treated yourself to a takeout feast with the 15% discount promotion code too? 

Anyway, here's a much overdue review of my ala carte buffet dinner at Ellenborough Market Cafe, located at Swissotel Merchant Court. 

A small dampening aspect of the situation now, due to covid measures, is that the buffet line is no longer open. So the excitement of browsing through the buffet line to find out 'what's up for grabs' and also to decide for ourselves on how much or how little of each food to take, is wholly removed from the dining experience. Instead, you'll be given a few sheets of the ala carte order chit and be overwhelmed by row and rows of dish names. 


But that teeny weeny disappointment was quickly dissolved by the wow factor of the seafood bucket that was served to our table. It was literally a bucket, filled with Boston lobster, rock lobster, clam, whelk, prawns, black mussels, king grab, sausages, root vegetables and mushrooms. 
Definitely a treat for seafood lovers, YUMS! 

The dishes available for the ala carte dinner buffet are of a Peranakan fusion theme, so you can expect lovely dishes like laksa, nonya, rojak, kueh pie tee, babi pongteh, nasi lemak rice (dyed a beautiful blue with the butterfly pea flower) and ngoh hiang et cetera. 
And at the same time, you can also find more western dishes like sirloin steak, pasta, roasted potatoes and mushroom soup, and chinese dishes like kung bao lotus root and wok-fried asian greens on the menu to help satiate your hunger. 


While the HB was totally in love with the Rock Lobster in Singapore Chili Crab Sauce (because lobster, DUH!), the dish that left the most lasting impression on me for the night was the pasta with pork ragout and sous vide egg. The super IG-worthy #eggporn moment of breaking the yolk of the sous vide egg aside, the pork ragout was really flavourful, and together with the sous vide egg, gave the paste a lovely creamy, savoury taste. 


Being a ant-person (someone with an extreme sweet-tooth), the dessert menu of 14 dishes wasn't all that impressive. A huge part of it was also because I'm not much of a fan of local/nonya desserts (nonya kueh, chendol, bubur cha cha, durian), and so my choices of dessert was immediately reduced by half. 
Anyway, the HB quite enjoyed the durian fritter, and also felt that it was better than the durian penyet. Well, I guess you just can't go wrong with dipping food in batter and deep-frying them, yes? 

And out of all the cakes and patisserie that I've tried (black forest trifle, new york cheesecake, raspberry lychee mousse, honey pecan walnut tart), I have the say that the raspberry lychee mousse stood out the most. Love the tanginess of the raspberry, coupled with the sweetness of the lychee that is enveloped in the fluffy near-nothingness of the airy mousse. The NY cheesecake was pretty good as well, rich and creamy, but both the HB and I did not understand why they had to add the icing pearl sprinkles on top. It was so hard crunchy that it nearly chipped my filling. =,="


Do check out the HB's full video review of our dinner feast for the night.

For more information on Ellenborough Market Cafe current opening hours and their dining offers, visit their website HERE

Till then,
Mia Foo


Sunday 1 August 2021

Basically Jo: Centella Cica Skincare for Acne & Sensitive Skin [Sponsored]


BasicallyJo was founded by Jolene, who suffers from acne and contact dermatitis (a form of eczema). Her persistent research and experiment with products led to many of her friends in the same situation coming to her for advice on skincare products and she was then inspired to launch BasicallyJo to share her knowledge on natural beauty remedies and products, and help those in the same shoes to regain their skin confidence. 

Promising to be a vegan, clean, cruelty-free and sustainable skincare line, BasicallyJo now carries two brands of Korean skincare - Pureforet Centella Cica and T'else Kombucha Teatox. Both brands contains natural ingredients and are free from harmful chemicals, which allows the skin to 'breathe freely' and hence reduce the possibility of potential acne breakouts and other skin allergy outbreaks. 


Do you know that exposure to blue light from screens causes our skin to age rapidly, leading to development of wrinkles and fine lines? In order to repair our skin barrier and combat the premature skin aging, we require ultra-intense hydration and collagen. However, rich moisturisers are typically not very well tolerated by those with sensitive (easily clogged up) skin (like yours truly), and many of us tend to lose out on the benefit of having a well hydrated skin. 

Pureforet Centella Cica Multi Cream is specially formulated after 12 years of research with the Korean Skin Centre for sensitive skin. With a triple combination of shea butter, aroma oil blends and centella asiatica, this multi cream hydrates the deeper layers of the skin, while antioxidants from centella cica stimulates collagen production within the skin, hence minimising the appearance of wrinkles and fine lines. This simply means that this cream is not only good for acne-prone or eczema skins, but also comes with anti-aging benefits! Talk about win-win! 

Coming in a handy-dandy 50ml tub, a little goes a long way when using this multi cream. With a slightly gel-like creamy consistency, this multi cream spreads easily and gets absorbed into the skin quickly, leaving no feeling of oiliness behind. Using this cream as part of my night routine has allowed me to wake up to a soft and supple skin, with no oily sheen on my face. The quick absorption of this cream also makes it a good day cream, as I need not wait too long for the cream to "set" before layering on my sunscreen and/or makeup.

Being a rich moisturiser (shea butter is no joke for oily-skin ladies like me, really!), I do get a slight sticky feeling on my skin should I dab on a little too much of the cream. But after nearly two weeks of using the cream, I'm glad to say that the richness of this multi cream is definitely all good and no harm to my extremely oily and yet dehydrated skin. 


And do you know that BasicallyJo is actively looking for testers for their products? Check out their FAQ to find out how you can apply to be their product testers! 

For more information on BasicallyJo and their range of skincare products, visit their website or IG

Till then,
Mia Foo


Saturday 19 June 2021

Jolly Up Your Day with Up and Away Balloons [sponsored]

With the current pandemic situation, I think a good advice to all will definitely be, 
to focus on the good. 
So glad to receive a bundle of joy (literally!) from Up and Away Balloons the other day, when I was feeling at my absolute worst from a truckload of stress at work. 

A full service balloon delivery service, Up & Away offers customizable arrangements for any special event or occasion. We strive to offer the best balloon products and quality of service on the market. Let up & Away be the string to your balloon so you can sit back and enjoy your celebration with a peace of mind knowing that everything is taken care of, from the designing and creation of your customised messages, to the delivery of the balloons at your doorstep.

Get carried up & away because the sky’s the limit when it comes to our customised balloons! Our team can create and deliver any type of balloon decor and will cater to your every request to the best of our ability. Add a personal touch and get a customised balloon for anyone in your life with our extensive selection of unique and magnificent balloons. 
-credits to up and away-


I'm not joking or exaggerating when I say you'll literally be swept "up & away" by the plethora of balloon types and designs available for you to choose from. Regardless of what occasion, you'll definitely find THE balloon(s) you need, be it for a gift, part of the gift, or for an elaborated decor setup. Up and Away is no doubt your best choice for customised balloon Singapore.

I obviously need a pick-me-up, so what's better than a lovely box of chocolates along with some pretty balloons?


Pretty helium balloons (with a customised message) with a box of lovely chocolates (snickers, kit kat, tim tam, godiva and cadbury!), how can this not bring a smile onto anybody's face? 


I'll highly recommend this chocolate hamper if you're thinking of sending some love to your loved ones to brighten up their day with some sweet treats (along with some words of encouragement on some pretty balloons). So do check out Up and Away Balloons HERE!

Till then,
Mia Foo


Saturday 29 May 2021

Mia Bakes: Healthy Date Muffins

 Hey lovely readers, it has been a while since my last post! Been bogged down by work and also overseeing renovation works of my new BTO. Hopefully there will be more baking (& cooking?!) recipes up here once I've settled down into my new house!

Anyway, here's a super quick and easy recipe for a healthy, dates muffin! Well, initially I wanted to make some sticky date pudding because there's 3 boxes of deglet noor dates in the house. But after preparing the "cake" portion, I got lazy to follow up with the caramel sauce and so.... a healthy date muffin it shall be! 
So let's get over with the ingredients, so we can get started!

To get 12 muffins, you'll need:

250g pitted dates
1 tsp baking soda
250ml boiling water
40g unsalted butter
40g unsweeten applesauce
185g plain flour
30g brown sugar
30g white sugar (I used stevia)
2 eggs
1.5 tsp baking powder
1/4 tsp salt
60g pumpkin seeds + roughly chopped walnuts
(or whatever seeds/nuts you fancy)
*60g of sugar makes a rather mild-tasting (not sweet AT ALL) muffin, do add more sugar if a sweeter tasting muffin is desired

In a clean bowl, add in your pitted (and roughly chopped) dates, baking soda and boiling water. Leave to soak for 20 to 30 minutes, until it has cooled down. 

In another bowl, add your butter, sugar and applesauce. Whisk until well combined. Crack in the eggs, one at a time, whisking until each egg is well combined before adding the next. Then, fold in the dry ingredients (flour, salt and baking powder) with a spatula until there's only a few stray pockets of flour left before folding in the dates mixture. Fold until nearly combined before folding in the pumpkin seeds until just combined; do not overmix! 

Spoon the batter into 12 muffin cups and bake in the oven that's pre-heated to 180 degrees Celsius for around 20 minutes or until a toothpick inserted in the middle comes out clean. 


As mentioned earlier, these muffins are not-sweet-at-all (in spite of all those dates) with a bouncy, chewy texture, and make quite a decent (healthy) breakfast muffin! 


I've actually eaten mine with some peanut butter for breakfast, YUMS!

Till then,
Mia Foo


Saturday 1 May 2021

Mia Bakes: Cream Scones (Butterless & Eggless)

 I've previously baked a version of a cream scone, but that contains the addition of butter (and egg), which then actually made it not nearly as creamy as it should have been. 
So now, let's try out a true blue CREAM (only) scone, shall we? 


For 8 scones, you'll need:

120g all purpose flour
20g sugar 
(or equivalent amount of sugar replacement, I used a mixture of stevia and low GI brown sugar)
100 - 115g of heavy cream
1 tsp baking powder
1/2 tsp vanilla extract
a heaping 1/4 tsp salt (perhaps around 1/3 tsp)
your choice of filling (I used mixed fruits, and chocolate chips)
more heavy cream (about 1 tbsp) for brushing on scones

This is also pretty much a one-bowl, quick and easy recipe! So in a clean, large bowl, add in all your dry ingredients (including your fillings!) and give everything a quick whisk to combine. 
Then, pour in your heavy cream (start with 100g first) and mix (best using your clean hands instead of a spatula) until everything comes together to form a dough ball. 
If the mixture is too dry (depending on different hydration level of flour), add in more heavy cream, bit by bit, until the mixture is just hydrated enough to form a soft pliable dough ball that will still kind of stick to your hands, but firm enough to holds its shape. 

Wrap the dough in clingwrap and set it in the fridge to rest for at least 2 to 4 hours, or best overnight. I highly suggest that you roll the dough out (or simply press it out with your hands) into the disc (if you want scone wedges) /rectangular shape (if you want scone squares) of about 1.5 inch thickness at this stage before chilling, so that everything will be easier to manage before baking. 
It'll be easier to go for square scones; simply fold the clingwrap around the heap of dough in a rectangle, and roll the dough out with a rolling pin (or simply just press the dough around with your hands) such that it filled up the clingwrap. Super easy, and no mess! You need not even wash your rolling pin after using it! HAHA! 

When the dough has rested, simply cut the dough into 8 equal pieces (squares or wedges), and set them (close together but not fully touching one another, about 1" or so) on a baking sheet lined with parchment paper. 
Brush the top evenly with some more heavy whipping cream, and you may sprinkle some coarse sugar on top as well, if you fancy. 

Bake the scones at an oven that's pre-heated to 210 degrees Celsius for 10 minutes (high temperature first for them to rise) before turning the temperature down to 190 degree Celsius and bake for another 10 minutes or so, or until the scones are evenly browned. 

My mixed fruit (sultanas, yellow raisins and chopped red cherries) cream scones.

And chocolate chip cream scones, YUM!

In comparison to butter scones, the cream scones are definitely lacking the buttery fragrance, which is nothing a 1/2 tsp of vanilla extract can't help with. The scones also tend to have a more tender, finer  crumb texture as compared to their butter cousins. 
In any case, when in doubt (of flavour), just go big with all your fillings. You won't miss the butter then. HAHA!

Till then,
Mia Foo


Sunday 18 April 2021

My #IDSTransformMe Journey: Pico-Laser Treatment after IDS Skincare [Sponsored]

There, there.... Finally, we've come to the end of my 4 months journey with IDS. 

To wrap up my 4 months treatment journey withhem, IDS decided to give me a laser treatment session, to lighten my acne scarring pigmentations, and also for some skin tightening effects. 

There's many kind of laser therapy available in the market right now, offering a variety of benefits such as pigment & scarring removal, skin tightening, hair removal, and vascular lasers. Some of them are ablative (vaporise the outer layer of our skin) while some are non-ablative (leave the outer layer of our skin intact), resulting in different length of downtime. All in all, always consult a board-certified healthcare practitioner or medical doctor in a proper clinic (such as IDS) on which works best for you. 

And for my case, IDS suggested that I try the Pico-Laser, a newer type of laser used in the IDS Clinics for pigmentation (and tattoo) removal. The 'pico' in Pico-Laser refers to picosecond, which is one trillionth of a second. This simply means that Pico-Lasers are approximately ten times faster than the traditional nanosecond Q-switched lasers, hence theoretically working more efficiently in targeting the specific tissues with less surrounding tissue damages. Pico-Lasers have also been found to be effective in treating skin texture problems such as acne scars and wrinkles, due to its ability to stimulate collagen at deeper layers of the skin, which is the result of stimulating the body's natural healing process. Most important of all, the main reason why IDS suggested that I try out this laser treatment is because it has NO DOWNTIME, which is perfect for me, as I have to be under the unforgiving hot sun from time to time in the course of my work. 

So, after a brief follow up with IDS on my skin improvement, I was whisked away to one of their treatment rooms at IDS aesthetics for a quick facial cleansing and application of the numbing cream. 


After which, I was left to wait at their "mini-lounge" in their disposable shower cap and facial mask, looking very unglam indeed. HAHA!

After about 20 minutes (and the numbing cream has taken effect), I was brought over to another treatment room to carry out the procedure. Due to the numbing cream, there was absolutely no pain during the procedure, just a slight discomfort (like having IPL shots??) and a faint burning smell. Dr. Ben was also quick and precise, and the whole treatment took about only about 5 to 10 minutes, and I was done!

(ignore the days 1 - 6 here)
Left 1-3: 0 day after Pico-Laser treatment
Right 1-3: 5 days after Pico-Laser treatment

As Pico-Laser is meant to be a milder form of laser treatment (no downtime), there may be visible improvement after one treatment session, but most patients will require several treatments to achieve the end results. 
But I have to say, I'm pretty impressed with the improvement in my skin (lightening of acne pigmentation and the V-lift effect) after just one treatment! 

For more information on IDS and their range of treatments and services, visit their website HERE

Till then,

Mia Foo


Saturday 17 April 2021

Getting My Personal Fragrance with Maison 21G [Sponsored]

Hey lovelies, I know it's been a while since last post. Would love to be more engaging here, but you know, #adultinglife sucks. Well, if you'll love to keep closer "contact" with me, do follow me on my IG (lifestyle & random snippets or my baking life

Now, back to the important stuff. :)


I was super honoured and elated when Maison 21G offered to send me a fragrance of my own, a customised perfume for me, by me!
If you're not familiar with Maison 21G, they're a bespoke French perfumery offering custom perfume Singapore, founded by Johanna Monange, armed with a wealth of knowledge in the field from her 20 years of experience in the industry. And why Maison 21G, you may ask. Well, maison is actually a French word for home, and 21G is due to the fact that a study conducted by a physician, Duncan MacDougall, found out that our soul weighs exactly 21 grams. Inspired by this, Maison 21G promises to encapsulate the scent of our soul in a 21 grams bottle. 
Inspiring, right? 


Not only that, all of Maison 21G's eau de parfum contains 21% of perfume concentrate, which is the highest in the industry. The high level of natural oils in their perfume also offer health benefits for our body and soul. Not only that, they only use biodegradable and sustainably-sourced natural ingredients, and reusable packaging with no plastic. Good for both the humans and Mother Earth! 

And to create your own customised scent with Maison 21G can be both fun and easy! There's three ways to personalise your own perfume:

1. Based on your personality (take a short quiz on their website) 
2. Get their recommendation based on your current favourite perfume
3. Create a blend by choosing the ingredients/scents (2 choices) you like

And of course, I chose to "surprise" myself by taking their short personality quiz! 

Love the scent that the quiz created for me. While the strength of the scent is strong (I could smell it just by holding the package!), probably due to the high amount of perfume concentrate, the fragrance is "mildly" floral and really comfortable on my senses. 
I guess their quiz is pretty on point, huh! 

At Maison 21G, you can not only customise your fragrance, but also customise the bottle art of your personalised scent and give it your special name. 


Unfortunately, there was a technical glitch when I sent in my order, so my bottle customisation wasn't captured and I got a bare bottle instead. T.T

But well, other than being slightly less IG-worthy, there's nothing not to love about this personalised fragrance of mine! Even my dad got hooked on the strong scent and kept asking, "Is this only meant for women?" 
HAHA, guess my Father's Day gift is now cast in concrete.

For those who are first looking for your perfect Mother's Day gift first, you can also check them out and use my promo code mollymia upon checkout to enjoy 15% discount off your purchase! 

For more information on Maison 21G and the range of fragrances and gifting choices they offer, visit their website HERE

Till then,
Mia Foo

Sunday 14 March 2021

Mia Makes: Mochi Stuffed Red Dates [心太软]

 Recently, my aunt gave my mum a huge bag of big-ass dried red dates she has brought from China and my mum, having watched the Channel 8 timeslip periodic/modern drama (My heroine luo ming yi or something) and saw them making these "心太软" treats, asked if I can try recreating them. 
Well, it's just stuffing "mochi" into red dates and steaming them; can't be hard right? 


So let's get over with the ingredients so we can get started! 
To get about 16 HUGE stuffed dates:

16 (DUH!) LARGE dried red dates
110 - 120g glutinous rice flour
30ml BOILING HOT water
50 - 60ml room temperature water
15 to 20g sugar (to taste)

Optional:
You may prepare some sugar syrup to drench your stuffed dates in, but I feel that it's really an overkill. 

To start, soak your dried red dates in hot water for an hour for them to soften. Then, rinse them clean. Using a small knife, slice them open lengthwise to remove the pit. Do not cut the dates fully into half, but leave them open up like a book. Set them aside. 

In a clean bowl, add in 30g of glutinous rice flour and add in 30ml of hot water. Stir to form a goopy paste. This additional step will help your mochi remains soft when they've cooled (left overnight). Otherwise, you may tweak the mochi recipe by substituting a small portion of your glutinous rice flour with corn flour or tapioca starch. These two flours will also give your mochi a softer, more fluid texture. 
To the goopy paste, add in another 80g of the glutinous rice flour and 50ml of water and mix to combine. You should get a ball of soft and very pliable dough that doesn't stick to your hands. Add more flour or water if required. 

If you are slightly OCD like me, weigh your dough batter to know how much each of your mochi balls should weigh (to fit into 16 dates). I've made myself 16 mochi balls of around 14 to 16g each. 
Then, roll the mochi ball in between your palm to form it into an oblong shape before stuffing it into the sliced red dates. Set the stuffed dates on a heat proof plate; making sure that the mochi portion are not touching each other. 

Then, steam (either in a steamer or in a double-boiler over the hob) for 15 minutes, and you're done! 


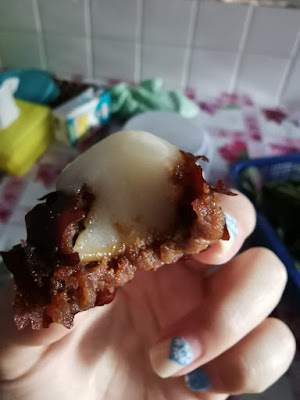
The red dates, after getting steamed, will develop a tart flavour, which goes really well with the slightly sweet mochi centre. If you absolutely dislike sourness, you may either add more sugar to your mochi dough, or prepare some sugar syrup (cooking some white or brown sugar in water until it thickens) to pour over your steamed dates. 

Best eaten when still slightly warm from the steamer, as the mochi centre will be extremely soft and chewy! 

Till then,
Mia Foo 


Sunday 7 March 2021

My #IDSTransformMe Journey: HTT Facial at IDS Aesthetic [Sponsored]

 Earlier in January this year, I was really glad to be able to join IDS on a 4-months #IDSTransformMe Journey in an attempt to achieve a healthier, clearer looking skin. And I have to say, after 1.5 months of using the range of IDS skincare products recommended to me by Dr. Ben Yim, my skin condition has really improved greatly; and I'm very less plagued by the pesky maskne (mask-induced acne) now, and I'm finally starting to win my lifelong battle with my number 1 enemy, the clogged pores. 

Thank you, Pore Formula. Thank you, Blemish Clear.

And now, for the 2nd phase of my #IDSTransformMe journey, I was given a chance to enjoy a session of their Hydro-Therapeutics Treatment (HTT) back at their IDS Clinic/Aesthetic branch at International Building. 

Their monogram colour scheme and a very clean and chic layout of the place really gave me the feeling that I'm placed in good (professional) hands. HAHA!


After a quick follow-up review with Dr. Yim, I was whisked away to one of these treatment room for the HTT facial. 

The HTT (or simply called Hydro Deep Cleansing) is a deep-cleansing facial treatment that everyone can benefit from. Created by professionals and designed for all skin types, this award-winning treatment works hard through various levels of deep cleansing to remove accumulated dirt, product build-up and clogged sebum that no regular cleanser can.

This facial treatment not only helps to unclog pores, but also aids with cellular regeneration and increase our collagen production, hence reducing our fine lines and wrinkles as well. 

The facial treatment started off with the usual double-cleansing, followed by water dermabrasion (or microdermabrasion) to remove our dead skin cells. Then, it was followed by an ultrasonic cleansing to clean out our pores, before the aesthetician carry out the extractions. As I'm super used to getting painful extractions during facial, the aesthetician was considered rather light-handed for my pain tolerance, and I even drifted off into sleep during the procedure. HAHA!
After the extraction, ultrasonic penetration of Vitamin C was applied to my face, before an anti-acne mask was given. 

At this point, I was getting really comfy on the treatment bed (and sleepy as well) and was hoping to catch a quick nap during the masking time. But the anti-acne mask was a minty one, and extremely cold (their masks are all stored in the fridge), so much so that it jolted me awake and drove away all the sleepiness in me. HEH! 


And then, it was some moisturiser and sunscreen and I'm good to go! My skin definitely felt smoother to the touch, and visibly brighter as well (no filter here, but obviously was under very bright white lights though). 

For more information of the services available at IDS Aesthetic, visit their website HERE

Till then,

Mia Foo