MollyMia Aspire to Inspire before we Expire

Saturday, 25 August 2018

Mia Bakes: Brown Sugar Steamed Cake (Huat Kueh)


Yes, that's a huat kueh (steamed cake) and I made it in a loaf pan. ROFL.

Never knew that making huat kueh can be so easy (though it take a little waiting time). So let's get over the ingredient so we can get started!

To get 1 loaf pan (approximate 10 slices), you'll need:
150g all purpose flour
50g dark brown sugar 
(add more if you prefer sweeter taste)
120ml warm water
(I used 50ml hot water and 70ml room temperature water)
1 egg
1 tsp yeast (about 3g)
1/4 tsp baking powder (optional)
toppings of your choice (I used about 35g of chopped dates & sultanas)

Making this steamed cake can't be any easier! First, fully melt your brown sugar in about 50ml of hot water and then add 70ml of room temperature water to make it lukewarm. Do make sure it's not too hot, if not you may kill your yeast. 

In a clean bowl, sift in your flour and add in your yeast and baking powder if you prefer to have extremely soft and airy steamed cake. If you prefer to have your steamed cake more solid and chewy, leave out the baking powder. 

Add in the lukewarm brown sugar water and crack in an egg. Mix well until fully incorporated. 
Pour the mixture into a well greased loaf pan (or any baking tin you prefer) and cover well with cling wrap to prevent the batter from drying out. Then, leave it to proof at a warm spot for about 1 to 2 hours until it almost tripled in size.
I proofed mine using my oven's proofing setting and it took me about 45 minutes. 

Then, scatter your topping lightly over the top of the proofed batter. I suggests that you chop your toppings as small as possible as they might all just sink to the bottom if too heavy, for the batter is pretty liquidy. 

Steam your cake over medium/high heat for 30 minutes before turning off the heat and leaving it in the covered pot/steamer for an additional 5 minutes before opening your lid and taking your steamed cake out. Let it cool in the tin for another 5 to 10 minutes before flipping it out on a cooling rack to cool completely. 


The combination of both yeast and baking powder gave me some ridiculously soft and fluffy steamed cake! HUAT AH!

Till then,
Mia Foo

Sunday, 19 August 2018

Mia Bakes: Mixed Fruit Cream Scones


Some mixed fruit cream scones, anyone? :) Oh well, but if you haven't guessed it, they're all gone by now. So why don't you make some yourself? It'll just take you.... 30 minutes (if you don't mind not having much of that fancy layered flakiness)?

So let's get over the ingredient so we can get started! To get 6 scones, you'll need:

100g top flour (or cake flour)
28g superfine wholemeal flour 
(or swap it back for top/cake flour)
30g FROZEN, CUBED unsalted butter
60ml cooking cream (& an additional 1.5 tsp)
(or you can also use heavy, or whipping cream)
1 egg, beaten (separate into TWO servings)
5 tsp baking stevia 
(my baking stevia is in 1:2 sugar ratio, so you can do your own conversion according to your own sweetness preference)
1 tsp vanilla extract
1 tsp baking powder
40g mixed dried fruits
(or you can use dried raisins, currants, sultanas etc)

First up, mix all your dried ingredients (flours, baking powder, sweetener) into a bowl and give it a quick whisk to combine. Then, cut in your frozen butter either with a pastry cutter, a mini food processor (recipe is too little to be using a large heavy duty one) , a fork with a knife, or simply just using your fingertips and rubbing the butter in. 
Stop when your butter are reduced to pea-sized and pretty evenly distributed in the dry ingredients. 
Then, mix in the dried fruits before adding in HALF of the beaten egg along with the cream and vanilla extract and give it a quick knead until everything just comes together into a dough. 
Never, ever overmix your scone dough as it'll work up the gluten in your flour (especially if you're substituting with all purpose flour) and you'll get tough, rock cake like scones. 

If you're in a hurry and do not like to wait, you can just pack the dough into a rectangular shape that's roughly 1.5 inches thick and cut them into 6 equal pieces, brush the top with some egg wash (add 1.5 tsp cream or milk to the remaining half of your beaten egg) and send them to bake at an oven pre-heated to 220 degree Celsius for 13 to 15 minutes, or until the top surface has browned nicely. 

If you can afford to wait for a couple more hours, then shape your dough into a rectangle, wrap it up in cling wrap and pop it into the fridge for at least an hour (I left mine overnight). 
Then, take out your cold dough from the fridge and let it rest for a few minutes on the counter if it's too stiff to work with (but it shouldn't be). With a bench scraper, cut the dough into half and stack the two pieces on top of each other. With the bench scraper (or roll with a rolling pin, if you prefer), press the dough to flatten it back into a rectangle of the previous size and slice it into two again. Repeat this slice-stack-flatten process for a total of 4 to 6 times. At any time, if you feel that your dough is getting too soft, wrap it back up in clingwrap and pop it back into the fridge for 10 minutes or so to firm it up. 
Then, cut your final rectangular dough into 6 equal pieces, brush the top with some egg wash and bake them off!


These cream scones are tender and crumbly, with a slight buttery fragrance (which is definitely something extremely important for a good scone, in my opinion) as compared to those cream scones that only uses heavy cream to replace all the fat (butter) in the recipe. Yes, that saves you the hassle of cutting frozen butter into the flour, but a scone ain't a good scone if it doesn't have the buttery fragrance, yes?

Till then,
Mia Foo


Wednesday, 15 August 2018

Dermagold's New Elite Miracle C+ Serum [Sponsored]


It's been a good three years ago when I first tried Dermagold's Miracle C+ Serum (read my review HERE) and I'm so glad to find out that Dermagold has reinvented this award-winning star product of theirs and came up with the New Elite Miracle C+ Serum!

An improved and updated version of our Award-Winner Miracle C+, this is a luxurious elite high performance 18% Vitamin C Ester serum fortified with hyaluronic acid and aloe. Multi-functioning product with anti-oxidant, anti-wrinkle, anti-pigment and anti-inflammatory properties. Brightens and whitens skin.  
-credit to dermagold.sg-


The benefits of their previous award-winning Miracle C+ have been preserved in the new Elite Miracle C+, which include:

1. Anti-Oxidant
2. Anti-Wrinkle
3. Anti-Pigment (for blemishes or pigmentation)
4. Anti-Inflammatory (for sensitive or irritated skin)

So, apart from helping to control and improve on existing skin prpblems, the new Elite Miracle C+ will also help to brighten and whiten our skin with regular use, making it an all-in-one power-packed formulation that's suitable for all skin types.


The new Elite Miracle C+ still comes in a light and watery gel consistency that spreads across our skin effortlessly and gets absorbed in no time. Not only that, I've experienced an obvious improved texture in the product, that felt smooth and luxurious against my skin. The rich and velvety texture slides easily against the skin, giving a refreshing feeling after application. 
In addition, the Elite Miracle C+ is also better able to lock in moisture to the skin without making our face looking and feeling greasy!

True enough, my skin feels more hydrated and supple after applying the product, so much so that I've been skipping my night moisturizer (I only use this in my night skincare regime) these days, and yet my skin appears equally, if not more supple and moisturized the next morning. 
As I've said before, invest in skincare and not makeup, ladies. You can't go wrong with that!

For more details, visit Dermagold's website HERE
Enjoy free shipping for all orders above SGD $100 and get $20 off your first order with every new Dermagold membership sign up HERE

Till then,
Mia Foo

Sunday, 5 August 2018

Mia Bakes: Super Quick and Easy Fluffy Chocolate Chip Pancakes

Because I recently impulse-bought Fifty 50 Low GI Maple Flavoured Fructose Sweetener (HERE) while carting out my usual purchase on iherb, I decided.... It's time for a pancake breakfast!


And since it's sunday cheatday, I decided to go big or go home and make some CHOCOLATE CHIP pancakes!

To get 3 thick and fluffy pancakes, you'll need:

85g top flour (or cake flour)
70ml milk
2 tsp to 1 tbsp powdered sugar
(do adjust the sugar according to your preference, and also based on the type of chocolate chips you're using. Eg. milk/dark/bittersweet etc)
(about) 2 tsp melted butter 
1 medium/large egg 
(yolk and whites separated)
1/4 tsp vanilla extract
3/4 baking powder
1/4 baking soda
30g to 35g semi-sweet chocolate chips 
(or however more or less you fancy)

First up, make sure all your ingredients (except melted butter) are at room temperature. Crack your egg open and separate the yolk and white. Set the egg whites aside and add your yolk into a big bowl along with the milk, melted butter, vanilla extract and sugar. Beat until well combined.
Add in the dry ingredients and fold until almost combined.
Almost meaning it would still be lumpy, but there's just minimal patches of pure white flour here and there. Then, add in your egg whites (you don't have to beat the whites into meringue!) and mix until just combined. You would still want your battery to remain lumpy but without any chunky remains of the snotty-looking egg whites. 
Finally, dump in all your chocolate chips and fold until just combined. 
Set your batter in the fridge to rest for about 10 minutes. 

After 10 minutes of resting, take your pancake batter our from the fridge and heat up your skillet/frying pan. I'm using a non-stick pan, hence there's no need to butter/oil it, but if yours isn't non-stick, lightly oil your pan and use a paper towel to remove any excess oils from the surface. Doing this will give you a well-browned pancake instead of patches of overly browned with "uncooked" parts all over. 

On the lowest heat, scoop 1/4 cup of your batter and pour it from about 3 inches height onto the pan to allow the batter to spread out into a circle on its own. Cook it on low heat until you see bubbles appearing on the surface, and quickly flip them over. Be sure to flip the pancakes when the uncooked, bubbly surface is still wet (a dry skin has not yet formed over the surface). This will allow the pancake to further rise up after getting flipped and grow thick and fluffy after they're cooked!
After flipping your pancakes, cover with a lid and cook for another 1 to 2 minutes.


And there you have it, thick and fluffy pancakes without the need to beat your egg whites into meringue!


And with a light drizzle of the pancake maple flavoured syrup (I only added 2 tsp of sugar to my batter), this is definitely the BEST Sunday #cheatday breakfast, ever!

Till then,
Mia Foo


Friday, 3 August 2018

Mia Bakes: Green Tea Wholemeal Stuffed Buns


Oh well, this is my 2nd attempt at trying to make a jam-filled bun (by stuffing it with jam BEFORE baking) and they still burst open. T.T
So I guess, you just cannot stuff your bread with jam before baking them. 


Anyway, this is 100% wholemeal, can you believe it? I've been baking bread loaves with 100% wholemeal flour for quite a while (using bread machine) and they're always significantly denser and tougher compared to refined loaves. But now, I guess I found the trick!

So let's get over with the ingredients so we can get started!
To get 6 buns, you'll need:

300g wholemeal flour
(I used Prima's superfine wholemeal)
2 tsp vital wheat gluten
2 tsp green tea powder
1.5 tsp instant yeast
30g caster sugar
15g unsalted butter, soften at room temperature
80ml cooking cream
(I guess you can use whipping cream too)
120ml milk
1/2 an egg, beaten
(keep the half and add a dash of cream/milk to make egg wash)
1/2 tsp salt
6 tsp of fillings of your choice, frozen)
(speculoos worked, jam obviously didn't. you can try nutella if you fancy too!)

adapted from Hokkaido Milk Bread recipe on ricenflour.com

Making the bread dough is easy if you have a bread machine. Just add all the ingredients (except for soften butter) in, start your kneading function and wait until the mixture forms a dough. Add in your butter, and let the dough knead until the function is completed. 
If you're doing this by hand, proceed in similar method. Add your liquid (cream, milk and egg) to your dry ingredients in a large bowl and mix until a dough ball is formed. Then, knead in your soften butter until you're left with a clean bowl (no more stray bits of dough sticking on the sides). There's no need to check for windowpane stage because you won't get it, as this is a 100% wholemeal dough. 
Then, oil your bowl and place your well kneaded dough in. Cover with cling wrap and leave it in the fridge overnight (for at least 6 to 8 hours) for 1st proofing.

The next morning, take out your dough from the fridge (it should be around twice the size) and set it on the counter for around 45 minutes to an hour for its temperature to rise up to room temperature. Then, check that proofing is completed by poking a hole right down the middle of the dough with floured finger, making sure that the hole doesn't close back up on its own.

The dough should be pretty smooth (and dry), so you probably need not require any dusting of flour on your work surface. However, if your dough feels a little sticky (differenr brands/batches of flour will have differing hydration levels), just very lightly dust your work surface with the minimal flour. 

Give the dough a few kneads and cut it into 6 equal pieces. Roll the dough pieces into round balls, and set aside (covered with cling wrap) for them to rest for 10 to 15 minutes. 

After the dough has rested, take out a piece of the dough from under the cling wrap and press it down onto your work surface to flatten it, you can use a small rolling pin to roll it out slightly, but just using my palms to press it out worked for me. Then, place a piece of your filling (frozen cookie butter, frozen nutella, or a piece of chocolate, anything!) wrap it into your dough. Pinch the seams a few times and make sure it's sealed properly. Then, placing the dough ball seam side down, cup your hand over the dough ball and give it a couple of rolling on the work surface to even out the seams and round up the dough ball. 

Place the dough aside, cover with a cling wrap to prevent drying, and continue the same with the other 5 dough balls. 

When all buns are done, place them about 2 inches apart on your parchment lined baking sheet, cover with cling wrap or a clean tea towel and set them aside at a warm place until they grows to 1.5x - 2x the original size, which should take you about 45 minutes or so. I used my oven's proofing function and so it only took me 25 minutes. 

Then, brush the top of your buns with some egg wash (the remaining half of your beaten egg with a dash of milk or cream) and send them to bake in your oven pre-heated to 190 degree Celsius for about 18 to 20 minutes, or until the bun has browned and tapping on the surface with your fingertip gives you a hollow "kok kok" sound. 


Tadaa~

Even though these are 100% wholemeal (and not those fake "wholemeal buns" recipe with only 10% wholemeal flour, like WHUTT? Who are you trying to kid?), they are as soft as, if not even softer than my 100% refined flour loaves! They just so soft and fluffy when still warm from the oven, but do get considerably harder the next day. But it might also be because I just left them sitting on the counter overnight. Heh! With proper airtight storage, they should remain soft and fluffy for some time longer, I believe!

Till then,
Mia Foo

Sunday, 29 July 2018

WholesaleAirtrack: Living Your Gymnast Dreams

-credits to dreamstime.com-

Always dreaming of perfecting that fancy somersault, but can't seem to get past the fear of tumbling over your own feet and landing on the cold hard ground?
Fear not, because Wholesaleairtrack  has got your back!

Being the world's largest supplier of inflatable airtrack, Wholesaleairtrack has several years of experience in producing airtracks. With all these years of being in business and hundreds of tests, Wholesaleairtrack has developed the best quality of air tumble track to ensure that each part of the airtrack maintains its best quality and lasts a long time and is safe for customers. They always strive to work closely with all customers to meet each of their requirements and tailor the airtrack according to their wishes. 


Having dealt with customers from all over the world, from experienced business to new entrants, Wholesaleairtrack has gone beyond just supplying products to helping customers with useful advice and tips for starting up. In order to maintain a good, long-term business relationship with their customers, Wholesaleairtrack is committed to live up to their highest expectation of their services and products, and will always strive to provide the most satisfying products. 

Other than the standard airtrack  that comes in P1. P2 and P3 variations along with a myriad of colours to choose from, you can also expect to find electric air track pump in various powers, ranging from as low as 500W to as high as 1800W to cater to your different needs. 

Wholesaleairtrack also provides various airtrack sets, such as the tumbl trak air floor that also comes in various pretty colours. 

Bringing products directly from manufacturer to your doorstep, Wholesaleairtrack pass along the savings of eliminating fancy showrooms, middleman and additional value of branding directly to their customers with low factory prices. Moreover, Wholesaleairtrack also strives to provide the best of customer service by offering FREE SHIPPING for all their airtracks and printing of logos on the airtrack without any customisation fees.

For more information, visit their website HERE or drop them an email at sales@wholesaleairtrack.com

Till then,
Mia Foo
Monday, 23 July 2018

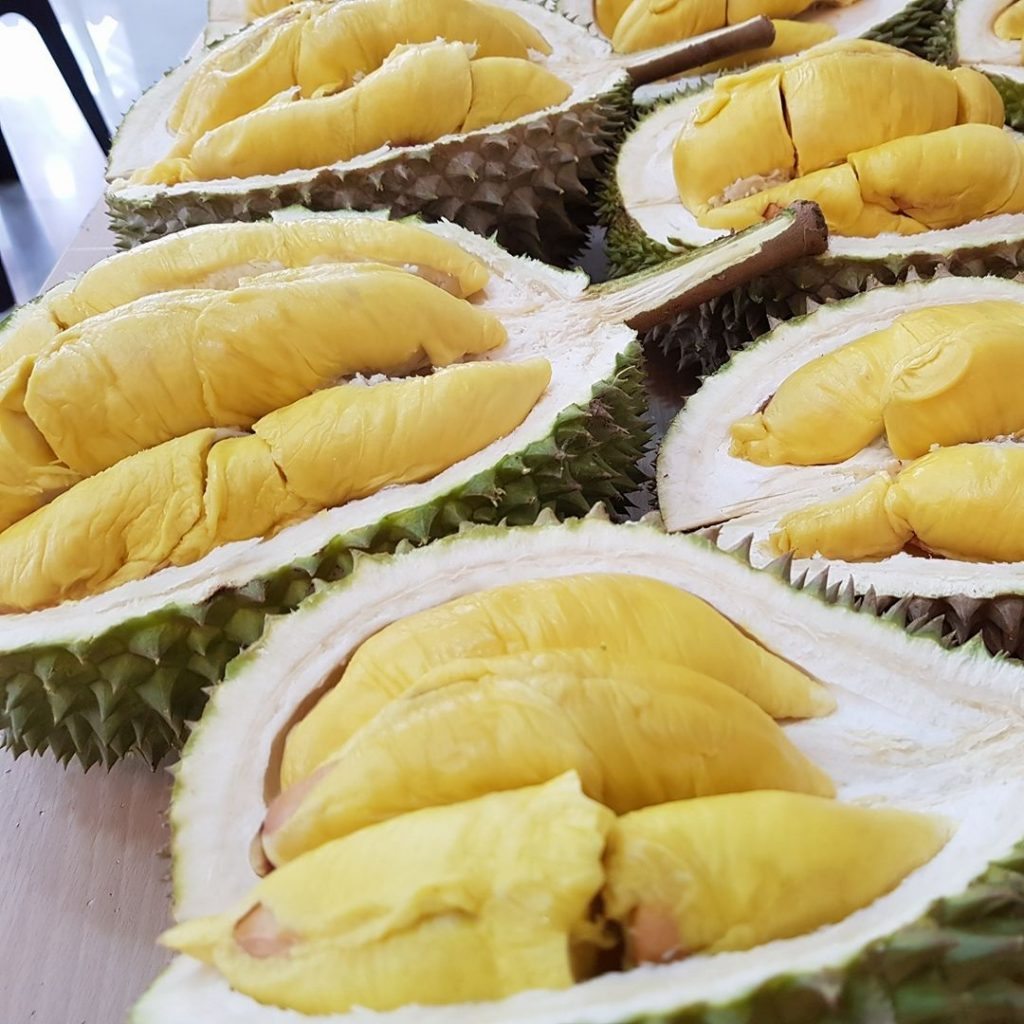
Duriandelivery.com.sg: get durian delivered to your doorsteps!

Do you smell something familiar? Yes, get ready to party, durian lovers! The durian season is here again!

-credits to duriandelivery.com.sg-

Well, actually I don't eat durian. I don't really detest the smell (like most other durian-haters), but it's the texture with the smell-and-taste combined that I can't seem to enjoy. But that doesn't stop my parents from enjoying their durians every year, during the durian seasons.
I still remember, earlier in the days when I was much younger and my grandma still very much active (she's still in the pink of health now, just a problem with weak legs), every year during the durian season, she would come over to our house and together with my mum and dad, head down to the market place in our neighbourhood and buy 2 to 3 big bags of durians from the fruit stall, carry them all the way back home, lay them out (still in husks) on newspapers on the floor and just whack everything. 
Back then, I actually quite like the smell of durian in husks and so I will always sit together with them (while my brother hides away) and just smell durians while they ate. 
Haha, I know it's weird, but don't judge me. 

And now, fast-forward at least 10... 15(?) years, there's no need for all those sweat (of carrying heavy bags of durians) and blood (when those pesky thorns prick you) in exchange of these King of Fruits, for you can easily order them online, and have your orders delivered right to your doorsteps. How convenient is that!

Being durian lovers themselves, Duriandelivery understand the desire for many durian lovers to have a durian eating experience that isn't filled with doubt disappointment, and definitely not the common quarrels with durian stall owners that happen all too often. Hence, Duriandelivery takes pride in ensuring the quality of their durians, paired with competitive pricing.

While most durian stalls typically are selling durians that are one day old, Duriandelivery makes sure that the durians reach us within 6-12 hours after they're plucked, keeping them at their best quality possible. Any fresher, you probably have to pluck them yourselves.

While there are quite a handful of durian variety available in Singapore, such as Musang King (Mao Shan Wang), Old Tree MSW, Red Prawn, D24, Golden Phoenix (Jin Feng), D101, Black Gold etc, the selection (and quantity) available on Duriandelivery still relies greatly on Mother Nature.

As of now, there are 4 variety available: Old Tree MSW, MSW, D101 and XO D24 (traditional D24 with a premium XO-like aftertaste). At Duriandelivery, the durians are de-husked and packed into hardy plastic containers in packs of 400g or 800g for easy delivery and greater convenience of their patrons.
Pricing (per 400g) ranges from $16.90 for XO D24 & D101 to $34.90 for Old Tree MSW. 

And here's what I got for my parents!


Old Tree MSW
These are the popular Mao Shan Wang that's plucked from only the oldest, most premium trees. Taste-wise, they're more rich, with a heavily complex flavour and much more bitter.

These Old Tree MSW have much smaller seeds and very plump flesh, apparently damn shiok to eat, especially if you're a fan of MSW for their bitterness. But my dad is not a fan though, for the bittersweetness of the usual MSW would have been just nice for him. So the slightly stronger bitterness in these Old Tree MSW has somehow crossed that line for him.
My mum loves the plumpness of the flesh though. I think that's pretty obvious just by looking at the pictures, they're huge!

Mao Shan Wang
The ever so popular MSW that's bittersweet with a complex taste. In terms of bitterness, these will be milder than the Old Tree MSW. 

Rich & creamy in texture, relatively small-seeded with plump flesh and that distinctive bittersweet flavour, my dad is a fan! He just kept eating non-stop from this box. ROFL.

Red Prawn
Intense sweet flavour, with a more distinctive orangey-yellow flesh and definitely more "fun-sized" compared to the other two variety.

My mum (actually my parents') first try of Red Prawn, and she loves it for the sweet flavour.

And do you know, Duriandelivery also offers 100% money back guarantee (bao jiak) for their durians? Duriandelivery offers full refund or replacement for any unripe/sour/watery durians. You can also get to enjoy free, same day delivery for purchases of above $120!

For more information & ordering, visit duriandelivery.com.sg

Till then,
Mia Foo

Friday, 20 July 2018

Mia Bakes: HappyCall Crisp Chocolate Chip Cookies (cookies cooked on hob!)


Well, I didn't intend to put this up as a recipe post, but in the end I just decided to (for my own record's sake) so here's a super quick and short post! 

To be honest, I have no idea how many cookies I can get out of this recipe because I've not finished baking the entire batch of dough (more than half of it is currently still frozen in my freezer) even after using part of it as my baked cheesecake base. That idea came out pretty fail, by the way, because the low heat required to bake off the cheesecake is not enough to give you a crunchy cookie base, which was what I want to achieve. But if you like a soft, severely underbaked, chewy and gooey cookie base, then go for it. 

Anyway, to get at least an estimated a dozen huge (subway sized) chocolate chip cookies, you'll need:

100g unsalted butter
70g shortening (preferably butter-flavoured)
75g dark brown sugar
115g castor sugar 
(I substituted part of this with stevia)
125g plain flour
60g top flour (or cake flour)
1 large egg
2 tsp vanilla extract
1/2 tsp baking powder
1/2 tsp baking soda
3/4 tsp salt
180g chocolate chips 
(I used semi-sweet & 72% dark mixed)

recipe adapted from modernhoney.com

First up, melt your unsalted butter in a pot over the hob and let it simmer until browned. Then, take it off the heat and set it aside to cool, before beating in the shortening and sugars until creamy.
Add in the egg (at room temperature) and vanilla extract, and mixed until well combined before sifting in the the rest of the dry ingredients (except chocolate chips) in 2 to 3 batches, folding until most of the flour cannot be seen. 
Then, add in your chocolate chips (or you can use chocolate chunks, up to you) and fold until just combined. 

And I'm pretty sure nobody needs to bake off a dozen huge-ass chocolate chip cookies at one shot, unless you're having a party, so just portion out the amount of dough you wish to bake off for now, and wrap the rest tightly in clingwrap and pop it into the freezer. That should give you ready-made chocolate chip cookie dough for the next couple of weeks!

Do note that cooking time will differ depending on how big or small you portion out your cookies to be, I made mine with 3 flat tablespoonfuls of dough each. 

The cookie dough has a pretty high fat content (170g of butter and shortening!) and also because HappyCall is a non-stick pan, there's really no need for you to add in anymore butter or cooking spray. Just warm up your pan for a little (needs not be very hot, just barely warm), and then press your cookie dough (I shaped mine into about slightly more than 0.5cm thick) onto the pan. Snap your HappyCall pan shut and lower your heat down to the lowest heat and cook for about 8 to 10 minutes, or until the side has turned golden brown.
Now, the reason why I used HappyCall pan is because the cookies will still be very soft and crumbly, so flipping them will be a b*tch! With HappyCall, you simply just flip your entire pan around and set it back onto the hob! It's that easy!
Cook your cookies for another 8 mins or so, until the side turns golden brown as well. 

At this point, the cookies will be fully baked (this is a slightly crunchy, crisp cookie so you need not worry about over-baking it that much) but they will still very extremely fragile. Leave it on the pan to cool for at least 3 to 5 minutes before attempting to pick it up. The cookies will firm up and turn crisp upon cooling down. 

Till then, 
Mia Foo