MollyMia Aspire to Inspire before we Expire
Showing posts with label bread recipe. Show all posts

Thursday, 13 August 2020

Mia Bakes: Applesauce Walnut & Raisin Quick Bread (With Green Banana Flour)

 Frankly speaking, I don't really understand the logic of quick breads. Let's face it, you can't get bread without long proofing. The texture just ain't right. They're still cakes, albeit coarser and denser.... Muffins! Yes, they're muffins baked in a loaf. Are they not? But breads or muffins, they're delicious. And they're also super quick and easy to make. So let's make ourselves some (slightly healthier) walnut and raisin quick bread using applesauce and green banana flour!
This is also going to be an eggless recipe, as I was baking this for my grandma, who doesn't eat eggs in the morning (due to religion). Making this eggless will allow her to eat the bread for breakfast instead of having to wait till after noon to eat it. 


If you've not heard of green banana flour, it's a gluten free alternative to grain flour, having been made from green bananas. They're said to be high in resistance starch, with benefits such as:

1. Improving negative effects of metabolic syndrome
2. Promotes a healthy colon
3. Could reduce insulin sensitivity
4. Possibly aids weight loss
5. May reduce cholesterol levels

So let's get over with the ingredients so we can get started!
To get 1 loaf serving, you'll need:

250g unsweeten applesauce
80g dark brown sugar
135g plain flour
85g green banana flour (I used Edward & Sons)
75g unsalted butter, soften
70g honey
1 tsp ground cinnamon
1/4 tsp ground nutmeg
1/2 tsp vanilla extract
1/4 tsp almond extract (optional)
1/3 tsp salt
2 1/2 tsp baking powder
1/4 tsp baking soda
100g raisins (I mixed sultanas with yellow raisins)
50-60g walnuts, roughly chopped.


In a large bowl, cream the soften butter and brown sugar together. Then, add in the applesauce, honey and extracts and mix until well combined. There might be some "separation" of the butter, but it's alright. From 135g of plain flour, take about 1 to 2 tbsps and mix it into the raisins and chopped walnut mixture and toss till everything is well coated. This will prevent the walnuts and raisins from sinking to the bottom of the bread while it bakes. 
Then, add in all the of the dry ingredients (flours and leavening agents) into the wet ingredients and mix until there's just a few streaks of flour to be seen. Then, dump in the chopped walnuts and raisins and mix until just combined. You do not want to overmix your batter, as the green banana flour (along with applesauce) will make your cake quick bread slightly denser (and crumbly) than usual. Overworking the gluten in your plain flour will definitely give you a super dense and tough bread. 

Once there's no more streaks of dry flour to be seen, scoop the batter into a lined loaf pan and bake at 175 degree Celsius for 30 to 35 minutes, or until a toothpick inserted comes out clean with just a few crumbs. Leave the bread to cool down slightly in the loaf pan for 5 to 10 minutes before taking it out of the pan and letting it cool COMPLETELY on a wire rack. Do not try to slice it when it's still warm; things will get messy with all the crumbling. 

And tadaa~ 

The dark brown sugar and honey will add a lot of rich sweetness to the cake, and while the applesauce helps to make the cake quick bread super moist, the green banana flour helps to give the bread a denser and "coarser" texture, like a christmas plum cake. Well, as I've said, this is definitely more of a cake (rich and sweet) than a bread (bland). Try it and let me know what you think!

Till then,
Mia Foo


Friday, 29 May 2020

Mia Bakes: No Knead Raisin Milk Bread

Soft, fluffy bread using just plain flour and absolutely no kneading required at all. You don't even need to touch the dough with your hands, is it possible?
The answer is YES!
So let's get over with the ingredients, so we can get started.

To get 1 small loaf (it'll only fill up 2/3 to 3/4 of a standard loaf cake tin), you'll need: 

150g plain flour
1 egg
25g castor sugar
75ml milk (need not be lukewarm)
1/2 tsp instant yeast
1/4 tsp salt
1/2 tbsp vegetable oil
40g raisin

ps. you can easily double this recipe to get a "standard sized" bread loaf. 

Making this bread can't be any simpler. You just need.... TIME. 
Yes, not elbow grease, but time. 

In a large bowl, add in your flour, castor sugar, instant yeast and salt. Make sure that your yeast is not in direct contact with the salt. Then, crack in an egg and add in the milk (I prefer to add the liquid directly over the yeast's spot to better dissolve them, though I know it's actually not required) and mix with a spatula or wooden spoon. When the dough has some sort of come together with no pockets of flour, add in the vegetable oil and continue stirring the dough for at least 5 minutes (or more, if you can) with the spatula, to help the gluten to develop. 

Now, for other kind of bread dough I would recommend that you mix with a pair of chopsticks, but not for this recipe, because the dough will be more like a batter and using spatula will give a more effective mixing due to the higher surface area. The ridiculously high hydration of the dough is what gives us soft and fluffy bread with no kneading. 

And yup, after you're done with the mixing, scrap down the sides of the bowl to push down the stray bits of batter as best as you can and cover the bowl with some cling wrap. Then, leave it on the countertop for 20 to 30 minutes first before keeping it overnight in the refrigerator (about 8 to 10 hours will be ideal). 

The next morning, take your bowl of dough out of the refrigerator and leave it on the counter for about 30 minutes for it to warm up slightly. Then, add in the raisins and stir with a spatula until well mixed. Then, pour out the dough into your prepared loaf tin (mine is non-stick but I greased it slightly with some non-stick cooking spray anyway to be doubly sure that nothing sticks. you may even line your tin with parchment paper because it's going to be quite sticky), cover it with a damp towel or clingwrap and set it at a warm place for 2nd proofing, until it is at least 1.5x to 2x the size. You can tell by sticking a toothpick into the batter and then using the height of the batter that has stuck onto the toothpick to make a marking on the loaf tin to know where should the batter rise till to be twice of the original depth/height. 
As it was an exceptionally chilly morning, it took me about 1.5 hours for the dough to nearly double in size. If your oven comes with a dough proofing setting, go ahead to use it and it should take you 20 to 30 minutes instead. Otherwise, you can put the tin inside your oven (switched off) and add in a bowl of boiling hot water below the rack to quicken the 2nd proofing process. 

And once the dough has proofed, brush the top of the dough with some eggwash (I used only the egg yolk with some water, hence it's super browned. But you can use the whole egg too) and bake it at 180 degree Celsius for about 25 to 30 minutes until nicely brown. 
Check for doneness by lightly tapping the surface of the bread with your fingertips. If it sounds hollow, the bread should be fully baked through. 
Tadaa~ Super soft, sweet and milky raisin bread with absolutely no kneading at all. 
And because the bread is made with plain flour instead of bread flour, the texture is much finer, closer to our usual store-bought loaf bread, and not as chewy as what you'll usually get with using bread flour. 


Just see how soft and fluffy it is! The bread considerably harden up (went stale) on the 3rd day even though I kept it in an airtight container, so I'll highly suggest that you do a smaller batch and try to finish the bread within 1 to 2 days.

Till then,
Mia Foo


Wednesday, 7 August 2019

Mia Bakes: No-Knead Wholemeal Ovolmatine Stuffed Buns

Hey lovely readers, I'm back with yet another wholemeal bread recipe, this time it's no-knead!
However, it's not going to be 100% wholemeal though, but only around 70% as I still have a couple tablespoons of all purpose flour leftover and wanted to finish them up ASAP.
Anyway, let's get over with the ingredients to get started!


To get 4 stuffed buns, you'll need:

Bread dough:
50g minus 1 tsp all purpose flour
100g superfine wholemeal flour
20g granulated sugar
(may reduce to 10g if you prefer your bread less sweet)
1 tsp vital wheal gluten
(may skip and replace back with flour, but bread may turn out more dense)
3/4 tsp instant dry yeast
1/8 tsp (or a pinch of) salt
10ml corn oil / vegetable oil
1 egg 
(mine was about 50g out of the shell)
50 - 70ml lukewarm water
(depending on hydration level of your flours and egg size)

Fillings:
Ovolmatine spread
chocolate chips
(I used 60% cacao)

recipe adapted from the super talented Chinese youtube-baker 茄子美食
She used bread flour and a lot more oil (both in the bread dough, during shaping before 2nd proofing, and after 2nd proofing before baking) so hers turned out a lot softer and fluffier on the inside and crisp-looking on the outside. 

First up, in a clean bowl add in 50g of all purpose flour and remove 1 tsp of it, replacing it with a tsp of vital wheat gluten. Then add in the rest of your dry ingredients, making sure that your yeast and salt are not in direct contact with each other.
Then, crack in your egg and and first add in 50ml of lukewarm (make sure it's not too hot if not it'll kill your yeast) water over the spot where you've pour in your yeast and mix well by stirring with a pair of chopsticks (highly recommend using chopsticks because the dough will be super, super sticky).
Continue adding water and stirring until you get a pastey, sticky yet smooth dough like so.


-credits to 茄子美食-

Then, add in the oil and give the dough another quick stir with the chopsticks until the oil gets fully absorbed by the wet dough. Then oil your hand slightly and pat down the wet dough roughly into a ball (MUST oil your hands because the dough sticks like a b*tch!) and cover with a clingwrap and leave it for 1st proofing overnight in the fridge until it roughly doubles (or at least 1.5x) in size. I left mine for about 11 hours in the fridge plus an additional 1.25 hours at room temperature after taking it out.

After the dough has risen back to room temperature, oil your work surface and hands generously, as the dough will still be extremely sticky, and dump your dough onto the oiled surface. Pat down on the dough to release the air pockets (no need to knead, as it's not exactly kneadable anyway) before shaping it into a log and cutting it into 4 equal pieces. Shape each piece of dough into a ball and set the rest aside under a piece of clingwrap while you work on the 1st dough ball.

The dough will be extremely soft and rather stretchy (and sticks to anything not oily enough) so there's no need to roll it out with a rolling pin. Instead you can just use your hands to pat it down and stretch it out into (roughly) a oval-ish rectangular shape. Then, add around 1 to 1.5 tablespoon of ovolmatine spread on the end of the dough nearer to you, or you can also spread it out in dollops all over the dough, before sprinkling a handful of chocolate chips all over the dough, careful to avoid the last inch of the dough piece that's further away from you as you need that seam area to close up the buns.

Then, starting from the end of the dough that's nearer to you, roll up the dough into a small log and press it tightly at the seams to close it up before folding it in half again and pressing the two (opened) end of the log together to seal the seams tightly. Then, shape it slightly into ball or squarish/rectangular bun, however you fancy, and set it on a baking tray lined with parchment paper.
Repeat for the other 3 dough balls and you can play around with other fillings too!

I've also tried one with grated parmesan and shredded mozzarella and red cheddar, which unfortunately kind of split open during baking because the dough was stretched rather thin. 

Some of the chocolate/ovolmatine oozed out from the "weakest link" too. 

So if your choice of fillings are the dry type such as sultanans, pumpkin seeds, red beans and etc (I've also made a sultana with pumpkin seeds one that turned out super round and pretty), you can really stretch your dough out as thin as possible, because even if there are micro-tears in the dough your filling won't be oozing out. 

However, if you're filling your buns with chocolate chips, cheeses or any kind of spreads that get melted and viscous during baking, be sure to make sure that there's no hole on the surface of your dough, or you will just have to make do with a less perfect looking stuffed bun. 

Till then,
Mia Foo


Friday, 19 April 2019

Mia Bakes: Tang Yuan Milk Bread (Soft bread with minimal kneading)


Hey fellow bread-lovers! Yup, I'm back with yet another bread recipe, and this time you can get soft and fluffy bread with minimal kneading. Yes, MINIMAL kneading. NO WINDOWPANE STAGE REQUIRED! And the method of making the dough is like a one-bowl yudane method, coupled with high hydration level, to give you soft and fluffy bread without an extreme arm's workout. 
Sounds super easy, right? Let's go! 

The idea of this delicious tang yuan bread comes from super talented youtube-baker Tears of Happiness. If you haven't heard of her, you should totally check out her videos (it's all in Mandarin, though). 

So, to get 10 tangyuan buns, you'll need:

200g all purpose flour 
(or bread flour, if you fancy)
1.5 tsp castor sugar
1 tsp instant yeast
1/4 tsp salt
1.5 tsp oil 
(I used vegetable oil)
1 large egg (around 50g w/o shell)
42ml BOILING HOT water
70 - 75ml whole milk (lukewarm)
(I added around 72ml)
10 frozen tangyuan (glutinous rice dumpling) of your choice, DEFROSTED
(I used peanut filling) 

First up, in a large bowl, add in the flour, salt and sugar, and give it a quick stir. Then, pour in the HOT (make sure it's BOILING HOT, just like making your yudane dough) water and stir it around with a spoon or chopsticks. Part of the dry flour will start clumping together to form bits of "yudane dough". Set the bowl aside and for the hot dough bits to cool down. 
In a small bowl, pour in the lukewarm whole milk and add in the yeast and give it a quick stir to mix well and set aside. 
Then, crack in an egg into the flour/dough bits mixture and pour in the milk-yeast mixture. Mix well with a spoon or chopsticks until fully combined. At this point, the dough will be extremely, extremely wet and mushy. If you attempt to tear off bits of the dough, it will just break off without any form of resistance. Cover the bowl with some clingwrap and set aside at room temperature for around 20 to 30 minutes. This allows the gluten to form on its own. 

After 20 to 30 minutes, you can check the dough by pulling at a corner of the dough ball, it should start to stretch well for gluten has developed. Then, add in 1.5 tsp of oil and start kneading the dough in the bowl. DO NOT knead the dough on a counter as it will be super sticky and nearly impossible to work with. Due to the addition of oil, hand-kneading of the dough will start off as being rather easy as the dough will not tend to stick to your hands. But after just a few minutes of working with the dough, the oil will be fully absorbed by the dough and it will start to be extremely sticky to both your hands and the bowl. Continue kneading the dough by a "folding" method instead. Pulling out the dough from a corner and tucking it back into the centre of the dough ball. Knead the dough for around 10 to 15 minutes until you are able to roughly tuck it into a ball shape. 
Then, wrap the bowl with clingwrap and leave it at a warm place for 1st proofing for about 1 hour. 

After 1 hour, check for completion of the 1st proofing by coating your finger generously with flour and poking it right down the centre of the dough ball. The hole should remain as it is with very minimal rebound. 
Then, sprinkle a generous amount of flour over the top of the dough ball and coat your hands with more flour and punch down the dough to deflate it. Knead it slightly until all the air bubbles has been deflated before overturning it out onto a well floured work surface. The dough will still be very sticky, so do make sure that your work surface is well dusted with flour. With flour-dusted hands, shape the dough ball into a log and cut it into 10 equal pieces and fold each piece roughly into a ball (you probably won't be able to make the dough into round balls by the traditional surface-rolling method as it'll stick) and cover with a clingwrap to prevent drying. 
Taking a piece of the dough ball, you can either roll it out slightly with a well-floured rolling pin, or simply flatten and stretch it out using your hands, as the dough is VERY soft, it will be very easy to flatten and stretch out. Then, take a piece of the defrosted tangyuan and wrap it into the dough ball. Pinch at the seams to seal properly and roll it around in between your hands to ensure roundness of the bun and set it on a baking tray lined with parchment paper, seam side down. 
Repeat with the remaining 9 dough balls/tang yuan to get a total of 10 buns. 

If your oven has a proofing function, proof your buns in the oven for around 20 to 25 minutes, until the buns grow around 1.5 to 2x in size. If your oven does not have a proofing function, you can either 2nd proof the buns at room temperature for a longer time (around 45 minutes), or save a bit more time by placing a bowl of hot water under your baking tray in a closed oven. 
Check for completion of the 2nd proofing by coating your fingertip with some flour and lightly press down on the side of the bun. If a slight indentation is left behind with a little bit of rebounding back, the buns are ready to be baked!

Pre-heat your oven to 175 degree Celsius and bake the buns for around 15 to 18 minutes, until the surface turns a light golden brown and when you tap the surface with your fingernails, it produce a hollow sound. 

TADAA~ 

I was expecting the filling to be more runny, like Liu Sha Bao, but they turned out pretty dry. These buns are best eaten when still warm, when the peanut filling are still moist, the mochi soft and chewy and the bread super soft and fluffy.


Look at that fluffiness!


Only a 10 minutes easy kneading required, no windowpane stage achieved, and using just plain flour. 
Awesome, right? 

Till then,
Mia Foo

Sunday, 7 April 2019

Mia Bakes: Nutella / Lemon Curd Stuffed Milk Bread

As you know, I used to own a Mayer Breadmaker. Yes, USED to. It has served me decently well for almost 2 years and then decided it's time to go halfway kneading the dough for my 1st try at a chocolate babka  a while back and I've stopped baking my own bread ever since.... 
And then one fine day, I decided just to test my own endurance and see if I can manage hand-kneading my bread dough from scratch, so here it is!


The recipe is simple, just very basic milk bread with about 1 tbsp filling of your choice. I decided to make a variety of fillings with nutella, lemon curd and raisins!

So to get 8 small buns, you'll need:
250g all purpose flour + 1.5 tsp vital wheat gluten
(or 250g bread flour)
30g castor sugar
160 - 170ml milk 
1 tsp (~3g) instant yeast
1/2 tsp salt
20g soften unsalted butter
 fillings of your choice

In a large bowl, add in your flour, sugar, salt and yeast, making sure that the yeast and salt are not in direct contact with each other. Then, add in 160ml of milk and stir with a pair of chopsticks or wooden spoon until the wet and dry ingredients starts to come together to form crumbly dough bits before going in with your hands to start kneading the dough in the bowl. At this point, you may either add more milk or flour depending on the hydration level of your flour and continue kneading until the dough pulls away from the bowl, coming together into a ball and your hands are relatively clean of sticky dough bits. 
Then, take your dough ball out and flatten it onto a clean work surface. Add in the soften butter and first fold the dough over the butter for a few times before started to knead it with your hands again. This time, be prepared to really work the dough out and knead for at least 30 minutes in order to reach the windowpane stage. I kneaded my dough for 45 minutes. 
And if you have no idea what windowpane stage means, it means you have to pull off a small piece of the dough and stretch it out with your hands. It should be able to be stretched till extremely thin, losing its opacity, and should you puncture a hold in the dough, the edges of the hole should be smooth, free of jagged edges. 

Fold the edges of the dough ball down its centre to form the dough into a round ball with smooth outer surface and leave it in a clean, oiled bowl and cover with some cling wrap. Leave the dough overnight in the fridge for 1st proofing, for at least 6 to 8 hours. 

The next morning, take your dough out of the fridge and leave it standing on the counter for at least 30 to 45 minutes for it to rise back up to room temperature. Check if the 1st proofing is done by poking a finger right down the middle of the dough ball, the hole should stay as it is (with slight rebounding at most) and the dough ball shouldn't collapse. 
Then, turn the dough ball out onto a lightly floured surface and give it a few kneads to knock out all the air bubbles within. Using a bench scraper or just twisting with your bare hands, divide the dough ball into 8 equal pieces, rolling each piece into a small ball shape and setting them aside, covered with a layer of cling wrap to prevent drying. 

Then, take out a piece of the dough ball and roll it out slightly with a small rolling pin. You should roll it in a way such that it's thinner at the outer rim and slightly thicker in the centre. Then, add a dollop (about 1 tbsp or slightly less) of nutella, lemon curd or any type of filling you fancy (I will not suggest watery jam though, they will cause the buns to burst open) onto the centre and wrap it up into a ball by first folding the outer edges in and pinching the seam close. Flip the bun over, seam side down, on a baking sheet lined with parchment paper and move on to the rest of the dough balls. 

If your oven has a proofing function, set the stuffed buns to rise in your oven at about 38 to 40 degree celsius for about 20 to 25 minutes, until the buns has expanded to 1.5x the original size. You can check for completion of the 2nd proofing by coating the tip of your finger with some flour and tapping it lightly on the bun. The depression should just bounce back very slightly, and still remains visible. 
If your oven do not have a proofing function, you can either leave the buns to proof at room temperature for about 1 hour, or create your own "proofing function" in your oven by placing your buns on the top rack and a dish of hot water on the lower rack. 

When the buns are proofed, take them out from the oven and set your oven temperature to 175 degree Celsius. Once pre-heated, let your buns bake for 20 to 25 minutes. Check for doneness of the buns by tapping on the bun surface, if it sounds hollow, it's done baking. 

These buns are crusty on the outside, but super soft and fluffy on the inside! 

The only problem is that they are best eaten on day 1, for the lose the freshness very quickly. 
Or perhaps, I just need a better method of keeping them. 

And if you're also filling your bread with lemon curd, please double, triple check that your seams are well pinched. Lemon curd is quite "jam-ish" and they do explode out from the buns much easier compared to nutella. 

Till then,
Mia Foo

Friday, 3 August 2018

Mia Bakes: Green Tea Wholemeal Stuffed Buns


Oh well, this is my 2nd attempt at trying to make a jam-filled bun (by stuffing it with jam BEFORE baking) and they still burst open. T.T
So I guess, you just cannot stuff your bread with jam before baking them. 


Anyway, this is 100% wholemeal, can you believe it? I've been baking bread loaves with 100% wholemeal flour for quite a while (using bread machine) and they're always significantly denser and tougher compared to refined loaves. But now, I guess I found the trick!

So let's get over with the ingredients so we can get started!
To get 6 buns, you'll need:

300g wholemeal flour
(I used Prima's superfine wholemeal)
2 tsp vital wheat gluten
2 tsp green tea powder
1.5 tsp instant yeast
30g caster sugar
15g unsalted butter, soften at room temperature
80ml cooking cream
(I guess you can use whipping cream too)
120ml milk
1/2 an egg, beaten
(keep the half and add a dash of cream/milk to make egg wash)
1/2 tsp salt
6 tsp of fillings of your choice, frozen)
(speculoos worked, jam obviously didn't. you can try nutella if you fancy too!)

adapted from Hokkaido Milk Bread recipe on ricenflour.com

Making the bread dough is easy if you have a bread machine. Just add all the ingredients (except for soften butter) in, start your kneading function and wait until the mixture forms a dough. Add in your butter, and let the dough knead until the function is completed. 
If you're doing this by hand, proceed in similar method. Add your liquid (cream, milk and egg) to your dry ingredients in a large bowl and mix until a dough ball is formed. Then, knead in your soften butter until you're left with a clean bowl (no more stray bits of dough sticking on the sides). There's no need to check for windowpane stage because you won't get it, as this is a 100% wholemeal dough. 
Then, oil your bowl and place your well kneaded dough in. Cover with cling wrap and leave it in the fridge overnight (for at least 6 to 8 hours) for 1st proofing.

The next morning, take out your dough from the fridge (it should be around twice the size) and set it on the counter for around 45 minutes to an hour for its temperature to rise up to room temperature. Then, check that proofing is completed by poking a hole right down the middle of the dough with floured finger, making sure that the hole doesn't close back up on its own.

The dough should be pretty smooth (and dry), so you probably need not require any dusting of flour on your work surface. However, if your dough feels a little sticky (differenr brands/batches of flour will have differing hydration levels), just very lightly dust your work surface with the minimal flour. 

Give the dough a few kneads and cut it into 6 equal pieces. Roll the dough pieces into round balls, and set aside (covered with cling wrap) for them to rest for 10 to 15 minutes. 

After the dough has rested, take out a piece of the dough from under the cling wrap and press it down onto your work surface to flatten it, you can use a small rolling pin to roll it out slightly, but just using my palms to press it out worked for me. Then, place a piece of your filling (frozen cookie butter, frozen nutella, or a piece of chocolate, anything!) wrap it into your dough. Pinch the seams a few times and make sure it's sealed properly. Then, placing the dough ball seam side down, cup your hand over the dough ball and give it a couple of rolling on the work surface to even out the seams and round up the dough ball. 

Place the dough aside, cover with a cling wrap to prevent drying, and continue the same with the other 5 dough balls. 

When all buns are done, place them about 2 inches apart on your parchment lined baking sheet, cover with cling wrap or a clean tea towel and set them aside at a warm place until they grows to 1.5x - 2x the original size, which should take you about 45 minutes or so. I used my oven's proofing function and so it only took me 25 minutes. 

Then, brush the top of your buns with some egg wash (the remaining half of your beaten egg with a dash of milk or cream) and send them to bake in your oven pre-heated to 190 degree Celsius for about 18 to 20 minutes, or until the bun has browned and tapping on the surface with your fingertip gives you a hollow "kok kok" sound. 


Tadaa~

Even though these are 100% wholemeal (and not those fake "wholemeal buns" recipe with only 10% wholemeal flour, like WHUTT? Who are you trying to kid?), they are as soft as, if not even softer than my 100% refined flour loaves! They just so soft and fluffy when still warm from the oven, but do get considerably harder the next day. But it might also be because I just left them sitting on the counter overnight. Heh! With proper airtight storage, they should remain soft and fluffy for some time longer, I believe!

Till then,
Mia Foo

Saturday, 14 April 2018

Mia Bakes: Matcha Mochi Roll Bread

While the whole world is all about going dirty (#dirtybuns), I still prefer to stay clean! And after stumbling upon Amanda's youtube video recipe on her soft European bread, I decided to give it a try! 


So to get 6 buns, you'll need:

For the bread dough
50g wholemeal flour
180g all purpose flour
15g vital wheat gluten
5g green tea powder
15g sugar
25g unsalted butter (soften)
1 egg
130ml water (room temperature)
1/2 tsp salt
1 tsp instant yeast (about 3g)

For the mochi
80g glutinous rice flour
20g corn flour
40g sugar
2 tsp vegetable oil
170ml milk

Filling (Optional)
Pitted and chopped dates 
(I used kurma dates)
Raisins 
Or any other fillings of your choice
I also made just 1 special bun with my leftover dark chocolate chips & salted caramel chips. 

I made the bread dough in my Mayer BM, but you can always do it by hand or in a standing mixer with a dough hook. 

Add all the ingredients (except for butter) into the machine, making sure that the yeast and salt do not come into direct contact with each other. Start the machine on mix dough function and let the machine do its work. When the dough starts to come together to form a ball, add in the soften butter and mix until the cycle is completed. 

The dough may be extremely wet and sticky (though still able to form up a shape) but that's okay. Turn the dough out into a greased bowl and cover with a clingwrap and set it into the fridge overnight (about 12 hours) for bulk fermentation. The dough should at least double in size when it's done fermenting. 

The next morning, let's start off with making the mochi! In a clean bowl, add in all the ingredients (both wet and dry) and stir to combine into a watery flour mixture. You can either microwave it (if you have one) for a few minutes or steam it for 20 minutes. When the watery mixture has solidified into a soft and sticky dough, the mochi is cooked. While it's still steaming hot, use your spatula or a wooden spoon to give it a few mix/kneads before setting it aside to cool down. 

While the mochi is cooling down, remove your overnight bread dough from the fridge and punch it down before turning it over a well floured surface. The dough should be extremely sticky (sticks ALL over your hand) so add more flour and continue kneading the dough until it warms up to room temperature comes together into a smooth dough ball. Cut the dough ball up into 6 equal pieces and set it aside for about 10 to 15 minutes to rest while you prepare your fillings. When the mochi has cooled down enough for you to handle, cut it up into 6 equal portions and set aside. You may dust your work surface with some glutinous rice flour if the mochi gets too sticky to work with. 

After the bread dough has rested, take 1 of the balls and rolled it out on a slightly floured surface to your preferred size. We're going to roll it up eventually, so the bigger you roll, the more layers you'll end up with in your bun, so just play around with the size according to your own liking. Then, take a piece of the mochi and roll it out to match the size of your rolled out bread dough. The mochi should be slightly smaller than your bread dough, with about 1/2 cm gap around the perimeter. I find it much easier to just give the mochi a few rolls with the rolling pin to roughly flatten it out, then you place the mochi over the bread dough and stretch it out to size with your hands. 

Then, sprinkle your choice of filling on top of the mochi and then starting from the end that's closer to you, roll it up into a bun. Pinch the ends together tightly to seal and set them on a baking paper lined tray for 2nd proofing in a warm place (or in your oven if yours have a proofing function) until it doubles in size. Mine took about 25 minutes in my own with a proofing setting. 

Then, send your buns to bake in an oven pre-heated to 190 degree Celsius for 25 minutes. Check that the bread is done by tapping on the top. If it sounds hollow, it's done!

You may use a sharp knife to slice out patterns on the surface of your bread after 2nd proofing before baking, but I just didn't bother to. 


And because today is Sunday and Sunday is my cheatday, I've specially made just ONE with a mixture of chocolate chips and salted caramel chips as the filling, and it's so good! The bread is soft and fluffy, mochi chewy and gooey and the chocolate filling molten and oozing. 
THIS IS JUST SO WORTH ALL THE WORK!

Do let me know if you've tried out this recipe and tell me what fillings did you use for your versions!

Till then,
Mia Foo

Saturday, 21 October 2017

Mia Bakes: Cinnamon Rolls

It's been a while since I've gotten the breadmaker and I've progressed from baking soft and fluffy refined white bread to the healthier, dense and tough 100% wholegrain bread. And judging that it's just 1 day away from my weekly cheatday (whereby I eat whatever I want, refined carbohydrates, sugar, whatever!), I decided to try out a non-breadmaker bread recipe that I've been wanting to try out. 
CINNAMON ROLLS! 
I've googled up a few recipes that looks more or less similar to each other and decided to just go ahead with nigella.com and incorporate yudane method into it to get softer, fluffier rolls with a little wholegrain.

So let's get over the ingredients so we can get started!

For the yudane dough:
40g (minus 1/2 tsp) all purpose flour
1/2 vital wheat gluten
40ml boiling water

For the bread dough:
20g wholemeal flour (couldn't resist adding it!)
1 tbsp (15g) vital wheat gluten
125g all purpose flour
35g soften unsalted butter
1/8 tsp salt
1 tsp instant yeast
20g granulated sugar
1 tsp ground cinnamon
95ml milk (lukewarm)

For the filling:
35g soften unsalted butter
35g muscovado sugar
(you can use brown sugar or white sugar)
2 tsp ground cinnamon 
Raisins (optional)

First up, prepare the yudane dough by mixing the flour and VWG with boiling water in a bowl and stirring until it comes together to form a sticky dough. Wrap it in cling wrap (to prevent drying out) and set aside (or pop it into the fridge) to cool down. 
Remember, do not add the scalding hot yudane dough directly into your bread dough mixture!

So while the yudane dough is cooling down, add your yeast to lukewarm milk and set aside for about 10 minutes or until it starts to froth up. 

I suggest that you add about 60 to 80ml of the milk at this stage first as the total amount of liquid may vary from flour to flour. It's always better to start off with a drier dough and add more liquid, as opposed to having to add a lot more flour and ending up with a much larger loaf than expected. 

Then, add in all the dry ingredients and cooled yudane dough and start mixing/kneading (I used my BM for this, but you can always use a mixer with dough hook or do it by hand!) until it starts to come together into a dough ball. At this stage, knead in the soften butter until well combined. You may add in more milk or flour judging from the dough's texture at this point. Continue kneading until you achieve windowpane stage. Check for the windowpane stage by taking a small piece of the dough and stretching it out with your fingers. You should be able to stretch it for quite a bit until the dough gets really, really thin and almost translucent before it finally breaks apart. 
On my Mayer BM12, I first ran mix dough function, followed by ferment dough function. 

Otherwise, form your bread dough into a smooth ball and place it in a greased bowl, cover with cling wrap and leave it in a warm place to proof for 1 hour, or until it has doubled in size. If your oven does not have a proofing function, then perhaps you can set your dough bowl in the oven (switched off!) and place a bowl of hot water underneath. That should work too. :)

While the dough is going through 1st proofing, prepare the filling by simply mixing the soften butter, sugar and cinnamon together into a paste. 
When the dough is done proofing, turn it out onto a clean surface (I have a non-stick silicon mat for this) and give it a few quick kneads to knock out all the air bubbles first, before rolling it out into a 9 by 5 inch (roughly, about there.... I just eyeballed it) rectangle. Spread the filling all over, leaving about half an inch around the perimeter. If you fancy some raisins, sprinkle a handful evenly over the surface before rolling the dough up on the long edge. Give the seam a few soft nips to make sure that it doesn't fall apart when you slice it. 
And yup, slice away! Cut the log into 9 1-inch pieces and set them cut side up on a lightly greased 9 by 9 inch baking pan. 
Then, cover slightly with a cling wrap and leave it in a warm place for 2nd proofing for about 15 to 20 minutes (or until the rolls "grow" into each other and completely fills up the pan). 

Brush the top of the rolls with egg wash (very important if you want pretty looking rolls) and set the rolls to bake in a pre-heated oven at 225 degree Celsius for about 12 to 15 minutes (I baked mine for 15 minutes but as we all know baking time varies from oven to oven). 


I skipped the egg wash out of laziness and ended up with dull looking cinnamon rolls. T.T 

If you would prefer not to add in wholemeal flour, just replace the whole recipe with just all purpose flour (you can skip the VWG as well, as adding VWG is just my habit after baking wholegrain bread for so long, it just feels incomplete without adding them in). 
Due to the yudane dough, these rolls ended up so soft and fluffy (a bread texture I've almost forgotten after switching to wholegrain) and it made my entire kitchen smelled so good while baking in the oven. 
ALL THOSE SWEET, CINNAMON, BUTTERY SMELLS....

And 1 roll is only about 150 kcals, pretty decent for a #cheatdayeat yes?

Till then,
Mia Foo


Wednesday, 15 March 2017

Mia Bakes: Tofu Chocolate Bread Loaf (BM Recipe)

Haha, yet another baking post up for the week! The thought to bake with tofu started after I came across a youtube video on tofu banana baked doughnuts. And I did ended up trying a variation of it without the banana HERE. 
Then I wondered if it's possible to have tofu replacing something in our everyday bread loaf, mainly to lower the calories per slice. Well, one fine day I was bored and hence decided to calculate the calories per slice of my usual homemade wholegrain bread, and was horrible shocked to know that my homebaked version is 2x the calories of the store bought loaves. 
No wonder my weight loss has plateau off

And due to denser loaves from wholegrain flour, I usually only manage to cut 9 slices per loaf and that gives me about 176 kcals per slice! 

Okay, calories talk aside, let's first get over the ingredients so we can get the BM started.
For a 500g loaf, you'll need:

125g wholemeal flour
115g all purpose flour
10g unsweeten cocoa powder
1 tbsp vital wheat gluten
10g sugar 
(I used 5g sugarless sugar & 5ml raw honey)
150g soft silken tofu
3g salt (about 1/2 tsp)
1 tsp instant yeast
1/4 tsp ceylon cinnamon
80ml milk

First, soak your wholemeal flour in the milk for about 20 minutes before adding in the rest of your ingredients and let the dough knead on your mix dough function

Due to lower percentage of wholegrain flour in this recipe, I got slightly higher loaf (perhaps switching to bread flour will give me an even higher loaf) and managed to cut 11 slices out of this loaf. That gives me about 92 kcals per slice, almost 50% of my usual sunflower seeds & raisin loaf. 


There's hardly any tofu taste and the bread still turned out pretty soft and chewy in spite of the high wholegrain content. Pretty sure that tofu shall be one of the main ingredients for my weekly bread making from now on!

Till then,
Mia Foo


Thursday, 15 December 2016

Mia Bakes: Soft & Fluffy Wholegrain Fruit & Nut Loaf (BM Recipe)

Despite telling myself I'm happy with my dense and heavy wholegrain loaf, I couldn't help but keep googling for 'soft and fluffy wholewheat bread recipe' and was just disappointed over and over again when all of the recipes I've clicked in with titles similar to "softest and fluffiest healthy wholemeal bread" pretty much just had 10% wholemeal flour and 90% refined bread flour.
Erm, how can you even call that a healthy wholemeal bread when by ratio, it's effectively still a refined bread?

And so (out of spite?) I decided, let me reverse that and use 10% refined flour! HAHAHA, okay I'm kidding. But I really started adding small amount of all purpose flour into my wholegrain loaf because that 3/4 full pack of AP flour has been sitting in my baking cabinet for a while now and I feel that if I don't finish it, weevils will grow soon, so.... yeah, you got it.


Anyway, for this SOFT and FLUFFY wholegrain loaf, you'll need:

185ml (cold) milk
28ml honey
(I wanted to put 30ml but 28ml was all I could squeeze out)
200g wholemeal flour
25g dark rye flour
25g all purpose flour
3.5 tsp vital wheat gluten
(I might have added more per 1/2 teaspoonful hence you may use up to 4 tsp)
1/4 tsp baking powder
1/4 tsp apple cider vinegar
1/4 tsp ceylon cinnamon
1/4 tsp salt
Abt 4.5g instant yeast
(if you're using mayer BM12, it's 1 full small measuring spoon + slightly less than 1/4)
30g unsalted butter
choice of chopped dried fruits & nuts 
(i used sunflower seeds, and a mix of raisins and cherries)

First up, add in your wholegrain flours and cold milk into the pan and let it sit for 30 to 45 minutes. 
Then, add in all your ingredients, except butter, and start your machine on mix dough function. Add in your butter only when your dough starts to form a ball. As different brands/batches of flours will have different hydration levels, do keep an eye on your dough and make sure it's hydrated enough. Eg. if it's sandy and tough like a beach ball, add in more liquid (preferably by the 1/2 teaspoonful) and if it's watery and formless, add in more flour.
Upon completion of the mix dough function, check your dough for windowpane stage, It won't stretch as thinly and beautifully as a 100% refined flour loaf, but it should stretch  and thin out quite a bit. If the dough is still lacking in elasticity, restart your machine on mix dough function again for another round of mixing.
After your dough is done mixing, restart your machine on graham or multigrain function and let the machine do the wonders! Oh, do remember to add your chopped fruit and nuts during the machine's feeding beep, too!


Giving you a 'bend test' to show that this loaf is really soft and fluffy. :)

Till then,
Mia Foo

Thursday, 3 November 2016

Mia's Bakes: Wholemeal Rye Bread (Mayer Bread Machine Recipe)

I've recently purchased Bob's Mill dark rye flour and buckwheat flour off iHerb (again!) to try out more variation of wholegrain bread loaves. 
However, it was really disappointing to find that the results were less than acceptable, for my bread turned out extremely short, dense and crumbly-cakey, like they've hardly risen at all. 


My wholemeal-dark rye-buckwheat loaf was made with the flour ratio of 2:1:1 (2 parts wholemeal) and with NatureGlory's organic Bonsoy and though extremely tasty with the distinctive nutty flavour from the addition of dark rye flour, the texture was just.... mehh. 

And then I realised, I might need a change of yeast.
And so, chucking Saf-Instant, I returned to Bake King's Instant Yeast and decided to give my dark rye flour another try. 
Well, I read somewhere saying that rye flour and bread machine doesn't do well together as a rye dough might be too heavy and tough for the bread machine to knead, but... let's just give it another shot!

So for my wholemeal rye bread, you'll need:

150g wholemeal AP flour
75g low-carbs flour
25g dark rye flour 
190ml milk 
3tsp vital wheat gluten
1 tsp ceylon cinnamon powder
21g raw honey
30g unsalted butter
1/4 tsp salt
1 1/4 small mayer tsp instant yeast (about 5g)

On my Mayer BM, I first added the wholemeal flour to the milk and let it sit for 20 minutes before adding in the rest of the dry ingredients and honey and starting the mix dough function, which will mix and knead the dough for 25 minutes. 

After which, I restarted the machine on multigrain setting and added in my butter cubes. And then about 75g of raisins and a few handful of chopped almonds at feeding point (which I regretted). 


Probably due to the dark rye flour, which made the dough heavier than denser than it would have been as just a wholemeal dough, the BM was unable to knead in the raisins at feeding point and I ended up with tons of raisins left behind in the bread pan and just a few of them sticking onto the surface of the bread. 


The chopped almond did get kneaded a little more into the dough, though still pretty much at the outer rim of the loaf. 

Although still denser and heavier than a refined white loaf, this time round my wholegrain loaf turned out much softer and chewier with the new yeast as compared to my previous bake(s). 
Just a reminder to self, is to add in the raisins during initial mixing whenever I add in dark rye flour to prevent high raisin wastage. 

Do you have a go-to recipe for a yummy wholegrain loaf? Do share them with me!

To get the wholegrain and low-carb flour I've used for this recipe, hop over to iHerb right now! 

Till then,
Mia Foo

Wednesday, 21 September 2016

Mia's Recipe: Low Carb Multigrain Fruit Loaf

And so, after achieving a wholegrain (whole wheat, oatmeal) bread loaf, which is perfectly edible (my bread machine recipe HERE), my greed for something new set me going on a googling-youtubing craze again for a multigrain, possibly low carb bread recipe. 
But what came up were mostly just bread made with almond meal, which is extremely expensive and totally not sustainable for my lifestyle. 
Depending on the brand, you might need to cough up at least almost $18 SGD for a packet of almond meal that doesn't even give you 500g of the almond flour on iherb, and that's way too expensive even in the name of low-carbohydrates. Plus, having a bread loaf made mostly (or entirely, in terms of dry ingredients) from almonds actually means 1 thing. Yes, it's low in carbohydrates, but other than almond flour, you will still need to add in milk, butter (oil) and possibly eggs, which means, this is a low carb, but super high fat bread loaf! 
And so, while I was lamenting that a truly healthy low-carb bread loaf is not going to be possible, I came across this on iherb. 
Bob's Red Mill Low-Carb Baking Mix

It's not exactly the cheapest flour mix you can get on iherb (it still cost you almost $10 for this pack of 453g) but comparing this to using solely just almond meal? I'll choose this anytime. Plus, Bob's also does a low-carb bread mix so it can only get even easier for you if all you want is to make bread with it. 

The grains that went into this flour mix includes: wholegrain oat flour, oat bran, oat fiber, flaxseed meal, wholegrain rye flour, wheat bran & wholegrain soy flour. These ingredients gives you only 120 calories per serving of 30g, and 13 g carbohydrates with 5g fibre, hence giving you a net carbohydrate of only 8g per serving!

Using a mixture of this low carb flour blend and wholemeal flour, I decided to bake a loaf of multigrain fruit bread using my Mayer bread machine!

The ingredients you'll need are:

120g wholemeal AP flour
120g low-carb baking mix
15g oatmeal
200ml milk
30ml honey
35g unsalted butter
1/4 tsp salt
1/2 tsp baking powder
2 1/4 vital wheat gluten
1/2 - 1 tsp ceylon cinnamon
(you may add more if you like cinnamon flavour, I've started adding ceylon cinnamon to my bread mainly for its health benefits)
1 1/4 small mayer tsp instant yeast (about 4.5g)
your choice of dried fruits, amount is up to you.
(I used dried raisins and cherries)

Even though I've started using VWG, I'll still prefer to do a quick soak of the wholemeal flour in the milk for at least 30 minutes before I add in the rest of the ingredients (except butter and dried fruits) for mixing using the mix dough function. After which, I restarted the machine on multigrain function and add in butter during mixing.
Do keep a close check on the dough during mixing / 1st kneading. Add in more liquid or flour by the teaspoons if your dough is sandy (too dry) or mushy (too wet).
Dried fruits will be added in after the feeding point beep sounded on the machine. If your bread machine somehow do not have such a function, or you're making this by hand, add in the dried fruits during kneading after 1st proofing (before shaping & 2nd proofing).


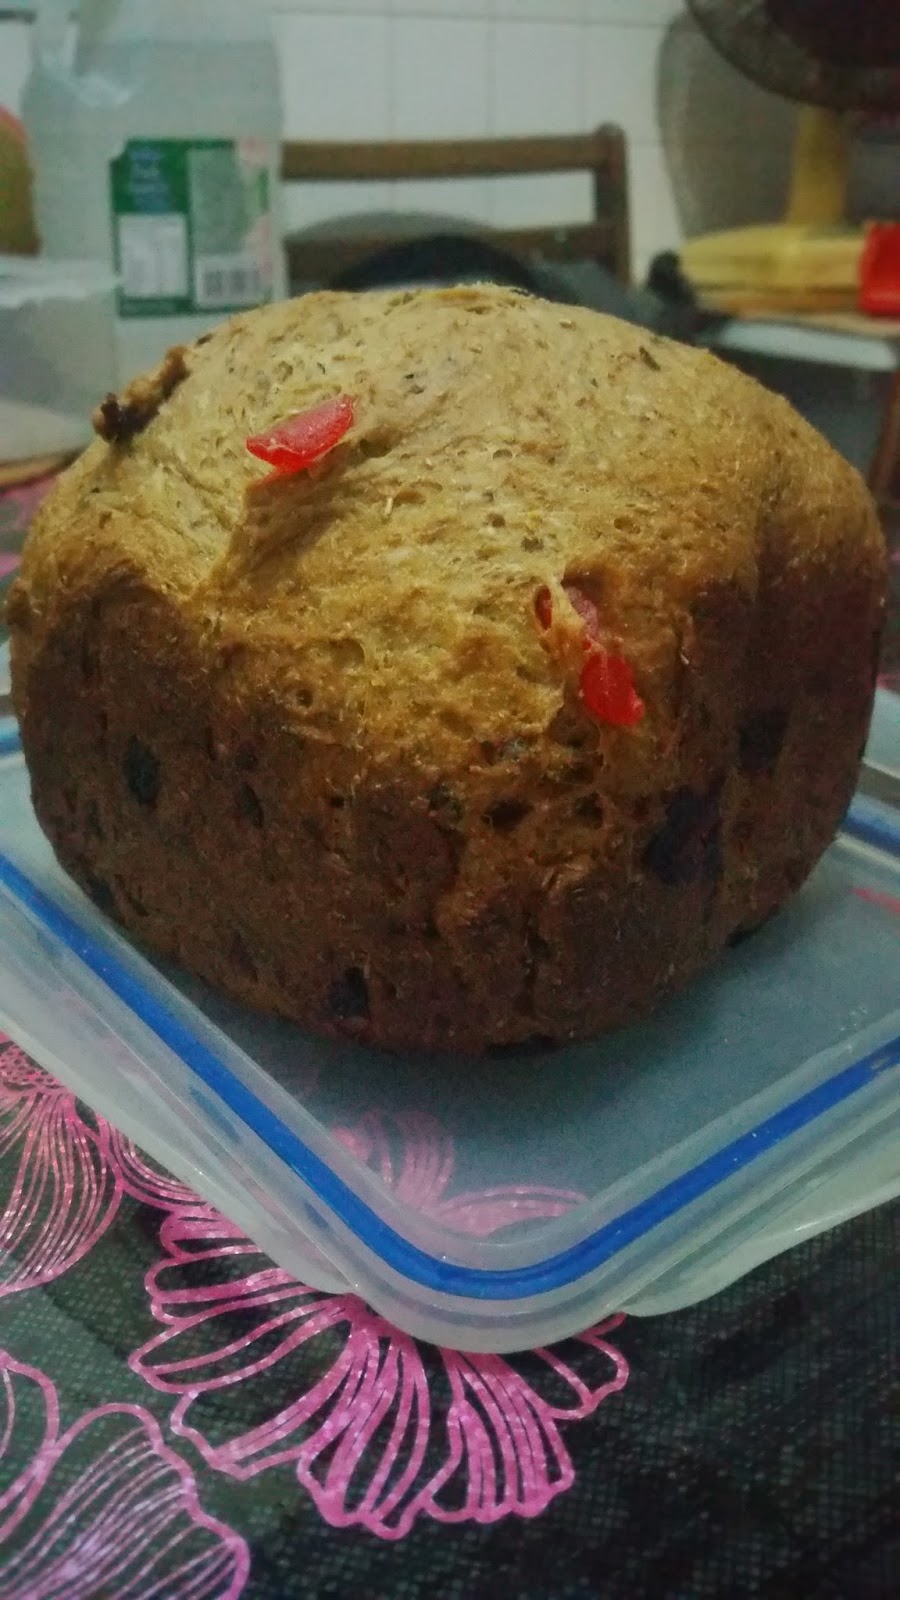
Tadaa~ Here's my low-carb multigrain fruit loaf, which an acquaintance thought was panettone. 

Have you ever tried baking your own low-carb bread using a blend of flours that's lower in carbohydrates too? Do share your recipes with me in the comment board below!

To get the low-carb flour I've used for this recipe, hop over to iHerb right now!

Till then,
Mia Foo