MollyMia Aspire to Inspire before we Expire
Showing posts with label bread. Show all posts

Sunday, 7 April 2019

Mia Bakes: Nutella / Lemon Curd Stuffed Milk Bread

As you know, I used to own a Mayer Breadmaker. Yes, USED to. It has served me decently well for almost 2 years and then decided it's time to go halfway kneading the dough for my 1st try at a chocolate babka  a while back and I've stopped baking my own bread ever since.... 
And then one fine day, I decided just to test my own endurance and see if I can manage hand-kneading my bread dough from scratch, so here it is!


The recipe is simple, just very basic milk bread with about 1 tbsp filling of your choice. I decided to make a variety of fillings with nutella, lemon curd and raisins!

So to get 8 small buns, you'll need:
250g all purpose flour + 1.5 tsp vital wheat gluten
(or 250g bread flour)
30g castor sugar
160 - 170ml milk 
1 tsp (~3g) instant yeast
1/2 tsp salt
20g soften unsalted butter
 fillings of your choice

In a large bowl, add in your flour, sugar, salt and yeast, making sure that the yeast and salt are not in direct contact with each other. Then, add in 160ml of milk and stir with a pair of chopsticks or wooden spoon until the wet and dry ingredients starts to come together to form crumbly dough bits before going in with your hands to start kneading the dough in the bowl. At this point, you may either add more milk or flour depending on the hydration level of your flour and continue kneading until the dough pulls away from the bowl, coming together into a ball and your hands are relatively clean of sticky dough bits. 
Then, take your dough ball out and flatten it onto a clean work surface. Add in the soften butter and first fold the dough over the butter for a few times before started to knead it with your hands again. This time, be prepared to really work the dough out and knead for at least 30 minutes in order to reach the windowpane stage. I kneaded my dough for 45 minutes. 
And if you have no idea what windowpane stage means, it means you have to pull off a small piece of the dough and stretch it out with your hands. It should be able to be stretched till extremely thin, losing its opacity, and should you puncture a hold in the dough, the edges of the hole should be smooth, free of jagged edges. 

Fold the edges of the dough ball down its centre to form the dough into a round ball with smooth outer surface and leave it in a clean, oiled bowl and cover with some cling wrap. Leave the dough overnight in the fridge for 1st proofing, for at least 6 to 8 hours. 

The next morning, take your dough out of the fridge and leave it standing on the counter for at least 30 to 45 minutes for it to rise back up to room temperature. Check if the 1st proofing is done by poking a finger right down the middle of the dough ball, the hole should stay as it is (with slight rebounding at most) and the dough ball shouldn't collapse. 
Then, turn the dough ball out onto a lightly floured surface and give it a few kneads to knock out all the air bubbles within. Using a bench scraper or just twisting with your bare hands, divide the dough ball into 8 equal pieces, rolling each piece into a small ball shape and setting them aside, covered with a layer of cling wrap to prevent drying. 

Then, take out a piece of the dough ball and roll it out slightly with a small rolling pin. You should roll it in a way such that it's thinner at the outer rim and slightly thicker in the centre. Then, add a dollop (about 1 tbsp or slightly less) of nutella, lemon curd or any type of filling you fancy (I will not suggest watery jam though, they will cause the buns to burst open) onto the centre and wrap it up into a ball by first folding the outer edges in and pinching the seam close. Flip the bun over, seam side down, on a baking sheet lined with parchment paper and move on to the rest of the dough balls. 

If your oven has a proofing function, set the stuffed buns to rise in your oven at about 38 to 40 degree celsius for about 20 to 25 minutes, until the buns has expanded to 1.5x the original size. You can check for completion of the 2nd proofing by coating the tip of your finger with some flour and tapping it lightly on the bun. The depression should just bounce back very slightly, and still remains visible. 
If your oven do not have a proofing function, you can either leave the buns to proof at room temperature for about 1 hour, or create your own "proofing function" in your oven by placing your buns on the top rack and a dish of hot water on the lower rack. 

When the buns are proofed, take them out from the oven and set your oven temperature to 175 degree Celsius. Once pre-heated, let your buns bake for 20 to 25 minutes. Check for doneness of the buns by tapping on the bun surface, if it sounds hollow, it's done baking. 

These buns are crusty on the outside, but super soft and fluffy on the inside! 

The only problem is that they are best eaten on day 1, for the lose the freshness very quickly. 
Or perhaps, I just need a better method of keeping them. 

And if you're also filling your bread with lemon curd, please double, triple check that your seams are well pinched. Lemon curd is quite "jam-ish" and they do explode out from the buns much easier compared to nutella. 

Till then,
Mia Foo

Monday, 3 December 2018

Bakestarters Christmas Edition Baking Kit: Earl Grey Dark Chocolate Babka


Yes, I've successfully made my 1st ever chocolate babka, all thanks to Bakestarters! 


Bakestarters is a local company specialising in baking and baking kits, which come with freshly packed and individually pre-portioned ingredients, along with a recipe card and detailed instructions, tips and even a QR code linking to a tutorial video. Other than eggs, Bakestarters measures and packs all the ingredients that we'll need, including fresh milk, butter and fresh fruits!
Some of the kits even come pre-packed with baking tools such as loaf pans, cookie cutters and parchment paper, offering baking enthusiasts of all skill levels a fun and hassle-free baking experience.

For this coming Christmas, Bakestarters has launched their all new festive Christmas collection comprising of 8 baking kits:
1. Gingerbread Men
2. Passionfruit Yule Log
3. Chocolate Peppermint Yule Log
4. Blackforest Brownies
5. Orange Pistachio Biscotti
6. Pumpkin Spice Biscoff Loaf
7. Earl Grey Dark Chocolate Babka
8. Tiramisu (no bake)


Initially I was thinking of giving the passionfruit yule log a go, but after realising that I actually do not have the required baking pan size, and it will probably NOT fit into my small oven as well, I decided to give babka a try! 

As you can see, the baking kit comes with individually packed and labelled,  pre-portioned ingredients in a cute box, which you will also find your recipe and instruction cards. Other ingredients that required chilling, like butter and fresh milk, were well packed into a small cooler bag, stuffed with a generous amount of ice packs to keep everything nice and cold. 

And frankly speaking, this pre-portioned, individually packed idea brought so much convenience and it took all the hassle of measuring out the ingredients one by one out of the way. It took me less than 5 minutes to get all the ingredients for the bread dough mixed up in my bowl and all I did was snip-pour-chuck. 
Well, there's just one thing I couldn't quite understand was why they need to pack the unsalted butter in resealable bags, when technically there shouldn't be anything left behind for us to reseal?
But anyway, that's hardly of any importance at all. 

Bakestarters has obviously put in a lot of effort curating and perfecting their recipes and ingredients, for I totally did not need to add in any more liquid or flour to "perfect" out my bread dough. I mean, if you do bake bread, you will probably face the very common issue of differing hydration level across different brands of flour, or even between different batches of the same brand of flour, right? There's never a time I found myself not needing to add in that extra few teaspoons/tablespoons of flour or water to my overly moist or dry dough ball. But with Bakestarters babka baking kit, I got my clean bowl and clean hands easily with less than 15 minutes of hand-kneading, and reach the windowpane stage within 20 minutes! 


However, instead of following their instruction of letting it proof till double in size for 1 to 1.5 hrs, I let my dough slow-proof in the fridge overnight (for almost 12 hours) instead, which will allow the bread to develop more (yeasty) flavour. As babka is made from enriched bread dough (brioche) which tends to be a lot softer (and harder to manage if you're not a very seasoned bread-baker), leaving the dough rest for a couple of hours in the fridge also helps with all the rolling and shaping later on. 


Since the baking kit is supposed to yield two loaves/wreath of babka, I decided to make one following their instruction to get a babka wreath, and another into a simple twisted loaf, topped with cinnamon streusels, YUMS!


And I also dropped a few pieces of the remaining streusels on the babka wreath, which I kind of regret. It'll probably look better without the random "spots"?


Look at those pretty chocolate swirls! But well, I kind of cut the wreath in the wrong direction and got a full cut across the tucked ends with no chocolate swirls instead. BOO!

But I have to say, this recipe is DA BOMBZ! The sweet brioche bread is so soft and tender, that it's almost cake-like. Even my mum and brother, who aren't fans of chocolate, loved it!

Bakestarters Christmas Collection 2018 Baking Kits is now up for preorder until 7 Dec, 2359 hr, and delivery of the kits will be from 11 to 21 Dec.
If you miss the preorder, do not worry! Bakestarters Christmas collection is still open for orders after 7 Dec, subject to availability of delivery dates. Do note that the blackout dates indicate full delivery slots so it's advisable for you guys to cart out quickly should you want to purchase any of the kits! You will also be able to get your kits in time for the New Year (if that's what you are planning for) as Bakestarters will be delivering after 25th December too!
For more information, visit their website HERE

Till then,
Mia Foo

Monday, 16 May 2016

Mia Bakes: Chocolate Chip Mochi Bread

Not sure if the mochi bread craze has caught on (or fizzed off) but I will always pick up 3 mini chocolate mochi buns whenever I drop by the bakery Yamazaki. It was pretty pricey for 3 bite sized buns, no doubt. But the crispy outer shell with the chewy gooey centre just make me want to scream: JUST TAKE MY MONEY!
So on second thought, I think why not just bake my own mochi buns? So after a while of googling (and found that you can get premix for mochi bread in Korea and Taiwan) and some failed attempts, here is the recipe for some yummy chocolate chip chocolate mochi buns.

You'll need:
180g glutinous rice flour
20g tapioca starch
20g unsweetened cocoa powder
20g castor sugar
125ml milk
60ml vegetable oil
1 large egg
1/2 tsp salt
as much chocolate chips as you like (optional)

First, into a big bowl, add in all the dry ingredients and give it a quick whisk to make sure they're well mixed together.
Then, add in all the wet ingredients and mix until fully combined.
The end mixture should be a little runny (such that it's extremely hard to shape it with your bare hands) yet not fully liquid like a cake mixture nor dry like a cookie dough.
I'll suggest that you mix in 120ml of milk first and then add in more milk, bit by bit until you get to the almost easily pipe-able consistency.

 You might want to keep the mixture in the fridge for 30 minutes or so for it to firm up before shaping them into balls (you should get 10 numbers of small buns) and then wet the surface with some water before baking them at 180 degree Celsius for 20 to 30 minutes.
Wetting the surface before baking will help to get a crispier outer shell.


They look cute, don't they?


Although still a far cry from those selling at Yamazaki Bakery (still very dense and not airy/chewy enough on the insides), these small chocolate mochi buns will still be a pretty yummy treat if eaten warm from the oven as the insides will be at its most ooey-gooey state.

I highly advise that you do not keep these overnight at all, as they dry out/toughen up considerably and develop a pretty icky texture despite the taste remaining as chocolatey.

Till then,
Mia Foo

Sunday, 27 December 2015

Mia Bakes: Red Tea Chia Seed Yudane Bread (Mayer BM12 Recipe)


This is my 2nd time trying the Yudane (Utane) method and I've previously tried the famous Tang Zhong (TZ) method for a fruit loaf and I would say it yields pretty similar results, just that the yudane method does not require 'cooking' over the stove and hence I stuck to it. Both methods help to gelatinise the starch in the flour, giving it a higher moisture content which yields a softer and more elastic bread loaf. 
While the TZ method calls for a 5 - 10% of the total flour content in the recipe with 5 parts of water and then cooking the mixture over small flame to hit 65 degree Celsius, the yudane method I've used calls for about 20% of the total flour content with equal ratio of boiling water. 
Before I elaborate on how to execute the yudane method, let's first get started on the original bread recipe given in the Mayer recipe book.

250g bread flour
180ml boiling water 
(to brew a flavoured tea of your choice)
20g salted butter
3g sea salt
30g sugar
3g active dry yeast
5 tablespoons chia seeds

To "yudanish" the bread recipe, simply use about 20% of the flour content to make the yudane dough with equal parts of boiling water. 
So for an original recipe with 250g of flour, my yudane dough will make up of 50g of bread flour with 50ml of boiling water. Just add the boiling water to the flour and stir until it comes together to form a wet, sticky dough and cool it down before proceeding with the rest of the baking procedure. 

So with the yudane dough done, the flour and water content of my remaining recipe will be reduced to 200g bread flour to 130ml of brewed tea. However, being not very trusting of the Mayer's recipe book, I've decided to give the recipe and its listed procedure a little tweak to get this particular recipe I've done for this Red Tea Chia Seed Loaf.

Yudane Dough: 50g Bread Flour + 50g Water (chilled in fridge)
180g bread flour
20g top flour
130ml red tea (chilled in fridge)
20g unsalted butter
2.5g table salt 
30g sugar
3g instant yeast
5 tablespoons chia seeds (grounded)

Add in cold tea, yudane dough, sugar, salt, and flour mixture into the bread pan, followed by instant yeast. Fit the bread pan into the bread machine and start the Mix Dough function, which will mix and knead the dough for 25 minutes straight. After 25 minutes, start the Soft Bread function (500g) and add in the grounded chia seeds and butter to mix. 
At the pattern sounding beep (1:30), remove the kneading paddle and let the BM finish its job.


TADAA~ 
Fragrant and soft Red Tea Chia Seed Bread! There's hardly any tea flavour in the bread but somehow there's a nice fragrance from the bread loaf that's a lot more distinct as compared to my past bakes. It might be because the semi-grounded chia seeds got roasted and gave our the fragrance, or it might really be the red tea that contributed to the nice smell. So try it and let me know how it went for you!

Till then,
Mia Foo

Monday, 22 December 2014

Panasonic Cooking Demo: Homebaked Goodies for Christmas

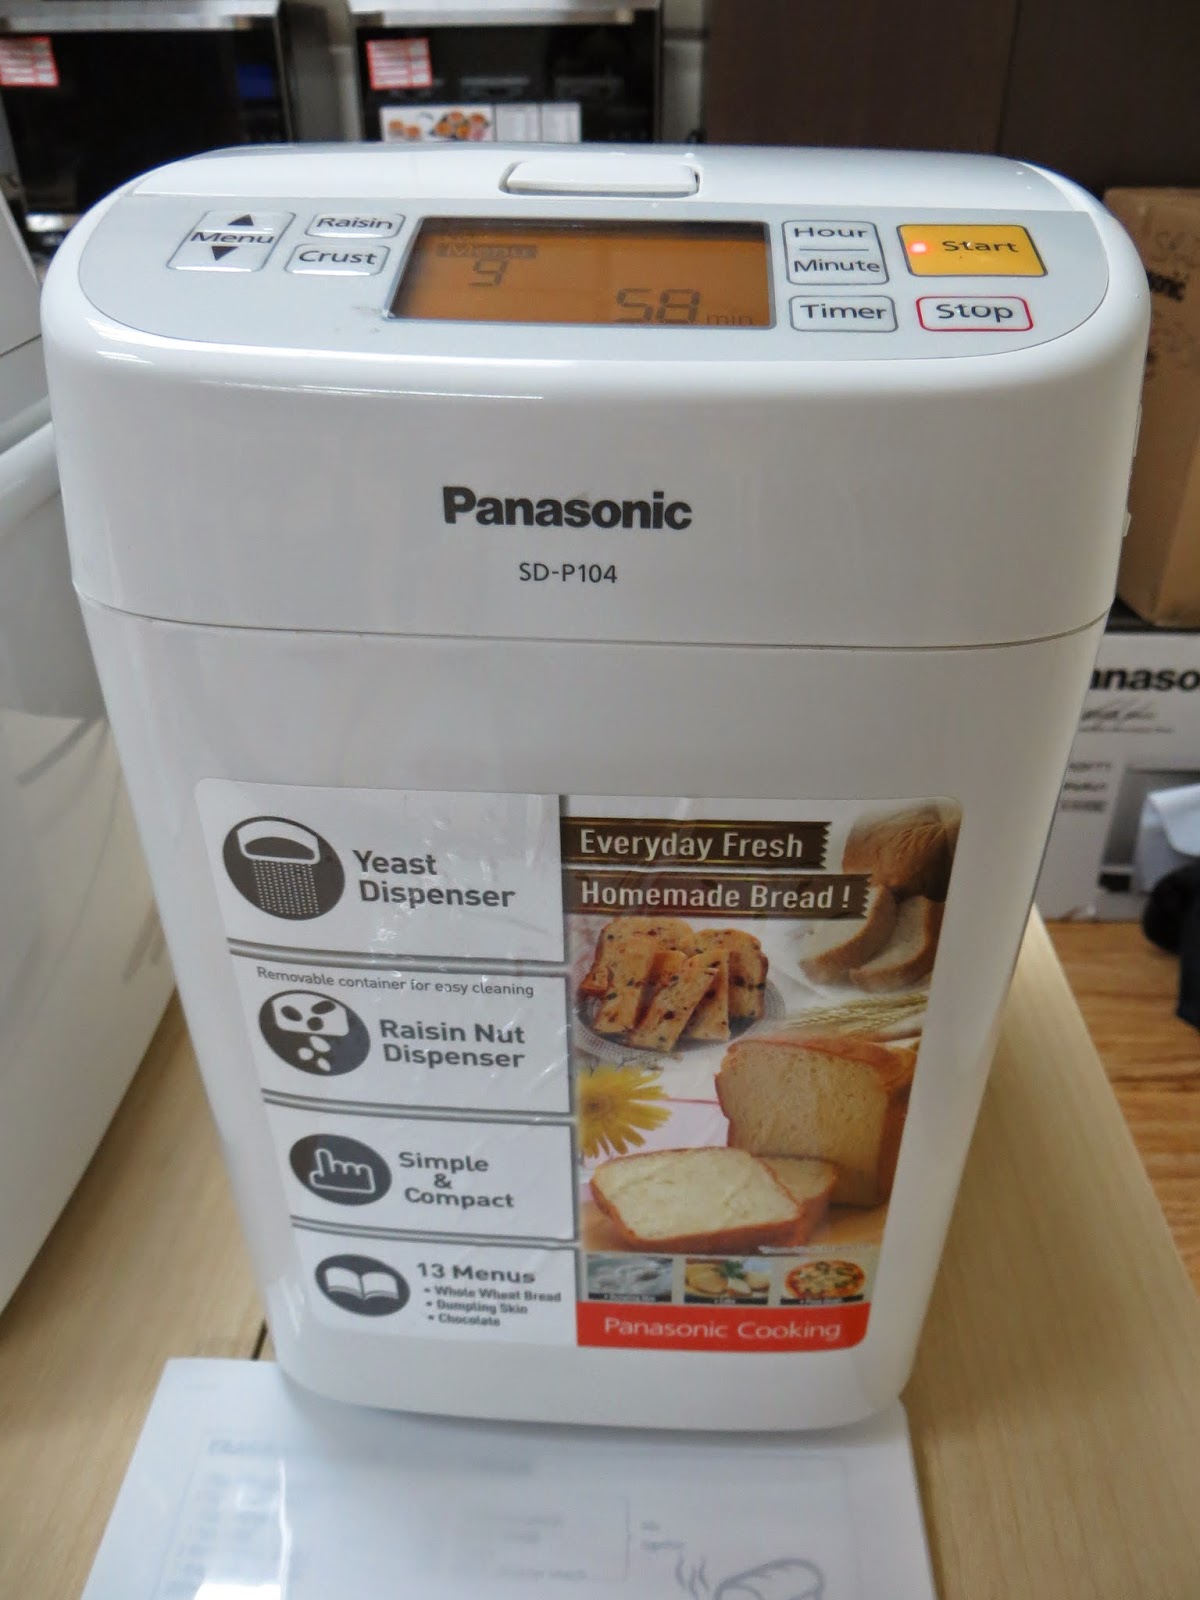
I was so excited when I received an invite from omy recently, on a cooking demo by Panasonic to make some homebaked goodies for Christmas. And so, on a Saturday afternoon, I made my way over to the cooking studio at the Panasonic Customer Service Centre, along with a small group of other omy bloggers, to learn how easy it'll be to make some yummy breads with the Panasonic SD-P104 Bread Maker!


This is actually my first time seeing a bread maker and I was a little surprise to find that it actually resembles an elongated rice cooker. SD-P104 also comes with a handle, which added on to its handy-dandy convenience of being able to bring it around easily. 

And what's the plus point of being early for an event, other than being able to snatch the 'circus seats'? You can take as much photographs as you like, without snapping the weird backviews/sideviews/frontviews of any unknowing photobombers. 

And yes, that's 3 whole shelves of ovens and microwaves at the back of the cooking studio. 

Our cooking mama, Theresa, prepping up the place before the rest of the bloggers arrive. And yes, that's a freshly baked bread loaf you spot back there. 


A sneak peak of the ingredients needed for the cooking demo today....

And upon arrival of all bloggers, Theresa got the demo going by introducing to us how the Panasonic SD-P104 bread maker works. It not only mixes, kneads, rises and bakes the bread at one touch of the button, but also help to dispense raisins & nuts (left grey squarish contraption) and instant yeast (right black round contraption) automatically at the proper time. 
Not only that, it also allows us to choose the crust colour we prefer (light or standard) and has 13 baking menus (including rice flour bread and dumpling skin) to allow us to bake an array of goodies like bread, dough and cake. And according to Theresa, you can also make your own fruit jam using this bread maker as well! 

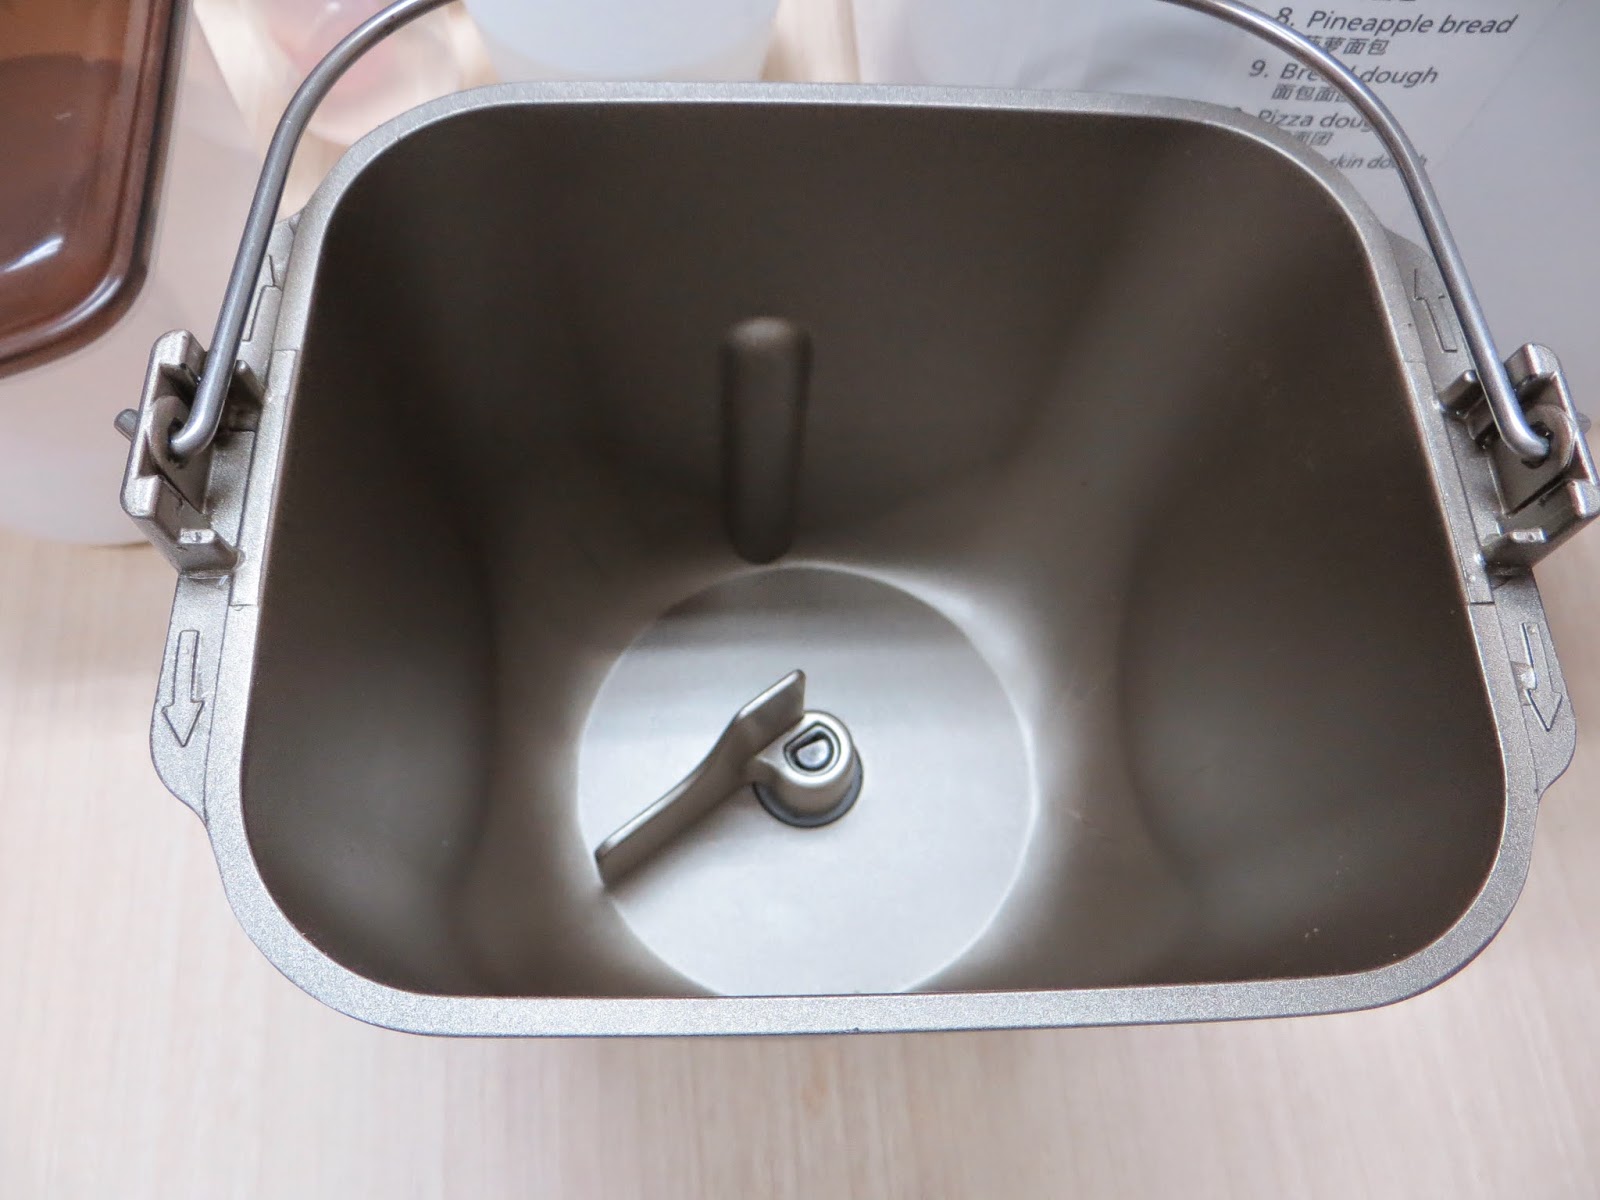
And other than the control panel and dispensers, the other remaining section of this amazing machine will be this bread pan.


And inside the bread pan comes with a detachable kneading blade. It's pretty surprising to know that such a small blade is enough to knead through the entire bread dough.


And while Theresa started off the class with showing us how she baked this perfect loaf of Fragrant Mixed Wheat Bread, Clarice, another friendly staff of Panasonic, helped to slice the freshly baked loaf for us to have a taste.


This bread is a little crispy on the outer crust, and totally soft and fluffy on the inside! And with a good dose of sunflower seeds, melon seeds, raisins and black sesame seeds, it totally added on to the sweetness and fragrance.... YUMS!

This is basically what happens after you dump all your ingredients into the bread pan and switch on the bread maker.
And in 2 hours under "Rapid" baking mode...

Viola~


And of course, we had a 2nd serving of this yummy bread loaf! Erm, okay I had a 3rd serving actually. xp

And if you think you can only make bread loaves with the bread maker, no that's not all! As mentioned, you can also make dough using the bread maker.


 and working on the ready made dough and allowed to rise further in a oven set at 40 degree C...

You can get some yummy flavoured bun rolls!


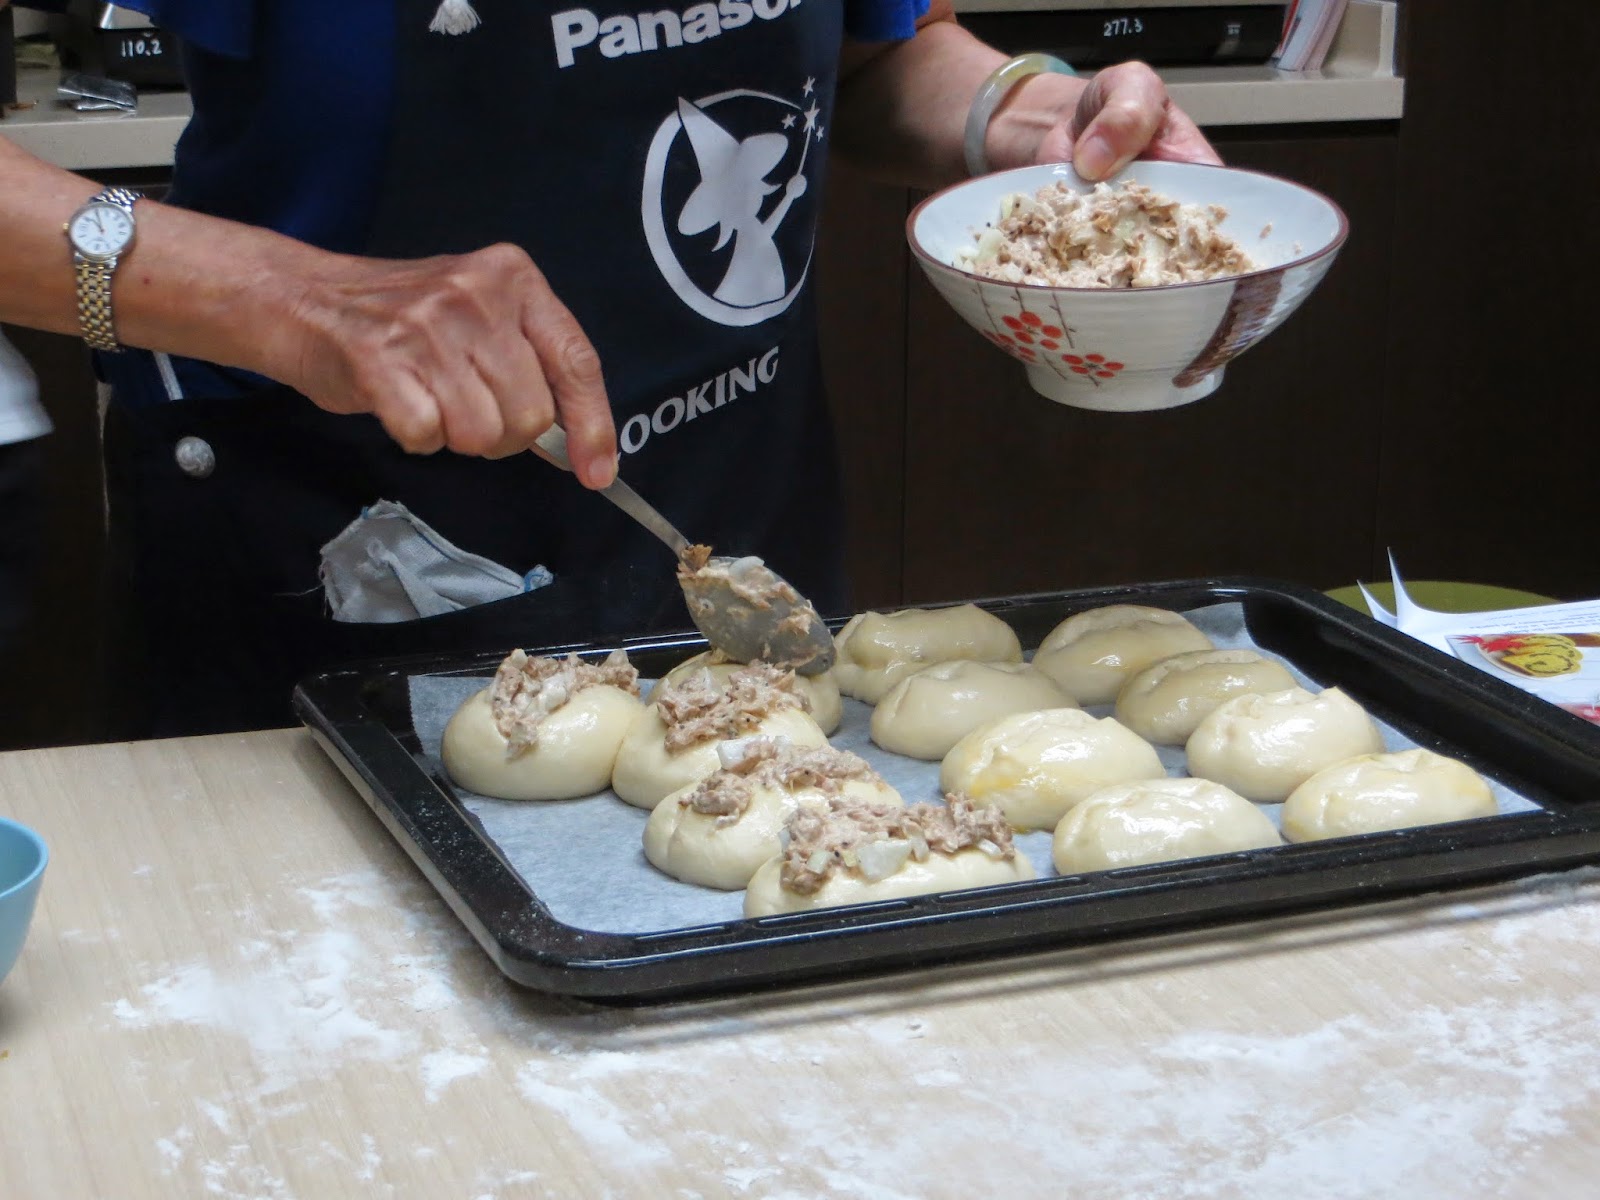
Theresa made cuts on top of the neatly shaped bun and stuffed in a good amount of canned tuna (minced), onions, cheese and a dash of paprika to make some yummy tuna bun rolls.


And even for a non canned tuna lover, this bun rolls were still yums! 


And next up... Guess what?


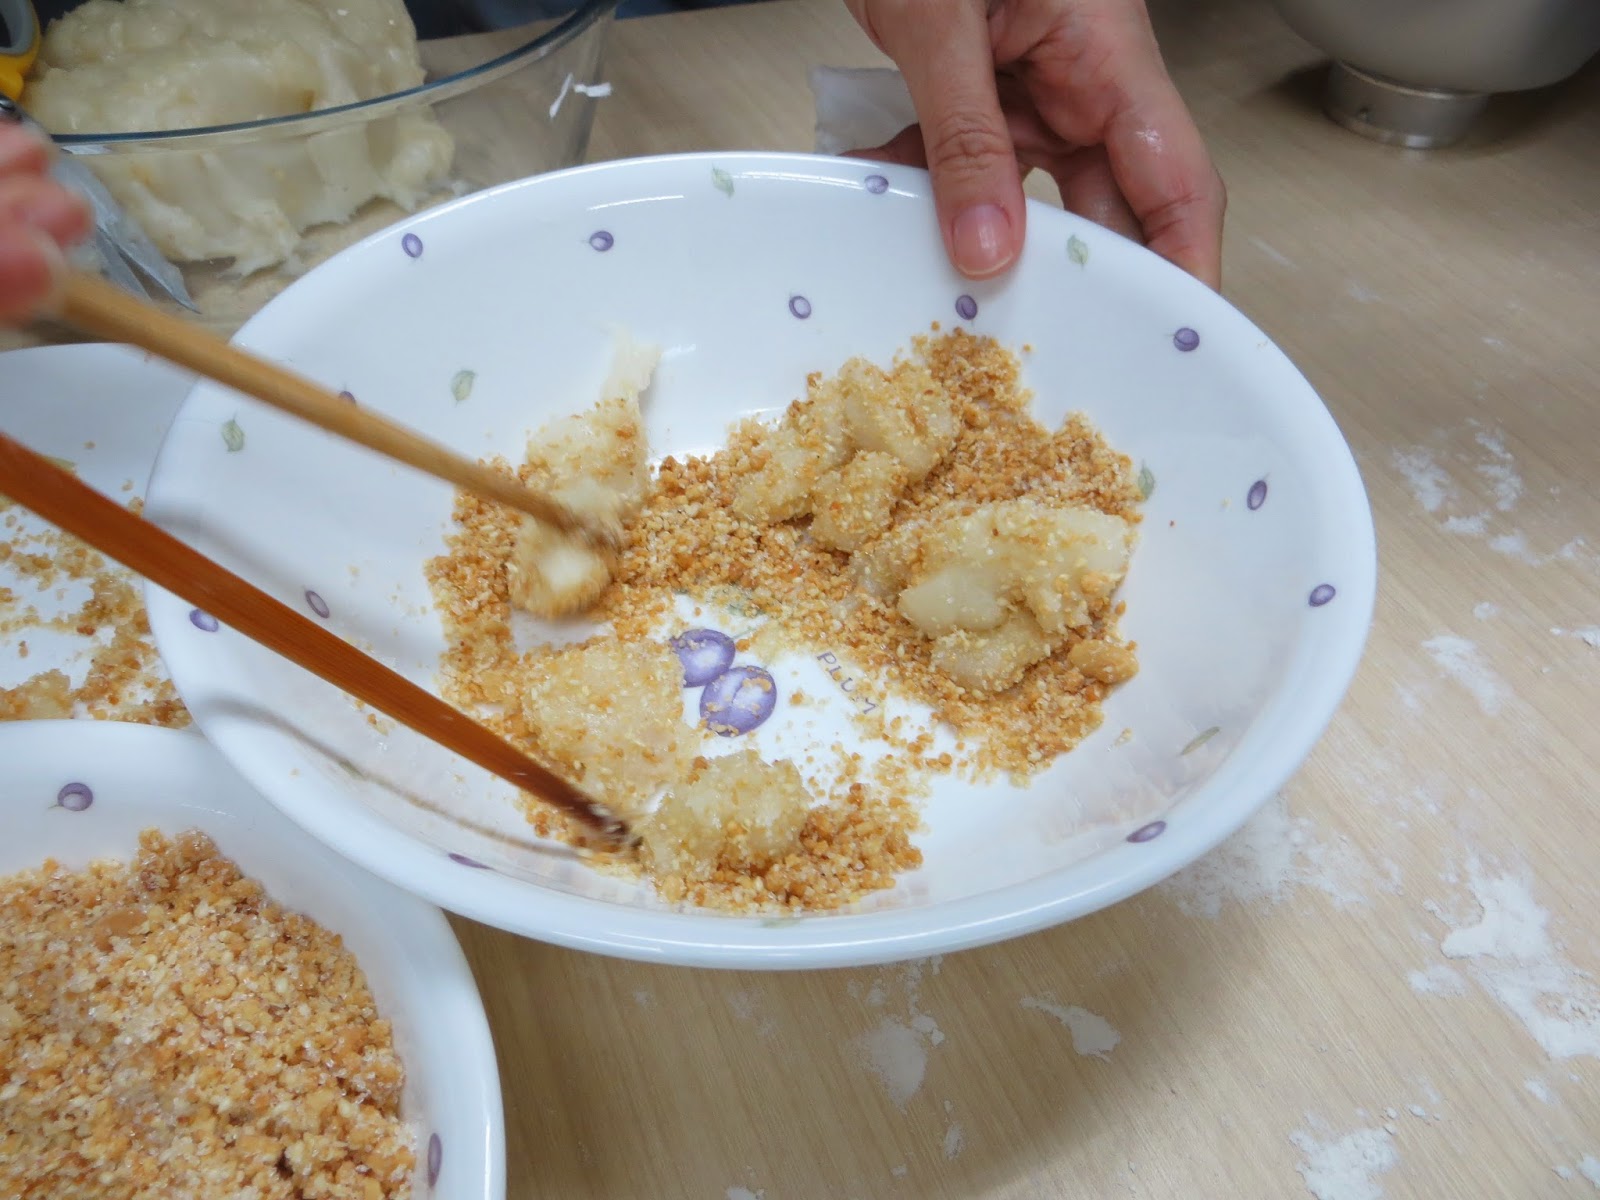
Yes, you can also easily make Muah Chee using the bread maker too! And the hardest part of it will definitely be cutting the ready made lump of muah chee and coating them with crushed peanuts. 
However, I felt that the muah chee was a little too soft and not chewy enough for my liking as a huge mochi/daifuku fan. 

And our last treat of the day...

Hmm, pizza?

No, it's focaccia bread! 

Covered fully with cherry tomatoes, olives and mozzarella cheese, the dough was left to rise at 40 degree C for another 50 minutes before baking.

And viola~

Fresh from the oven, fragrant and fluffy, it's so yummy that even those scalding hot cherry tomatoes couldn't stop our gluttony! 

For more information on SD-P104 Bread Maker and other Panasonic products, visit Panasonic's website HERE or their facebook HERE.

Till then,
Mia Foo
Saturday, 19 April 2014

Mia's Review: Costa Coffee

This is a super duper overdue post. When A was still back in town during her vacations, we decided to drop by Costa Coffee for a cuppa along with R. Always wanted to give this new coffee franchise a try ever since they enter Singapore's market, but couldn't find any coffee kaki to go with.

We dropped by the branch at Somerset 313, a really big and open branch that's usually empty. 

Like so. Haha!


And other than pastry desserts and beverages, Costa also sells chocolate bars! Didn't get any to try though. Might just try one some day. 

Iced Mocha (Medium) - $6.90

The coffee is pretty strong, no doubt. But I do feel that the barista has overdone on the chocolate. It tasted more like milo with strong coffee added rather than mocha. Nevertheless, it's still of a coffee standard whereby I will revisit, unlike *cough cough* CB...TL *cough cough*...

 Chocolate Muffin - $3.90

Comparing to Starbuck's chocolate muffin, Costa's is slightly (?) cheaper, but also much smaller. I remembered I almost died on Starbuck's chocolate muffin back then when I ate it along with a cuppa, and towards the last few bites I just gave up on it because I just felt so sickened with the taste.
For Costa's muffin, no such issue. The serving size is good. Might stretch my small (yet active) stomach a little pass the usual 40 ~ 50% full limit (for desserts), but won't get so full that I get sickened by the taste.

The muffin is pretty dense and rather moist, however, dependent on the 'location' of the muffin. The outer sides tend to be drier while the insides are moist. It's also generously packed full of chocolate chips, which guarantees you a rich chocolatey taste in every single bite.

I mean, look that at gooey chocolate centre. Need I say more?

If I didn't remember wrongly, A ordered some almond croissant or something along that line. However, it was pretty disappointing as it's soft, not crisp at all, and hardly has any buttery fragrance to it.
Big, flat, and pretty badly done.

R's half eaten Cinnamon Raisin Swirl - $4.10

Tried a bite of this and was quite overwhelmed by the strong cinnamon taste. A decent choice, only for the cinnamon lovers.

For more information, visit Costa's website HERE

Till then,
Mia