MollyMia Aspire to Inspire before we Expire
Showing posts with label recipe. Show all posts

Tuesday, 19 January 2021

Mia Bakes: Cinnamon-Coffee Crumb Cake

 A while back, I've tried making a coffee loaf cake following this Korean youtuber HojuGyver's mocha-ppang recipe, but it turned out so dry, dense and lacking in coffee flavour overall, it was quite a huge disappointment. 
But as y'all know, other than chocolate, my one other true love is actually coffee and there's no way I'm gonna give up on getting a recipe that yields me a good coffee cake....
Well, I'm referring to the UK's version (literally a coffee-flavoured cake) and not the American version (any flavoured cake, but usually NOT coffee, that you typically eat while having a cuppa coffee).

And so, I found Claire Saffitz X Dessert Person and her recipe for a coffee coffee cake.
Yay! <3


So let's get over with the ingredients to get started! 
For 1 standard loaf cake, you'll need: 

Cake:
230g all purpose flour
1 1/4 tsp baking powder
1/4 tsp baking soda
1/4 tsp salt
90g plain yogurt
75g unsalted butter
25g vegetable oil
60ml strong coffee **see note below
50g castor sugar
30g brown sugar
2 eggs
1 tsp vanilla extract

Crumb Topping:
80g all purpose flour
50g brown sugar
1 tsp ground cinnamon
55g unsalted butter (soften at room temperature)
1/2 pack 3-in-1 coffee mix sachet

Ribbon:
1 1/2 tbsp brown sugar
1 1/2 tsp ground cinnamon
1/2 pack 3-in-1 coffee mix sachet

recipe adapted from Claire Saffitz x Dessert Person's Coffee Coffee Cake

**for my coffee, I've added 60ml hot water to a sachet of Gold Kili Traditional Kopi-O and another sachet of SUPER 3-in-1 Reduced Sugar.
This is already a GREATLY reduced-sugar recipe, so do not try to reduce anymore sugar from your cake batter. In fact, you can do with a little more sugar in your cake batter for better flavour (Eg, using normal or rich 3-in-1 coffee mix sachet instead of reduced sugar).

First up, the streusel crumb toppings. In a small bowl, add in all the crumb topping ingredients and work it with your fingers until all the butter has been rubbed into the dry ingredients and the mixture resembles wet muddy sand. You would want to keep the chunks on the smaller side (although I know it's tempting to have big chunks of streusels) such that they won't crumble off the cake easily as you cut into them later on. Then, set the bowl aside in the fridge (to firm up) as you move on to the ribbon mixture. 

In another small bowl, add in the brown sugar, ground cinnamon and the remaining 1/2 sachet of the coffee mix and give it a quick toss to combine. Then, set it aside. 

Now, in a large bowl, add in the soften butter and sugars and whisk until the butter turns pale and fluffy. Then, crack in the eggs, 1 by 1 and mixing until fully incorporated with each addition, before adding in the oil, yogurt and vanilla extract. Mix well. Then, add in the cooled coffee and mix well. You may find some "curds" of yogurt floating around in the mixture at this point, but don't worry. It'll all be fine. 
Finally, sift in all your dry ingredients (flour, salt and leavening agents) and fold with a spatula or wooden spoon until just combined. 

Then, fill your prepared loaf pan (greased and lined with parchment paper) with half of the cake batter and level it out as best as possible before sprinkling the sugar-cinnamon-coffee dry mixture all over the surface. Then, top the loaf pan up with the remaining half of the cake batter and level the surface off before topping it up with the chilled streusel crumb toppings. Give the loaf pan a few solid taps on the counter to get rid of any air bubbles in the middle before baking it in the oven preheated to 175 degree Celsius for about 40-45 minutes, until a toothpick inserted in the middle comes out clean. 

When the baking time went beyond the 30 minute mark, I was starting to get paranoid that my crumb toppings are gonna burn, but they obviously didn't. 
But as all ovens behave differently, you may want to keep a close eye on yours and cover the top with a piece of aluminium foil to prevent the streusel crumbs from over-browning/burning. 

And I obviously didn't do a good job levelling out the surface of my cake batter before I sprinkle in my ribbon. HEH! 

So while the cake is on the denser side like a solid pound cake, it's still relatively moist due to addition of the yogurt (or you may use sour cream too) and packed full of coffee and cinnamon flavour, an epic combination. (I personally love adding cinnamon to my coffee, YUMS!). 
Do give this recipe a try if you're also a coffee fan like me!

Till then,
Mia Foo

Wednesday, 23 December 2020

Mia Makes: Potato Cheese Mochi Cakes

Potato, Mochi and Cheese. All mish-mashed into one. Yay or Nay?


It's definitely a big YAY for me, so let's get over with the ingredients to get started!

Potato Mochi: 
~400g potatoes, raw. 
110 - 120g glutinous rice flour
4 - 5 tablespoon water (or milk) 
salt & pepper to taste
(I've used 1 tsp salt + 1/2 tsp pepper and it was still pretty bland) 

Filling:
Cheese, or anything else you fancy
(I've used shredded cheddar & mozzarella mix, but I'll highly recommend adding some Parmesan for flavour).

First up, wash and peel your potatoes and cut them into thin slices (such that they'll cook quickly) and steam them until they're fully cooked and soft. It's better to steam than boil, as the latter will introduce a lot of unnecessary moisture to the potato, and you'll end up adding a lot more flour to make up for it. 

Once your potato slices are fully cooked until soft and tender, mash them up using either a fork or a potato masher/ricer. Do it while they're still hot as they'll be easier to mash up while still hot from the steamer. Then, leave it to cool slightly (until you can handle them with your hands) before adding in the glutinous rice flour. 

As different potatoes will have different water content, I'll suggest that you'll start with just 100g of the flour first, along with half the water/milk and move forward from there. Just make sure you're left with a dough ball that's smooth and pliable, and doesn't really stick to your hands, and you're good to go!

Then, portion your dough into equal pieces (I did 40g balls for mine) and keep them under a damp tea towel or cling wrap to prevent them from drying out. Take a piece of the dough ball and flatten it slightly into a disc with your palm. Using your thumb, slowly press out from the centre of the disc and shape the dough ball into a bowl shape. Then add in your choice of filling into the centre of the "bowl" before pressing the edges together to seal. Do make sure you pinch the seams tightly such that your fillings will not leak out while cooking. Then, give the wrapped up dough ball a quick roll in between your palms to smoothen out the crease and flatten it back into a small disc before putting it back under the cling wrap/tea towel while working on the rest of the dough balls. 
Once all the dough balls are filled and shaped, it's time to cook them! 


Spray down your non-stick pan generously with some non-stick cooking spray or simply add about 1 tablespoon of cooking oil to it and put it on medium heat. Once the oil has heated up, put in your mochi cakes and allow to cook on low/medium heat for about 5 minutes on each side, or until the surface is golden brown and the cakes soft and marshmallowy to the touch. You should also be able to smell a lovely fried potato fragrance, another indication that your cakes are done!

Be careful not to overcook these mochi cakes, else your cheese filling might burst out. 

That's what you'll get if you fill your mochi cakes with shredded mozzarella, look at that string of melty cheese! <3

Absolutely love the soft and chewy potato mochi with melty and gooey cheese in the centre. Other than the slight blandness in flavour, this was so good! 

Till then,
Mia Foo


Sunday, 15 November 2020

Mia Bakes: Cottage Cheese Torte (Low Calorie Baked Cheesecake)

 Previously, I've posted a recipe for Ricotta Burnt Cheesecake and was so glad to have found a lower calorie, diet-friendly and yet equally yummy cheesecake. 
And now, I found cottage cheese!

Do you know, 100g of cream cheese packs 342 kcals, while ricotta holds 174 kcal and cottage cheese has barely 100 kcals? And if they're all going to end up tasting equally good, why waste that 3x calories for the same enjoyment, right? 


Goodbye, cream cheese. I won't see you to the door.


Anyway, let's get over with the ingredients, so we can get started!

For a (roughly) 20 x 10 cm loaf pan, you'll need:

For the filling:
200g cottage cheese
2 eggs, separated.
12g plain flour
75g baking sugar replacement
(you can replace with castor sugar in 1:1 ratio)
90g cooking (or heavy) cream
1 tbsp lemon juice
(you may add in grated peel of the whole lemon if you wish)
a pinch of salt
1/2 tsp vanilla extract
1/8 tsp cream of tartar (optional, for meringue)

For the crust (optional):
70g (or more, if you like a thick crust) biscuit of your choice.
(I've used Britannia Good Day Cashew Cookies, but you can use digestives or even lotus biscuits) 
1 tbsp butter (or more, depending on your biscuit)


First up, place all your cookies and 1 tbsp of soften (or melted) butter into a small food processor and process until everything has come together and the consistency resembles wet sand. If the crumbs are unable to hold its shape when pressed together, add a little more butter (or you may replace with lower-fat options like greek yogurt or unsweetened applesauce) until you get to a malleable texture. If you do not have a small food processor, feel free to do this step in a ziplock bag with a rolling pin instead.

Pour the buttered crumbs into your loaf pan, lined with parchment paper and pat it down firmly to form the crust base. Pop it into the oven to bake at 180 degrees Celsius for 5 minutes for the base to somewhat firm up before removing the pan from the oven to cool down slightly while preparing the rest of the ingredients. 

In a large clean bowl, add your separated egg whites and give it a quick whisk with your handheld mixer (or stand mixer, if you have one) to loosen it up. Using a clean spoon (no traces of oil here, as it'll prevent your whites from getting whisked up into meringue), take out a small spoonful (I'll say about half a tablespoonful will suffice) of the whites in a small dish and set everything aside. In another clean bowl, add in your cottage cheese and give it a good beating mixing with your handheld mixer (or balloon whisk, if you're up for spending some elbow grease) until the big curds have more of less broken down into tiny pieces. Then, add in the cream and continue mixing until the mixture has turned considerably smoother. It'll be impossible to beat them into cream cheese consistency, just make sure that there's no more huge lumps of cheese floating around in the mixture and you'll be fine. Then, add in the egg yolks, 1/4 of the sugar, lemon juice (and grated peel), vanilla extract and salt. Whisk until well combined before adding in the flour. Mix until there's no more dry pockets of flour and set the mixture aside. Wash your handheld mixer whisks CLEAN before proceeding. 

Check if your crust base has cooled down before brushing on the 1/2 tbsp of beaten egg whites over the top of the base with a pastry brush lightly. Then, set the pan back into the oven to bake for another 5 minutes (or until you start smelling a nice buttery fragrance from the baked base). Remove from the oven and set aside to cool down. Turn the oven temperature down to 175 degrees Celsius. 

Then, with CLEAN whisk attachments on your handheld mixer, whisk the remaining of your egg whites until frothy before adding in the cream of tartar (optional) and 1/3 of the remaining sugar. Continue whisking and adding rest of the sugar in another 2 additions, whisking thoroughly after each additions. Continue beating the egg whites until stiff peaks formed. 

With a spatula, scoop 1/3 of the meringue and fold it into the cheese-yolk mixture. Then, pour the mixture back into the rest of the meringue and fold lightly (either with a spatula or you can also use a balloon whisk, but mix with a FOLDING technique) until just combined. Do not overmix, or you'll risk deflating your meringue. Pour the fluffy mixture into the loaf pan, over your pre-baked crust and bake at 175 degrees Celsius (reduce by 10 degrees if on fan) for around 25 minutes, or until the top of the torte is evenly browned, and the top springs back slightly when tapped lightly with a finger and the centre jiggles slightly when shaken. If you'll prefer a "fairer" cheesecake (I personally like how the charred/caramelised flavour of the browned top cuts into the otherwise cloying heaviness of a cheesecake) with a sinful creamy mouthfeel, feel free to lower your temperature to 160 degrees Celsius and bake the torte in a hot water bath for much longer (35 to 40 minutes)

After the torte is done, leave it in the oven, door closed, for another 15 minutes before leaving the oven door slightly ajar and allowing the torte to cool down in the oven for at least another 30 minutes. When the torte has cooled down to room temperature (or just slightly warm to touch), cover the top of the torte with clingwrap and pop the entire thing (parchment paper, loaf pan and all) into the fridge for at least 4 to 6 hours before serving. 


The torte will puff up slightly while baking, and the top will shrink back to flatten back out when cooled. But it shouldn't crack, and should stay relatively flat (instead of ending up with a depression in the centre) if you've allowed the torte to cool down slowly in the warm oven. 

I love how the centre of the torte remains slightly molten, yet not alarmingly runny. Due to brushing the top of the pre-baked crust with beaten egg whites, which formed a "waterproof" layer between the moist cheese filling and the baked crust, it allows the crust base to stay crisp instead of turning soggy. The overall texture of the torte, though definitely not fluffy like Japanese cotton cheesecake, is still a lot lighter and fluffier than a typical (cream cheese) baked cheesecake without beating the egg whites separately into meringue. Flavour wise, it's also much lighter (cottage cheese are supposed to be less sweet than cream cheese) and a lot less surfeiting. 
I guess, I've nailed THE recipe to follow for a baked cheesecake for myself!

Till then,
Mia Foo 

Monday, 12 October 2020

Mia Bakes: Mung Bean Cakes (绿豆糕)

挑战过了桂花糕,下一个就是你了 - 绿豆糕!
(After succeeding the Osmanthus Rice Cake, the next one shall be you - Mung Bean Cake!)


Initally, I bought a set of  the mooncake press-mould, thinking that perhaps I can have a try at making my own fusion mooncakes (eg. baked mooncake skin but with pineapple cake filling) this year, but the procrastination... 
Oh well, Mid-Autumn is long over, so let's make Mung Bean Cakes instead!

For 20 (33 - 35g) cakes, you'll need:

250g mung beans (dry, with skin)
35g unsalted butter
50g Gavia Sweetener (1:1 sugar replacement)
20g honey
15g full cream milk powder
a pinch of salt
(and ALOT of elbow grease)

recipe adapted from Amanda Tastes

The procedures to make this cake is really simple, just that you'll require a lot of elbow grease frying the mung bean puree into the cooked dough. But anyhow, let's get started!

To 250g of mung beans, add in some water to soak the beans for at least an hour or two, until the beans has expanded in size. Then, give the beans a good rinse and pour them into a pot. Add enough water just that all the beans are covered, and bring the water to a boil over high heat on the hob. Then, turn off the hob and leave the beans to "steam" in the covered pot for 15 to 20 minutes, before adding some more water (if it has dried up) and repeating the process (of heating until the water boils, turning off the heat, steaming the beans in the covered pot) for another 2 times, until the beans are thoroughly cooked through and soft. This trick will save you a lot of gas (or electricity, if you're using induction hob) and possibly some cooking time as well.
Do remember to not add too much water (just enough to cover the beans) while boiling them, if not your puree will end up extremely watery and you'll need longer frying time later on to reduce the puree into a dough. 

Pour the cooked beans and the remaining water into your food processor or blender, and blend into a fine puree. Do blend the beans for a while longer so as to better break down the skin. Otherwise, you can also remove the skin before cooking to get a smoother, finer cake texture. 
Then, pass the puree over a sieve and directly into a non-stick pan. You may also skip the sifting part if you do not mind a coarser mouth-feel in your cake. Also, if you've already removed the skin before cooking, sifting is also not required. 

To the puree, add in the butter, sugar, honey, milk powder and a pinch of salt. Then, start stirring the mixture NON-STOP over medium heat until most of the moisture in the puree has evaporated and the mixture will start to come together into a dough. 
Now, how long more to cook the mixture once they start to come together depends on how dry/moist you prefer your cake to be. But do note that if your dough is too moist, it's harder for the cake to take the shape of your mould, and if it's too dry, they'll crack easily. 


Transfer the hot dough into a clean bowl and cover with a cling wrap. Make sure that the cling wrap is touching the surface of the dough to prevent it from drying out. Then, leave it to cool/chill in the fridge. Once the dough has cooled down, it's time to start shaping! First, divide your dough into equal portion sizes and roll them into balls. You can do this by first weighing the total weight of your dough and dividing it by how many pieces you wish to get. Just make sure that the size of your dough ball doesn't exceed the capacity of your mould press (mine is a 50g mooncake mould press). 
Then, oil your mould press to prevent sticking, and start pressing away! 

Tadaa~

I'll probably increase the amount of sugar the next time I attempt this, as this batch has an extremely obvious "low-sugar" taste. HAHAHA! 


Taste wise, due to the very subtle sweetness, the mung bean flavour is very prominent. My dad actually asked that I try covering some in flour batter and deep-fry them, saying it'll taste just like Kuih Kasturi (the mung bean fritters selling at most Goreng Pisang stalls). 
 HAHAHA!

Till then,
Mia Foo


Friday, 18 September 2020

Mia Bakes: Pumpkin Protein Pancakes


And so, after using unsweeten applesauce in my protein pancakes for nearly forever, I decided to try using mashed pumpkins instead when I realised my neglected half of a butternut pumpkin is nearing the end of its shelf life.
Will it work? Let's find out! 

For 1 serving of 5-6 small pancakes, you'll need:

25g whey protein powder (I'm using My Protein Impact Whey Isolate)
10g oat flour 
18g oat fibre (about 2 tbsps)
120g raw pumpkin
1 egg
1/2 tsp baking powder
1/4 tsp baking soda

First, wash your pumpkin clean and cut into thin slices. Steam for 10 to 15 minutes until it's fully cooked through and mash it up with a fork. Set aside to cool.
Crack your egg into a small bowl and separate your egg yolk and white. Place the egg yolk in a large bowl and add in the cooled, mashed pumpkin. Mix thoroughly to combine. Then, add in all the other dry ingredients (if your protein powder is not flavoured, add in 1 to 2 tsp of sugar to taste) and mix until just combined. 
Lastly, add in the egg whites and lightly stir until there's no more obvious snotty gloops of the egg whites. This trick is to ensure that you get thick and fluffy pancakes!

Cook the pancakes over medium heat on a lightly greased non-stick pan. Always remember to wipe away all excess oils on the pan before you spoon in your pancake batter to get a pretty, evenly browned surface on your pancakes. Cook for roughly 3 to 4 minutes on one side, until bubbles start to appear on the surface, before flipping it over. Then, cook for another 2 to 3 minutes, or until the surface springs back when you press down on it, indicating that it's fully cooked through. 
Pancakes made from whey protein tends to be rather dry, so always make sure to not overcook them. If not, you'll end up with a stack of cardboard. 

And tadaa~ These pancakes are thicc! 


As compared to the applesauce version, these pancakes are significantly denser, slightly mushier, and has a subtle pumpkin sweetness to it. Not exactly the best stack of protein pancakes, but it'll do when I run out of applesauce or when I need to finish up my half-eaten pumpkins!

Till then,

Mia Foo


Friday, 11 September 2020

Mia Cooks: Honey Garlic Sriracha Shirataki Noodles Stir Fry

Yup, I've been obsessed with sriracha sauce lately and I'm not gonna lie. I've been adding it to literally everything I eat these days, even salads (salad dressing recipe here)! Another ingredient I've been crazy about these days is the shirataki noodles. Not only are they super low calorie, but I love the chewy, bouncy mouthfeel of the noodles that great resembles glass noodles. 

So let's combine these two together for a quick, 1 pan lunch! For 1 LARGE serving (in terms of volume, not calories), you'll need:

200g shirataki noodles
100g shredded cabbage
1/4 white onion, thinly sliced
1 king oyster mushroom (around 50 - 60g), sliced
8 peeled shrimps (around 70g)
2 cloves garlic, finely chopped
1 tbsp light soy sauce
1 tbsp fish sauce (replace with light soy sauce if you don't have)
1 tbsp honey
1 tbsp sriracha 
1 tsp sesame oil
pinch of salt, garlic salt, ground ginger

optional: zucchini, sliced. 
I had just a bit leftover (around 40 - 50g) in the fridge so I just added them in.  

First up, boil the shirataki noodles. There'll be a strong fishy odour when you pour it out of the packet. While there's some who claims that the fishiness can be rinsed away, I always prefer to boil mine for a couple of minutes along with a clove of crushed garlic and a pinch of salt and ground ginger to be safe
Then, drain the noodles and set aside. 

In a small bowl, mix the soy sauce, fish sauce, honey, sriracha and sesame oil together until well combined and set aside. 

In a heated non-stick pan, grease it with a little cooking spray and stir fry the onions until they turn slightly transparent. Then, add in the chopped garlic (I actually reused the boiled garlic from pre-boiling the noodles, but you can use two fresh cloves of garlic instead) and stir fry for a while more until fragrant. Then, add in the cabbage (and zucchini) with a pinch of garlic salt and cook until the cabbage are slightly wilted. Add in the mushrooms, shrimps and noodles. Give it a quick stir to combine, before pouring in the sauce mixture. Give it a good toss to make sure that everything is well coated with the sauce. Continue stir frying until the shrimps are fully cooked and it's done! 

I served mine along with some frozen chicken gyoza that I've steamed, but you can just have the stir-fried noodles on its own. It'll make a decent portion, hearty lunch! 


Best of all, everything (gyoza included) is barely 350 kcals! Super diet-friendly!

Till then,
Mia Foo


Thursday, 3 September 2020

Mia Bakes: Healthy Pumpkin Bread (with Greek Yogurt & Green Banana Flour!)

Pumpkins, anyone? 

I'm hardly a fan of pumpkin growing up. Somehow in our family, we're typically not a fan of sweet taste unless they're in the form of cakes and pastries. It was only very recently, when I changed my diet and got onto team #eatclean did I started eating pumpkins frequently. 
Yup, they're one of the most diet-friendly food, being low in calories (at only 50 kcals per cup!) and yet, nutrient-dense. However, taste wise, I'll still prefer sweet potatoes (or brown/multigrain rice) as my source of starchy carbs. I guess that's why many times my "impulse pumpkin buys" always ends up in nearly half of the unfinished pumpkin going bad in the fridge. T.T 

And so I decided, I'm not going to let anymore precious food go to waste! Left with a generous quarter cut of my pumpkin that's nearing the end of its shelf life, I decided to bake something out of it! Initially I thought of trying out the recipe for my healthy sweet potato brownies and substituting the sweet potatoes with pumpkins, but that'll leave me with too much brownies to eat alone (I'm the only person in the family who enjoys chocolatey bakes). And so I thought, why not some pumpkin quick bread instead? And similar to my previous recipe for the applesauce walnut & raisin quick bread, there's nothing "bready" about this quick bread, and they're way more like muffins. 


So much so that I even baked some in muffin form. HAHA!

So now let's get over with the ingredients, so we can get started!
To get 1 standard loaf serving (10 - 12 slices), you'll need:

150g raw pumpkin (or about 130g canned pumpkin puree)
2 eggs
55g plain greek yogurt
40g brown sugar
30g castor sugar
(or you can use 70g of either sugar)
110g plain flour
30g green banana flour
1 tsp vanilla extract
1 tsp ground cinnamon
1/4 ground nutmeg
1/4 salt
1/2 tsp baking powder
1/2 tsp baking soda
60 - 70g semi-sweet chocolate chips
30 - 40g pumpkin seeds (plus a handful more as toppings, if desire)

First up, wash your pumpkin clean and remove the skin and seeds (you can roast the seeds and eat them too!). Cut them into thin slices and steam for 10 to 15 minutes (depending on how thin you slice them) until they're thoroughly cooked through and soft. Pour off the excess liquid that has drained out of the pumpkins and mash them up with a fork. Stir in the sugars until well combined and leave them aside to cool. 
When the mashed pumpkin has cooled down, add in the eggs, one at a time, and mix until well combined. Then, add in the greek yogurt and vanilla extract and mix well. Then, mix in the green banana flour, salt and spices until well combined. There's no gluten in green banana flour, so there's no risk of overmixing the batter at this point. 
Then, from your bowl of 110g plain flour, spoon a heaping tablespoon of it and toss it with your chocolate chips & pumpkin seeds. This trick will help them stay up in the middle of the loaf rather than sinking to the bottom during baking. Add the remaining plain flour, baking powder and baking soda into the mixture and fold lightly to combine, until there's just a few streaks of dry ingredients. At this point, add in the chocolate chips and pumpkin seeds and fold until just combined, with no more streaks of dry ingredients to be seen. 
Pour your batter into your prepared loaf pan (sprayed with non-stick cooking spray and lined with parchment paper) and bake at 175 degree Celsius for 35 to 40 minutes, or until a toothpick inserted comes out clean. 

Do check on them at the 30 minute mark, and if you see that the surface has gotten too browned, you can cover the top with some aluminium foil to prevent over-browning. 

Although this is also a quick bread, its texture is totally different from the one I made with applesauce and butter (my applesauce walnut & raisin quick bread). While the applesauce-butter one is more moist and with a denser, cakier texture, this version made with greek yogurt and pumpkin puree turns out drier and a lot more chewy. 
To be honest, I think I will prefer the applesauce-butter version. HAHAHA! What's baked goods without butter, right?

Till then,
Mia Foo

Friday, 28 August 2020

Mia Makes: Whey Protein Pancakes (with 2-ingredients chocolate sauce)

 On a diet, but craving for pancakes? 
What if I tell you, you can get your pancake craving fixed (with chocolate chips!) at only 350 kcals and still get 27g of protein? Sounds too good to be true?


But it is! So let's get over with the ingredients, so we can get started!

25g whey protein powder (I'm using My Protein Impact Whey Isolate)
10g oat flour 
18g oat fibre (about 2 tbsps)
120g unsweeten applesauce
1 egg
1/2 tsp baking powder
1/4 tsp baking soda

Optional:
20g dark chocolate chips
a little sugar to taste, if your protein powder is unflavoured. 

First up, separate your egg whites from yolk. Nope, we're not going to whip the whites, but somehow adding the whites separately at the very end will give you thicker, fluffier pancakes. Try it!

In a clean bowl, add in the yolk and applesauce and whisk until fully mixed. Then, add in all the dry ingredients (except the chocolate chips) and mix until there's no obvious pockets of dry flour. Then, add in the egg whites and chocolate chips and fold the mixture until there's no more obvious streaks of snotty egg whites floating around. You need not fully incorporate (and risk over-mixing your batter) the whites into the batter. 

Cook the batter over the hob on a non-stick pan, as you would with any other pancakes (eg. flipping when bubbles start to appear on the surface).
If you still don't know, the trick to get an evenly browned pancake is to NOT add oil/butter to your pan (hence it better be non-stick). Just give it a quick spray with some non-stick cooking spray and be sure to wipe off any excess oil (if you can SEE the droplets of oil, that's excess) with a kitchen towel before pouring in your pancake batter. 


Tadaa~
I've used milk tea flavoured whey protein powder, hence I've a stack of Milk Tea Chocolate Chip pancakes, YUM!

Protein pancakes made with whey protein powder will always turn out rather dry, so while this recipe will give you thick and "fluffy" pancakes, do not expect them to be moist and tender. But, comparing to a "traditional" whey protein pancake (especially those from protein pancake premix), this fare a lot better as the applesauce helps to make it a little more moist, while oat fibre tends to create this moist-mushy texture in baked goods.


I usually eat my pancakes with some maple flavoured syrup or peanut butter, but this time I thought of trying out a simple recipe for some chocolate sauce. 

You'll need:
3 tbsp cocoa powder 
1 tbsp honey
water (add enough to get the consistency you desire)

adapted from wholeheartedlylaura.com

While the consistency of the sauce was perfect (drippy, yet not too runny), the taste was pretty.... "healthy". Perhaps it will work better with more sweetener, or to use drinking cocoa powder instead of the unsweeten kind I've used. If you've tried this recipe using drinking cocoa powder and it turned out well for you, do let me know in the comments section below!

Till then,
Mia Foo

Thursday, 13 August 2020

Mia Bakes: Applesauce Walnut & Raisin Quick Bread (With Green Banana Flour)

 Frankly speaking, I don't really understand the logic of quick breads. Let's face it, you can't get bread without long proofing. The texture just ain't right. They're still cakes, albeit coarser and denser.... Muffins! Yes, they're muffins baked in a loaf. Are they not? But breads or muffins, they're delicious. And they're also super quick and easy to make. So let's make ourselves some (slightly healthier) walnut and raisin quick bread using applesauce and green banana flour!
This is also going to be an eggless recipe, as I was baking this for my grandma, who doesn't eat eggs in the morning (due to religion). Making this eggless will allow her to eat the bread for breakfast instead of having to wait till after noon to eat it. 


If you've not heard of green banana flour, it's a gluten free alternative to grain flour, having been made from green bananas. They're said to be high in resistance starch, with benefits such as:

1. Improving negative effects of metabolic syndrome
2. Promotes a healthy colon
3. Could reduce insulin sensitivity
4. Possibly aids weight loss
5. May reduce cholesterol levels

So let's get over with the ingredients so we can get started!
To get 1 loaf serving, you'll need:

250g unsweeten applesauce
80g dark brown sugar
135g plain flour
85g green banana flour (I used Edward & Sons)
75g unsalted butter, soften
70g honey
1 tsp ground cinnamon
1/4 tsp ground nutmeg
1/2 tsp vanilla extract
1/4 tsp almond extract (optional)
1/3 tsp salt
2 1/2 tsp baking powder
1/4 tsp baking soda
100g raisins (I mixed sultanas with yellow raisins)
50-60g walnuts, roughly chopped.


In a large bowl, cream the soften butter and brown sugar together. Then, add in the applesauce, honey and extracts and mix until well combined. There might be some "separation" of the butter, but it's alright. From 135g of plain flour, take about 1 to 2 tbsps and mix it into the raisins and chopped walnut mixture and toss till everything is well coated. This will prevent the walnuts and raisins from sinking to the bottom of the bread while it bakes. 
Then, add in all the of the dry ingredients (flours and leavening agents) into the wet ingredients and mix until there's just a few streaks of flour to be seen. Then, dump in the chopped walnuts and raisins and mix until just combined. You do not want to overmix your batter, as the green banana flour (along with applesauce) will make your cake quick bread slightly denser (and crumbly) than usual. Overworking the gluten in your plain flour will definitely give you a super dense and tough bread. 

Once there's no more streaks of dry flour to be seen, scoop the batter into a lined loaf pan and bake at 175 degree Celsius for 30 to 35 minutes, or until a toothpick inserted comes out clean with just a few crumbs. Leave the bread to cool down slightly in the loaf pan for 5 to 10 minutes before taking it out of the pan and letting it cool COMPLETELY on a wire rack. Do not try to slice it when it's still warm; things will get messy with all the crumbling. 

And tadaa~ 

The dark brown sugar and honey will add a lot of rich sweetness to the cake, and while the applesauce helps to make the cake quick bread super moist, the green banana flour helps to give the bread a denser and "coarser" texture, like a christmas plum cake. Well, as I've said, this is definitely more of a cake (rich and sweet) than a bread (bland). Try it and let me know what you think!

Till then,
Mia Foo


Friday, 7 August 2020

Mia Cooks: Chicken Breast Tofu Hambagu (Japanese Hamburger Steak)

Well, it's been months of working from home and likewise, months of eating either chicken breast or white fish for lunch (I've slowly added in chickpeas and tofu along the way). Nope, I'm not giving them up. Just thought of making something more... special? Something that doesn't screams CHICKEN BREAST at me straight from the serving plate.

And then I found the video for Tofu Burger Steak on MASA's Cooking ABC and I thought, this is it! I shall try to make my own version of chicken breast tofu hambagu!


So to get 4 small pieces of the hamburger steak (2 servings), you'll need:

150g silken tofu (drained, see below for procedure)
160 - 180g chicken breast
50g white onion, finely chopped
1 green chili, chopped 
(I used India Chili -Banji)
your choice of seasoning
(I used garlic salt, black pepper, ground ginger, light soy sauce and some rice wine vinegar)

Things will get a lot simpler if you have a mini food processor, but if you don't, a sharp chopping knife will do just fine. But first, we have to strain off the excess liquid in the silken tofu. Wrap your piece of tofu in some sturdy kitchen towel paper and place it over a sieve that is set of a bowl. Then, place some form of weight ( I put a bowl of water) over the kitchen towel wrapped tofu and leave it standing for 30 minutes to an hour. You can also use pressed tofu instead of silken tofu (and drain it the same way), but due to the difference in water content and texture, you might need to add an egg as a binder for the final mixture to shape well.

For chicken breast, if you're using frozen ones like me, I'll suggest that you defrost them in a bowl of salt water (as already mentioned in my previous recipe posts using chicken breast). I find that brining the chicken breast (especially frozen ones) not only make the meat less tough, but also helps eliminate the "frozen" taste that tends to linger in the chicken despite being fully cooked. If you've ever eaten a piece of "bad" (frozen) chicken, you'll know what I'm talking about.

Rinse your brined chicken breast clean under tap water and either cut them into chunks (if you're using a food processor) or simply chop them up into minced meat using a chopper, and set them aside. Next, the onion. If you're a fan of caramelised onions, I'll suggest that you fully cook the onions by stir frying them with a little bit of oil until they've caramelised before adding them into the other raw ingredients. Otherwise, just skip the pre-cooking part, it's fine. If you personally love the sweetness of cooked onions, feel free to add more into the mix.


In a large bowl, add in your minced chicken, chopped onions and chili, and mash up the tofu with your hands before adding them into the bowl. Add in seasonings of your choice and mix with a pair of chopsticks (or fork) by stirring in one direction vigorously until everything is well combined and starts to feel pastey and sticky. If you're using a food processor, simply dump everything into the food processor and process until you're left with a homogeneous meat paste.

Then, using clean hands, divide the mixture into 4 portions and shape each portion into palm size meat patty. Do try to throw (or drop) them from one hand to the other so as to remove any pockets of air trapped in between. Then, place the patties onto a lightly greased non stick pan and cook on low to medium heat for 5 to 7 minutes on each side, until browned. 


Even though I've used chicken breast, the addition of silken tofu not only reduce the overall calories but also makes the patty super soft and tender. And the bits of onions added a nice sweetness while the chili added a nice heat. 

Till then,
Mia Foo

Sunday, 2 August 2020

Mia Bakes: Yogurt Oat Fibre Pancakes

On a low calorie diet, need to hit your macros target for protein, but craving pancakes and hates those protein (powder) pancakes with a vengeance and would rather chew on cardboard instead?

Now, I got you covered.
With these, super low calorie, high protein, MOIST pancakes. 

To get a stack of 5 small pancakes, you'll need:

190g plain natural yogurt + a tiny pinch of salt
(or about 100g of plain Greek Yogurt)
1 egg
1 tbsp oat fibre
2 tsp stevia 
(or any amount of sweetener of your choice)
2 tbsp PB2 (powdered peanut butter)**
1/4 baking powder
1/8 baking soda
water or milk, if required (to tweak the batter consistency)

optional:
a few drops of vanilla extract
handful of chocolate chips

**feel free to substitute with plain flour and/or unsweetened cocoa powder if you do not wish to get peanut butter flavoured pancakes.

I used Farmer's Union 0.5% fat plain greek yogurt for the macros calculation and got the calorie count of the entire recipe (excluding optional ingredients) at only 193 kcals, with 20.1g protein, 6.8g fat and 24.2g carbs (total, not net carbs). Rather impressive, yes?
Do note that the PB2 added a substantial amount of protein to the recipe, hence if you were to swap it out for cocoa powder or plain flour, you should probably get a stack of pancakes with lower calories and lower protein count.


If you're using natural yogurt, you'll need to strain it overnight using a sieve with either cheesecloth, if you have one, or some coffee filter paper or tea filter paper will do the trick as well. Set your sieve over a bowl and lay the filter paper over it, spoon the natural yogurt into the sieve and sprinkle a tiny pinch of salt over it. Cover with a cling wrap and set in the fridge overnight. After 8 to 12 hours, it should be of a consistency that's even thicker than your usual greek yogurt. But of course, if you feel that this is too much of a hassle, you can simply use 100g of greek yogurt instead.

And to a clean bowl, add in the yogurt and crack in an egg and whisk until well combined, before adding in all of the remaining dry ingredients, mixing until the batter is smooth. There's no wheat flour in the recipe here, so no worries about overmixing your pancake batter. Depending on how big your egg is and how strained your yogurt is, feel free to tweak the consistency of your pancake batter with milk or just water to a thick, yet pour-able consistency.

Then, go on to heat up and lightly grease your non-stick pan. Pour the pancake batter onto the pan, it should spread out easily on its own. Do not try to make them too big, as they do not flip well (no flour, remember?). Cook the pancake over low to medium heat for 3 to 5 minutes, until bubbles starts to appear on the surface, and carefully slip them over to cook on the other side. As I said, these pancakes DO NOT flip well, so be extra careful when flipping them. Cook the pancakes on the other side for another 2 to 3 minutes, or until the top springs back slightly when you press lightly on them. They will also puff up considerably when just cooked, and deflates soon after leaving the pan (like souffle pancakes/baked cheesecake).

And tadaa~ My beautiful stack of 5 pancakes. 

If I'm adding chocolate chips to my pancake, I'll always make my first pancake without the added chips so that my stack of pancakes won't look spotty in the pictures. HAHA. 

But look at them! These pancakes are super, super moist and soft in the middle. Just like the gooey centre of a baked cheesecake. Well, it's almost just like eating cheesecake, but in pancake form, with the slight tartness of yogurt (you might want to add more sweetener if you're not a fan of the sourness of natural plain yogurt) and without the crazy calories. 
ENJOY! 

Till then,
Mia Foo


Saturday, 1 August 2020

Mia Cooks: Yogurt Sriracha Shredded Chicken Salad

You know what, I've been using sriracha sauce to spice up nearly ALL my stir fries for lunch these days (used up 1.5 bottles till date) and have also been snacking on greek yogurt as my mid-day snack for MONTHS. But never ever have I thought of mixing these two together to create a low calorie, diet-friendly salad dressing. 
But, better too late then never, right?

Anyway, the ingredients for the salad is really simple, and you can pair it with any type of vegetables you fancy, really. But here's what I used for mine.

For 2 servings, you'll need: 

For the salad:
1 half skinless, boneless chicken breast (about 150 - 180g, raw)
2 cloves of garlic, crushed (press down with the blade of your knife)
1/4 tsp ground ginger (or a few slices of fresh ginger)
1/4 tsp salt
1/4 tsp ground black pepper
Capsicum / Bell Peppers (I used red and yellow, half each)
Japanese Cucumber (1 small/medium, about 200g)
1 King Oyster Mushroom, sliced (about 70g)
1/2 white onion, thinly sliced (about 50g)

For the dressing:
2 tbsp plain Greek yogurt
1 tbsp honey lemon 
(I used the juice I have leftover in my jug of honeyed lemon slices, but you can mix honey and lemon juice in the ratio you prefer)
1 - 2 tbsp sriracha sauce
a pinch of salt
a dash of chili powder (optional)


First up, always brine your chicken if they're frozen. Immerse the chicken in a bowl of salt water and leave it to chill in the fridge for 2 to 3 hours. Then, rinse the chicken under a running tap for a few seconds and place it into a pot with just enough water to cover the entire piece of chicken. Into the water, add the crushed garlic, ground ginger, salt and black pepper and then bring the water to a boil. Allow to simmer until the chicken breast is fully cooked. Remove the chicken breast from the water and leave it to cool down before tearing the chicken into shreds with your hands; set them aside.

In a hot pan (make sure they're hot), put in the sliced mushrooms and roast them over high heat until they're browned and starts to smell roasty and fragrant. The trick here is to make sure that your pan is hot enough, if not the mushroom will start to produce moisture and they won't brown nicely. Once the mushrooms are browned, remove them from the pan and add in the sliced onions. Cook the onions over medium heat until they turn slightly translucent. Go ahead to cook them further until they're caramelised or even add them into your salad raw if you're a fan of either. Set the cooked mushrooms and onions aside to cool down. 

Then, cut your choice of vegetables into bite size strips and add them into a large clean bowl. Add in the cooled chicken, mushrooms and onions. Then, in a small bowl, add in 2 tablespoons of greek yogurt along with 1 tbsp of honey lemon water. As the consistency of greek yogurt differs across different brands, just add enough honey lemon water to reach the consistency of natural yogurt. Then add in sriracha until you get the desired amount of spiciness. Season with a tiny pinch of salt and some chili powder before adding the dressing into your bowl of salad. Toss well to combine.

Tadaa~

I'm not a huge fan of salad dressing in general, hence I used the bare minimum amount I need to get some taste in my raw vegetables. If you're the kind who loves to drench your salad in dressing, you may want to double the recipe for the dressing instead. 

Till then,
Mia Foo


Friday, 31 July 2020

Mia Bakes: 44 Calories Chocolate Cake

Oh yeah, a 44 calories chocolate cake. 
Wait, WHAT? FORTY-FOUR calories, CHOCOLATE cake? 
Yes, you read that right. And that wasn't a clickbait title, nor some portion size reduction trick. I'm going to share with you a recipe I've found on Oat Fiber's youtube channel, for a friggin 44 calories chocolate cake of a decent portion size that WILL fill you up. 

And here's what's 40 calories of chocolate cake look like. 
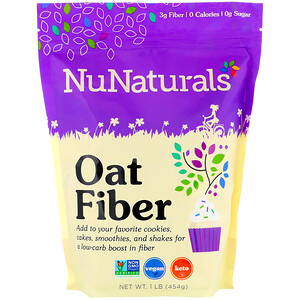
And the trick here, as I've said is NOT portion sizes, but oat fibre (I got mine from NuNaturals off iherb.sg)! 

Oat fibre comes from the fibrous husk of the oats, which is pure insoluble fibre and hence, virtually indigestible and therefore contains zero calories, carbs and nutrients. It helps to pack a load of insoluble fibre into our diet, which helps to reduce constipation (provided you're drinking enough water), promotes a full feeling for long periods of time and may even help to reduce over LDL cholesterol. 

Okay, the "health benefits" of oat fibre aside, the bigger benefit of oat fibre (for fellow ladies watching your calories), is that it is ZERO calories and helps to add bulk to your food. For example, you can get your usual 4-pancake stack into a 6-pancake stack without any additional calories just by adding oat fibre! This is literally a godsend for me right now, being unable to do any form of legit exercise for the next 2 months due to a tailbone fracture.

Anyway, let's get over with the ingredients, so we can get started.

For 1 serving (I made mine in 2 silicon cupcake moulds): 
1 tbsp plain flour (27.5 kcals)
2 tbsp oat fibre (0 kcals)
1 tbsp unsweeten cocoa powder (10 kcals, I used Hershey's)
0.5 tbsp 0 calorie sweetener of your choice (0 kcals)
1 tbsp 0 calorie maple flavour syrup (0 kcals) 
1/8 tsp baking powder (0 kcals)
half of 1/8 tsp baking soda (0 kcals)
1 tbsp low fat milk (6 kcals, I used FairPrice housebrand)
1.5 - 2 tbsp water (0 kcals)

adapted from Oat Fiber

Making this can't be any easier, just dump all the dry ingredients into a small clean bowl (you can sift your cocoa powder if they're too lumpy), give it a quick stir with a fork to get them well combined before adding in the wet ingredients (except the water) and stirring until well combined. Then, add in enough water to get the batter to a pourable, cake batter consistency.

Then, transfer the batter into a mould of your choice and STEAM it, either in your steamer if you have one or in a large pot of boiling water, covered, for about 15 to 20 minutes, until a toothpick inserted comes out clean.

The thing about oat fibre, is that it gives a very dry and crumbly, yet also wet and mushy texture to baked goods, if you've replaced too much of the flour with it. So steaming this cake is the way to get your cake coming out tender, moist and fudgy, just like a fudgy brownie. 

If you're not hard up on saving the calories, I'll strongly suggest that you pop in a tablespoon of chocolate chips as well to add in more flavour to the cake. Otherwise, this will be an extremely healthy tasting cake. But hey, it's only 44 calories and it's of a decent serving size that will fill you up. What more can you ask for, right?

Till then,
Mia Foo