MollyMia Aspire to Inspire before we Expire
Showing posts with label brownies. Show all posts

Saturday, 2 January 2021

Mia Bakes: Stout Brownies

Fellow beer lovers, fall in!
Oh well, actually it's not really beer, but stout. Believe it or not, despite me being a huge beer/cider lover, I've never ever tried stout before, as everyone around me told me that it's a lot more bitter than beer. So when's a better time to make use of this bitterness, other than to couple it with a decadent, rich chocolate and get some brownies, right? 

So let's get over with the ingredients, so we can get started!


For 9 - 16 squares (9' x 9' square tin):

1 can (323 ml) of Extra Stout 
(I used ABC, but you can always use Guinness)
100g unsalted butter
75g plain yogurt (greek yogurt or strained)
150g finely chopped dark chocolate (I used 60% cacao)
120g castor sugar 
100g plain flour
50g unsweetened cocoa powder
2 eggs
1/4 tsp salt
45 - 50g walnuts, lightly crushed
3/4 tsp baking powder
1/4 tsp baking soda
1/2 tsp vanilla essence
1/4 tsp chocolate essence optional
a handful of crushed oreo biscuits as topping, optional

recipe adapted from The MeatMen


First up, empty the entire can of extra stout into a pot and allow the foam to dissipate. Then, place the pot over medium heat and allow it to boil for 10 to 15 minutes until you're left with roughly 250ml of the dark liquid. Then, pour the reduced stout into a bowl and allow to cool. 
Into the same pot, add in your butter and let it melt fully before adding in the chopped dark chocolate. Stir constantly to allow the chocolate to melt and fully combine, and also to prevent burning. You can also do this in a microwave or over a bain marie. Once the chocolate has fully melted, remove the pot from the heat and add in the sugar, mixing until the sugar has fully incorporated. Add in the greek yogurt/strained yogurt (click HERE to find out how to strain your normal plain yogurt!) and give it a good mix to bring down the temperature of the mixture. 
Allow the mixure to cool to a point where it will not cook your eggs, before cracking them in, one by one, making sure to whisk until the mixture is fully incorporated before adding in the second egg. Then, pour in your cooled, reduced stout and mix until well combined. 
Sift in the dry ingredients (flour, cocoa powder, salt, baking powder and baking soda) and fold with a spatula until almost combined (just a few streaks of flour here and there), before adding in the crushed walnuts and folding until just combined.

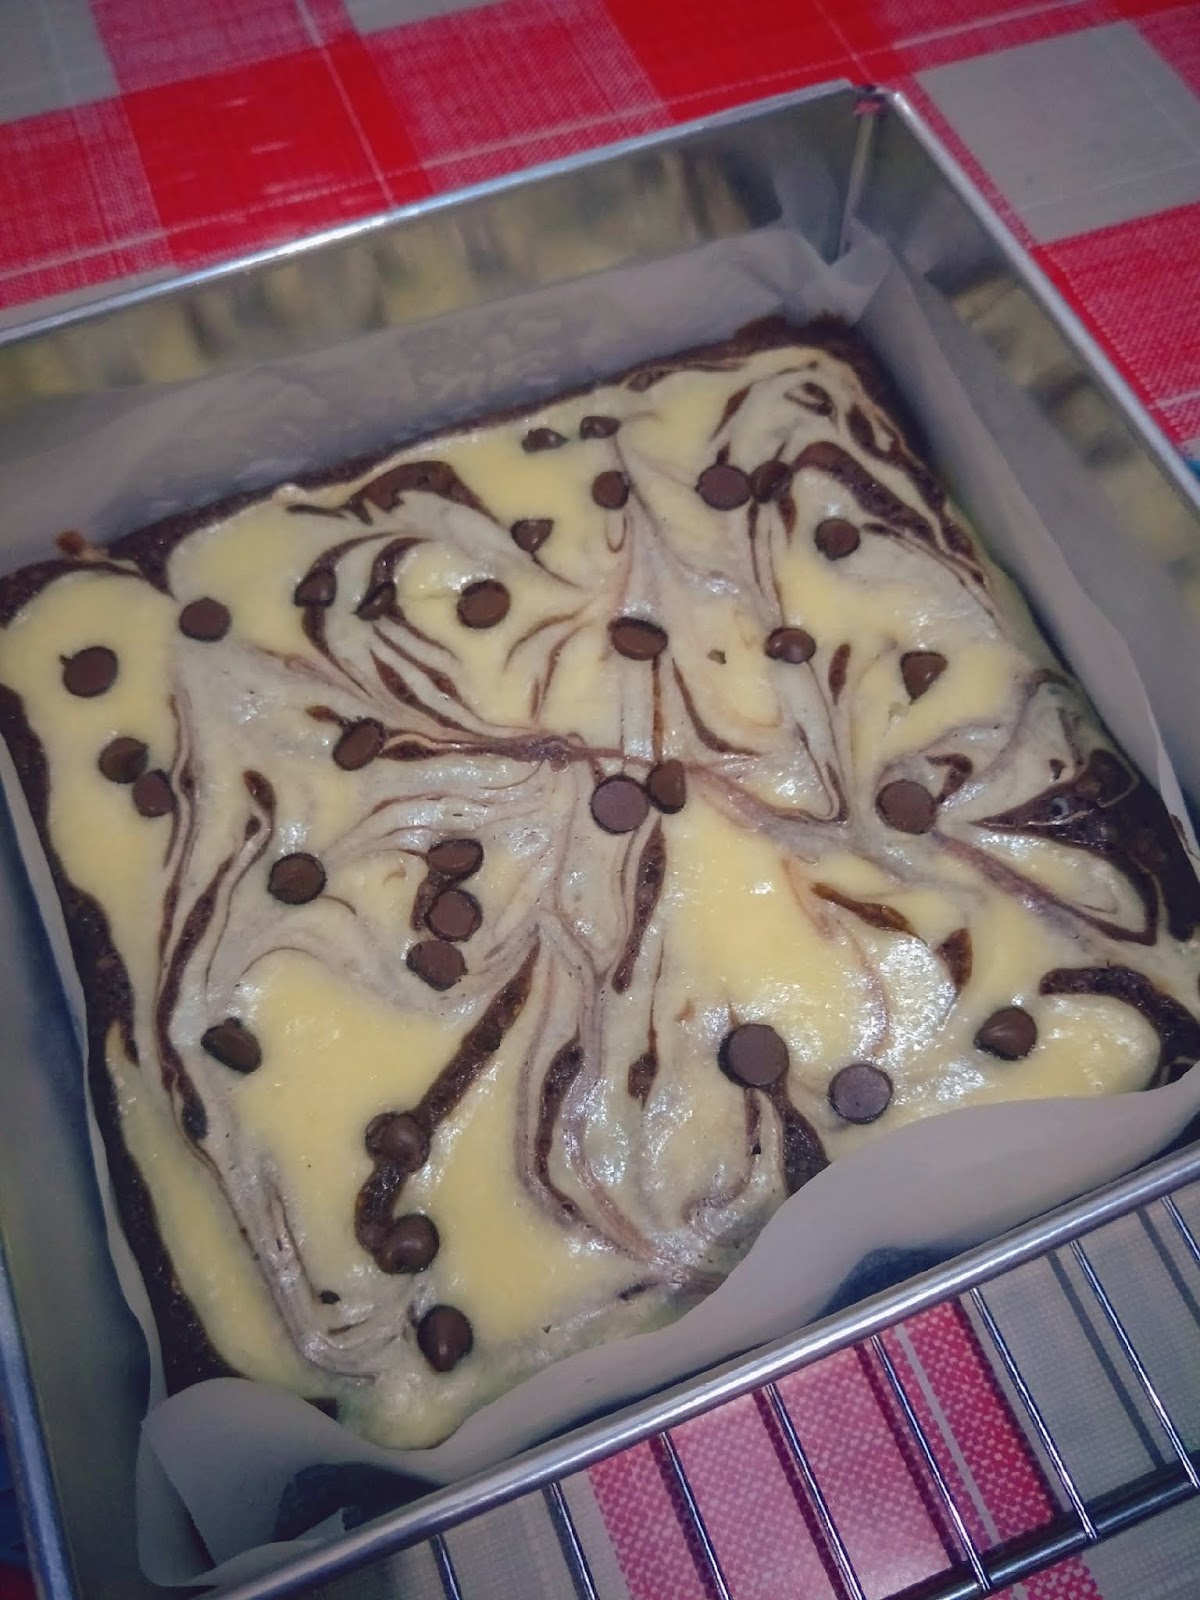
Pour the batter into your prepared tin (lined with parchment paper and sprayed with non-stick cooking spray), give the tin a few light taps to allow any air bubbles to come up, before sprinkling a handful of crushed oreo biscuits over the top. Then, bake in your oven that's pre-heated to 170 degrees Celsius for about 23 to 25 minutes, until a toothpick inserted in the middle come out relatively clean with just a few moist crumbs. 
Leave it to cool completely before cutting into squares!


There you have it! 
Moist, fudgy, rich and chocolatey brownie with a slight hint of the stout flavour to give the brownie a "dark chocolate" flavour. Replacing part of the butter with yogurt not only helped to reduce the calories, but also added on to the fudginess and made the brownie more moist. I'll say you do not try to reduce the sugar anymore, because this is already a less-sweet recipe. Instead, if you'll prefer a sweeter brownie, go ahead to add more sugar, or throw in a couple handfuls of chocolate chips to oomph up the sweetness. If you're a chocolate/brownie fan, do give this a try, even if you're not a fan of stout!

Till then,
Mia Foo

Tuesday, 23 June 2020

Mia Bakes: Mochi Brownies

I've been toying with the idea of mixing mochi and brownies (my two favourite desserts!) together, but never really put my thoughts into actions. And then I realised that there's really something called Mochi Brownie, and I decided that I definitely have to try it out!

But due to my not-working-very-optimally oven replacement appliance (that's something similar to an airfryer, but weaker), I had to bake mine at very high temperature (nothing gets fully baked through at temperature lower than 225 degrees Celsius) and so I ended up with pretty ugly looking, deformed mochi brownie cupcakes. But the taste was definitely not affected. So let's get over with the ingredients so we can get started.

For 6 mochi brownie cupcakes, you'll need:

80g glutinous rice flour
15g baking stevia 
30g muscovado sugar (or brown sugar)
if not using stevia, just use a total of 60g brown sugar instead
10g unsweeten cocoa powder
15g melted butter 
100ml milk 
1/4 tsp instant coffee
1/2 large egg (about 26g, beaten)
1/2 tsp baking powder
1/4 tsp baking soda
a pinch of salt (omit if using salted butter)
60g semi-sweet chocolate chips

recipe adapted from Spoonful Passion

First up, add 10 to 15ml of milk (from the total of 100ml required) to the instant coffee and warm it up in the microwave such that the granules will dissolve. If you do not have a microwave, you can replace with as little hot water as you can manage to get the granules fully dissolved. Then, set it aside. 
In a large bowl, add the melted butter to the sugars and mix until incorporated. Then, mix in the half-egg and mix until well combined before stirring in the milk and coffee mixture. Then, add in all the dry ingredients (except the chocolate chips) and whisk until everything is well combined. 
Spoon the batter into your muffin tin, either sprayed with some non-stick cooking spray or greased with butter. Then, drop the chocolate chips into each well (about 10g worth into each well). 

Bake in the oven that's pre-heated to 180 degree Celsius for about 20 to 25 minutes, until a toothpick inserted comes out clean. 

As I said, because I need to bake mine at ridiculously high temperature in order to have them fully baked through, all my brownie cupcakes kind of "exploded". 

But they're still super yummy! Rich chocolate flavour with a texture that's both soft and fluffy, yet chewy. 

See how bouncy it is! <3

Till then,
Mia Foo


Sunday, 24 March 2019

Mia Bakes: Cheesecake Brownie

Wow, it's been quite a while, people! I know I should be continuing with my New Zealand travelogue, but it's really hard trying to organise the thousand over photographs taken with 3+1 devices. Just... give it a little more time, yeah?
Well, frankly speaking I've been baking a lot less too. I've been a little bit busy with some other commitment, and perhaps I will blog about that in time to come.
But let's get back to baking, shall we? This time, it's a really simple "two-bowls" recipe by mashing up two extremely no-brainer one-bowl recipes together.
Cheesecake Brownies!

Let's get over the ingredients so we can get started!

For the cheesecake:
250g cream cheese, soften
(block cream cheese, not the spread) 
50g castor sugar
1 egg

For the brownie:
1 bag of Betty Crocker Fudge Pouch Brownie Mix
75g semi-sweet chocolate chips
1 egg
2 tbsp strong coffee
75g melted butter
I heated up 85g of unsalted butter and let it simmer down to 75g, which made it slightly browned and more flavourful

In a clean bowl, beat the soften cream cheese with sugar until well combined. Add in the egg and mix further until smooth and set aside.
In another clean bowl, pour in the brownie mix along with egg, strong coffee and melted butter and mix until just combined. Throw in the chocolate chips and give it a couple of folds to distribute it evenly in the batter.

Line your 8x8 baking pan with baking paper and spray it down with some cooking spray so nothing sticks. Pour in the brownie batter and even it out with a spatula. Then, using a spoon, drop dollops of the cheesecake batter on top of the brownie batter. With a chopstick, give the mixture a few swirls to marble up the two batters. Tap the pan on the counter to even out the surface. You may add a bit more chocolate chips on top of the cheesecake batter if you fancy.

Send the cheesecake brownie to bake in the oven that's pre-heated to 175 degree Celsius for about 25 minutes. You may want to start checking for the doneness with a toothpick at 20 minutes, especially if you want your brownie to be fudgey instead of being cakey. If a fudgey brownie is what you're looking for, your toothpick should have a few wet crumbs on it. At this point, also check for the doneness of the cheesecake by lightly pressing down on the surface to make sure that it has "set".

Take the pan out of the oven and wait for it to cool down slightly for around 10 minutes before attempting to lift the entire brownie out of the pan. Then, leave it on a wire rack to cool COMPLETELY before cutting into it.

If you would love a more marbled looking effect, I suggest you can alternate the brownie and cheesecake batter layers into 4 layers such that you can get some cheesecake right in the middle of the brownie layer as well. 

I know, Betty Crocker brownie mix isn't the best tasting ones you can find, but by switching up the water and oil with strong coffee and melted butter, along with a handful of chocolate chips really do make a difference. The coffee brought out the richness of the chocolate and the (browned) butter added a lot more decadent flavour to the brownie.
TRY IT!

Till then,
Mia Foo

Saturday, 7 July 2018

Mia Bakes: Brookies (Brownie+Cookies)


Finally, I made myself some (half-healthy) brookies!

Even though I made this for my #cheatdayeats on Sunday, I'm still hesitant on "go big or go home" and decided to lessen my guilt by combining a sinful, high calorie chocolate chip cookie with a healthy, low calorie (just 70 kcal per serving!) brownie to balance it out! :)

So let's get over the ingredients so we can get started!

For the chocolate chip cookies:
(adapted from tasty.co)

60g unsalted butter 
12ml to 15ml strong coffee (optional)
25g baking stevia (or 50g castor sugar)
60g light brown muscovado sugar
80g all purpose flour
1/2 an egg 
1/2 tsp salt
1/2 tsp vanilla extract
1/4 tsp baking soda
110g chocolate chips/chunks 
(dark, milk, bittersweet, semi-sweet or a mixture, to your preference. I've used 72% dark chocolate chips & Excellence Chili Chocolate)

For the healthy (70 kcal) brownie:

64g unsweeten applesauce
80g plain greek yogurt
84g raw honey
60g all purpose flour
45g unsweeten cocoa powder
1 egg
1/2 tsp baking powder
1/2 tsp vanilla extract
1/4 tsp salt


First, let's start off with preparing the cookie dough as it needs to chill for at least 30 minutes. In a pot, melt your butter and keep it over low heat until browned and set it aside to cool. As the water content in the butter will be evaporated during browning, measure the butter again and top it back up to 60g with a dash of strong coffee (or water, if you prefer). 
Then, add in your sugars and beat with a balloon whisk until well combined before beating in the half-egg and vanilla extract. Sift in the dry ingredients (flour, salt and baking powder) and fold until mostly combined before folding in your chocolate chunks until just combined. 
Cover with some cling wrap and place it in the fridge to firm up for at least 30 minutes or overnight for the flavours to develop. 

While the cookie dough is chilling, prepare your brownie batter! It couldn't be any simpler, for this is a 1 bowl recipe. First up, dump all your wet ingredients into a large bowl (applesauce, yogurt, honey and vanilla extract) and whisk until well combined. Sift in your dry ingredients (very important to sift the cocoa powder as they're always lumpy!) and mix until just combined. THAT'S IT!
Pour your brownie batter into a greased/parchment lined baking pan (I used a round pan, but you can use an 8x8 square tin) and bring out your chilled dough from the fridge. 
Using either your hands or spoons, drop chunks (big or small, up to you!) of the cookie dough all over the top of the brownie until it's mostly covered. You need not make sure that the surface is 100% covered as the cookie dough will spread as it bakes.


I personally did not use up all my cookie dough for the brookie (hence the "bald" patches) but leftover about 20% of the dough to bake up as some chocolate chip cookies, which I found to be too sweet. I have already reduced the sugars from tasty's recipe to begin with and used dark (and spicy) chocolates, so... I can't imagine how sweet the cookies will be if one is to follow that recipe strictly.
And I do know the 70 kcal brownie looks inviting but I do not suggest that you use this brownie recipe as a straight up brownie on its own. I've intentionally tone the flavour down (both the sweetness and richness of chocolate flavour) to complement the strong flavour from the cookie. In short, these two seemingly separated recipes are meant to be baked and eaten TOGETHER. 
If you're bent on having a healthy, low-calorie brownie, check out my 77 kcal brownie recipe HERE.

Alright, then send your brookies to bake in the oven pre-heated to 180 degree celsius for about 25 minutes until the middle has set an a skewer inserted comes out clean with just a few crumbs. 


Wait for the brookies to cool COMPLETELY before cutting as the cookies will be exceptionally crumbly when still warm from the oven. 

Till then,
Mia Foo


Thursday, 7 September 2017

Mia's Recipe: Biscoff Brownies

If you haven't heard of Lotus Biscoff biscuits, then you have not lived! These small caramelised babies are one of my favourite kind of biscuits.
And how about marrying these yummies with brownies? 
More yummies, up for it? 

Let's get over with the ingredients so we can get started. :)

For a 12 servings in a 8 x 4 loaf tin, you'll need:

120g castor sugar 
(or replace with baking stevia to cut calories)
2 small eggs
45g all purpose flour
17g unsweetened cocoa powder
113g unsweetened baking chocolate 
(this is exactly 1 whole bar of Hershey's baking bar) 
100g unsalted butter
75g semi-sweet/dark chocolate chips (I've used 60% cocoa)
60g crushed biscoff biscuits

optional:
biscoff spread (as a drizzle)
(you can use smooth or crunchy, as little as as much as you like)

So first up, melt your baking chocolate and butter in a pot (or ban-marie if you prefer, but with the butter, you really do not need to) over low fire until they're totally melted and well combined. Then, set them aside to cool.
In a clean bowl, beat your eggs on high until they turns frothy, before you add your sugars in 3 additions, beating on high until the mixture more than doubles in volume, turns pale yellow and very thick (ribbon stage). 

Double check that your butter-chocolate mixture is not hot before you add them into the egg mixture, folding gently (I prefer to "fold" using a whisk instead of a spatula) until just combined, before sifting in the flour and cocoa powder. Fold until most of the lumps are gone (you need not fold until well combined yet) before adding in the crushed biscoff and chocolate chips and then finally folding until just combined. Pour the mixture into your lined/lightly greased baking tin and give it a few taps to knock out any air bubbles. 

Melt up a few tablespoons (or more if you prefer) of biscoff spread in either a microwave or ban-marie until they're of a more flowy consistency and drizzle them as thinly or thickly over the brownie mixture before sending brownie batter into the oven set at 160 degree Celsius for 25 to 30 minutes. 


I left mine in the oven for about 2 to 3 minutes past the 30 mark as I prefer my brownies to be less moist and fudgy (I've weird taste, I know). 


Obviously, I could have done way more crushed biscoff (note to self) and perhaps omit the chocolate chips AND reduce the sugar slightly (they were still a little too sweet). 

The baked biscoff spread "crust" on the top of the brownie was a really nice, sweet touch to the otherwise plain old rich-chocolatey brownie. But it also added a lot of sweetness in the flavour, so do remember to tone down on the sugar and chocolate chips if you're to pile on the biscoff drizzle. :)

Till then,
Mia Foo

Saturday, 24 September 2016

Mia's Recipe: Healthy 77 Calories Brownies

Yes, that's not a typo and your eyes aren't playing a trick on you. I'm going to share with you my recipe for a yummy, 77 calories brownie!


With no refined flour, no refined sugar, and no butter, this will be the perfect sweet treat for those watching your diet! Best of all, this doesn't taste healthy at all! 

To make your own 77 calories brownie (16 servings), you'll need:

1/2 cup unsweetened applesauce 
1/2 cup honey 
(you may reduce it if you prefer your brownies less sweet)
2 eggs
1/2 cup wholemeal flour
(I've used 1/4 wholemeal and 1/4 low-carb mix, else with 100% wholemeal you should be getting 75 calories brownies instead) 
1/2 cup unsweetened cocoa powder
1 tsp baking powder
1/4 tsp salt

optional: chocolate chips or chopped nuts of your choice
(but do note these aren't included in my calorie count) 

It can't be any simpler to make this yummy brownies. First, add all your wet ingredients (honey, applesauce, eggs) into a bowl and mix till combined. 
Then, sift in your dry ingredients (very important to sift, especially for cocoa powders as  they're always lumpy) and mix until just combined. 
You may fold in your additional chocolate chips or chopped nuts before pouring the batter into a greased (or non-stick) 8 x 8 inch square brownie pan, for an easy time cutting them into 2" squares so you can gauge your calorie intake better.
Bake at 180 degree Celsius for 20 minutes and check that a toothpick inserted in the middle comes out clean. 


Due to the wholemeal flour, the brownie will be slightly more crumbly but still stay soft and moist (due to the honey and applesauce). 
I find that even without the chocolate chips, I wouldn't mind having the brownie a little less sweet hence it's probably good to reduce another tbsp of honey from the recipe (to use about 100ml instead of 120ml) and to make up for the hydration level with some skimmed milk. 


Do share with me how yours turned out if you've tried this recipe as well. 

Edited: I've tried substituting butter with applesauce for breadmaking and it turned out quite terrible! Fellow bread-bakers, if you've ever successfully did a butter-applesauce replacement, do let me know how you did it!

To get the wholegrain and low-carb flour I've used for this recipe, hop over to iHerb right now! 

Till then,
Mia Foo