MollyMia Aspire to Inspire before we Expire

Sunday, 15 September 2013

Mia's Recipe: Churros

Last week, I tried to bake some Mickey Mouse vanilla cupcakes with brownie centre but failed miserably as I didn't cream my butter and sugar together well. I ended up with extremely dense, brownie like cupcakes. :(

This week, I've decided to give my all time favourite Spanish snack a go, Churros! I've combined Ochikeron's and Ann Reardon's recipe to get a recipe of my own. So let's get on to the ingredient list. 

We will need:
1. Milk - 150ml
2. Water - 100ml
3. Flour (All purpose, bread, or cake) - 125g
4. Unsalted butter - 115g
5. Sugar - 13g (1 tablespoon)
 6. Vanilla extract - 1 teaspoon
7. Eggs - 3 nos.
8. A pinch of salt
9. Cinnamon sugar

First up, combine 1 tsp. of cinnamon powder with 3 tbsp. of caster sugar (you can use normal granulated sugar if you wish) to make Cinnamon sugar and set that aside. Otherwise, just grab a bottle of the cinnamon sugar from the supermarket.

Combine the milk and water in a pot. 
If you dislike the taste of milk, you can use 250ml of water. Likewise, if you'll prefer a richer taste of milk you can use 250ml of milk as well.
Add in the unsalted butter and bring the mixture to a low boil. Mix well until all butter has melted. 
Add in sugar and salt and mix well until all sugar and salt has dissolved. 
Turn down the heat and sift in the flour. Mix vigorously until the mixture comes together into a dough ball. Keep the pot on low heat and continue mixing for a while until the dough starts to leave a skin on the side of the pot.
Transfer the dough into a clean bowl (or you can do it in the pot if you wish) and continue stirring at it to cool it down. This is crucial as you will be adding in the eggs next and you will not want the hot dough to scramble your eggs. 


When the dough has cooled slightly, crack in the 3 eggs, mix well after each addition. 

It'll look like a slimy mess as above when you first crack in the egg and it seems like it will not mix. But trust me, continue working on it and it'll all come together. 

You know you got it when your batter turns sticky like so. (I apologise for the blurry pic. Gotta take it singlehandedly while I battled the batter) 

Then transfer your batter into a pastry bag fixed with a star tip. The "traditional" churros will probably need a large tip (0.6") but since I do not have one, I decided to make some mini churros with my ~0.6cm tip!


I piped out a total of 70 number of 9-10cm long strips like so. There was still a small amount of batter left in my pastry bag so I reckon I could have gotten 75 of them. 

I've piped about 18 to 20 strips on two large baking sheets to be baked at 190 degree celsius for 12 to 15 minutes or until golden brown. Just before baking, spray them down with some cooking oil spray or brush them generously with some melted unsalted butter. 
For the other half of my batter, I've piped them onto smaller squares of baking paper that will be a good fit for my frying pot, 4 strips to one square. Then, I deep fried them in the frying pot sheet by sheet (to avoid the churros on two sheets sticking together) till golden brown. When the batter starts to firm and puff up, gently pry them off the baking paper and remove the paper from the oil. 

When the churros (both baked and fried) are still hot, roll them in a plate of cinnamon sugar and make sure they're well coated. 


Fried ones on the left and baked ones on the right. I know they look burnt in the photos, but actually they're not. I've no idea why the photos turned out so dark.

These churros are crispy on the outside and soft on the inside with a pleasant taste of cinnamon sugar. I personally will prefer the baked ones, not only because they're much easier to cook but also very much less oily. They'll definitely taste good with a cup of hot chocolate or with some chocolate dip!

Do try both method out and tell me which is your preference. :)

Till then,
Mia

Friday, 13 September 2013

Mia's Review: Marutama Ramen

 This is an extremely late post, for I've visited Marutama @ The Central with Airmeli after our diamond lash workshop held at Blisshouse. I've long heard about Marutama Ramen, it's always one of the names that pops up alongside Santouka (still my favourite!), Ippudo (urgh, too salty) and Tampopo (not bad) when you ask for ramen recommendations. So when Airmeli led me to the ramen shop, I was really excited and cheered, "Oh yay, Marutama!"


Their choices of ramen flavour is not really extensive. A very typical menu of an authentic humble ramen-ya. I ordered for myself a daikon and their Nama Karashi Ramen while Airmeli got a Tori Dango and their Aka Ramen.

 Daikon - $4

Yes, you might feel that $4 for 2 pieces of radish (although they're quite big pieces) is pretty much a rip off, but I didn't really care much for the pricey-ness of it because:

1. I really love daikon
2. They're really damn awesome!

The daikon is served almost piping hot in a rich & flavourful savoury broth, which tastes like tonkotsu/chicken broth, and is cooked down extremely well to be amazingly soft throughout. Each and every bite is 'stuffed' full of the savoury taste of the rich broth. I need not even chew on them, but just pushes my tongue towards the roof of my mouth to mash it up and release the broth that was soaked up within. 
Heavenly. Definitely a must try for all daikon lovers out there. 

 Tori Dango (Chicken Meatball) - $5

The Tori Dango is definitely a disappointment, and yes, it's not worth the $5. I expected the dango to be of, well, chewy dango texture. (duh!) But the first bite brought nothing but disappointment to my face. Nothing in this meat-packed ball is chewy. Instead, the entire meatball is soggy and crumbly. A soft bite to the surface easily breaks the dango in half and a few more bites just literally crumbles them into distinctive separate chunks in your mouth. Not my favourite kind of texture in a meatball. 
However, from a cooking noob's POV, I also wonder if it's because they're using a lot of real chicken meat and very little flour.
As for the taste wise, I can't fault them on it but shan't commend them on it either. It's a "typical" meatball taste, flavourful yet nothing distinctive that screams: I'm a chicken meatball! I guess the only thing that hinted it's chicken and not pork is the crumbly texture.

Airmeli's Aka Ramen - $15

 My Nama Karashi Ramen - $12

It looks just like a normal chicken broth ramen, yeah? But it's actually spicy ramen! This is one thing that is kinda intriguing to me. A 100% non-spicy looking spicy ramen!
The broth is rich, flavourful and has the spiciness level just right for me. 
I think I'm just an average spicy food eater, and I do not like to eat challengingly spicy food as I believe it doesn't do justice to the ingredients and preparer of the dish. :)
Comparing the richness of flavour to Santouka and Ippudo, Marutama is definitely smack in the middle. I feel that their broth is definitely richer than Santouka's yet still manageable for me, unlike Ippudo's, which almost killed me. 
Went Ippudo once, and plans never to return.
I do get a little thirsty while eating the ramen, due to the salty flavour of the broth, but I'm attributing it to the fact that I'm more of a lighter taste person. My preference for lighter taste is blatantly hinted in my obvious dislike for Ippudo's ramen.
As for the noodles, it hovers between chewy and hard imo, deviating slightly more towards hard. I'm a chewy (softer) noodle person, and Marutama's noodles really came this close to making it right for me. It was just a little bit too close to the hard side, but I can still accept it as well made noodles. 
The char siu was also pretty well done, having a good mix of lean and fatty meat, cooked to a savoury tenderness.
I'm also rather disappointed that the ramen wasn't served with menma (bamboo shoots) and it wasn't offered as an additional topping or side dishes either. 

And as seen from the picture, the ramen doesn't come with the flavoured egg (typical of many ramen shops) but need an additional $1.50 for an add on. 


Just look at the pictures, need I say more? The $1.50 is a MUST SPEND! 

I first poked my chopsticks into the whites and pulled off a huge chunk of it to reveal a fully intact yellowy orange yolk. I thought the yolk and overcooked, but how wrong I was! Look at how beautifully the glossy orange oozes out from the puncture I made with my chopstick! The egg is definitely well braised to a rich flavour and the whites is cooked to the point of having just solidifying. There's no obviously semi-transparent runny-ness anywhere in the egg whites, and yet they're amazingly soft, tears apart at the slightest pressure and runs down your throat effortlessly. 
I do feel that Marutama does their flavoured egg better than Santouka and Ippudo. :)

And in addition, Marutama offers Kaedama for those big eaters. With leftover broth and an additional $2, you can get your noodles refilled and eat to your heart's content! I'm not sure if it's a full portion refill though, because there's absolutely no way I can ever go for a kaedama. 
For those who've tried their kaedama, please let me know in the comment box!

Till then,
Mia

Sunday, 8 September 2013

Bunstruction: Jelly thinks she's a puppy

Previously, I've blogged about Molly's bunstruction to her litterbox and some slight gnawing of my fan's wire. Now I got to say, Molly's was nothing compared to Jelly's bunstruction. Just a couple weeks ago, Jelly chewed through my phone's wire. My LANDLINE phone wires. The thing is we've already bunny-proofed it by covering it in plastic casing, but due to the connection to the plug, about 3cm of the wire gotta be left bare. And that's where Jelly gnawed it through. My dad and mum spent almost half a day getting the new wires, removing the casing, replacing the wires, installing back the casing, and protecting the bare wires by wrapping it in duct tape. The next day, we found Jelly gnawing at it again. So we double, and tripled protect it with MORE duct tape. Now, the phone cable wire (the usual thickness, you should know it) is 1 cm in radius. =.="

And now, I faced this.
 Jelly found my 2 months old rubber wedges and ate it! Like, WHATTTT? I thought only dogs like to chew shoes? Why bunnies do that too? Initially, I thought Jelly was only being her usual curious self and doing random sniffing around my shoes, so I left her alone. But half an hour later, my mum started screeching like a banshee, "Look what Jelly has done!"
I went out of the room and found Jelly already hiding behind the sofa and my mum holding on to my poor shoes. My 2 months old, relatively new jelly wedges.
Jelly ate my jelly wedges, no puns intended.
So a word of advice to fellow bunnymamas & bunnypapas who thinks bunny-proofing is all about wires (like me), start keeping your shoes in covered cabinets now! Keep your shoes safe from your (possible) pup-bunnies!

And there's Jelly hiding behind the sofa in chillax mode, obviously not guilt-stricken.

And for another cute pic of Jelly.....
Totally tranced for grooming. Ahahahaha! Pardon my fat legs, please!

And more Jelly pics for those without IG.
 Staring straight at the camera while I snapped a shot.

She purposely flipped her pellets bowl over and because I refused to pick the pellets back into the bowl (she kept nudging it for fun) she started eating them off the floor. 

Till then,
Mia

Thursday, 5 September 2013

Mia's Update: We baked Macarons!

If you haven't realised, I'm a huge fan of macarons (french macaroons). I absolutely adores the Fleur De Sel from Canele and at one point, buys a box of 6 every week. :p 
On top of that, I'm also a huge fan of those home bakers on youtube. Just to name a few, there's yoyomax12, ochikeron, Laura Vitale and Ann Reardon
So I thought, why not bake my own macarons? And hence I did, just last weekend, with my cousin (SY) at her house. And together we form the chincai bakers. But that's not really important, let's take a look at the recipe first. :)
 
Egg whites - 140g (4 large or 5 small eggs)
Caster sugar - 70g
Icing sugar (or powdered sugar) - 230g
Ground almond (or almond meal) - 120g
Salt - 2g
Food colouring (Optional, gel or powdered preferred)
(Makes 40 large macarons or 140 mini macarons)
credits to Ann Reardon

The steps to make macaron are really few and simple, yet to get it right is not easy at all. 

First up, add your egg whites (aged/or just at room temperature is enough) into a large bowl and beat it until it's frothy. Then add in your caster sugar (you may do so in 3 additions) and beat on high speed until it turns glossy and form stiff peaks (you can flip the bowl over and nothing falls out). Add in gel/powdered food colouring according to your liking. I couldn't find any gel or powdered ones, so we added in a few drops of red liquid food colouring.
If you want to have flavoured macaron shells, add in the flavouring at this point too. We added in one drop of rose flavouring to give our shells a subtle tinge of rose taste. 
Continue to mix until the colour turns even and set it aside.


Sift the dry ingredients (icing sugar, ground almond, salt) and give it a quick mix with a fork or a whisk. SY got mad crazy with the ground almond (chanting: go through, b*tch!) because they simply will not go through the sieve. We chucked away a good amount that seemed fine enough and yet just wouldn't pass through the sieve and re-sift with new additions from the packet, a couple of times until we decided that precision is not really important. Hence, we're the chincai bakers.

Fold the sifted dry ingredients into the beaten sugar egg whites mixture. It was recommended that we do 30 to 50 folds to get the mixture to a molten state. The wet and dry ingredients should be mixed well with no lumps and be viscous enough to ribbon down nicely when picked up and dropped from the spatula yet not runny. (this is the extremely tricky part)
Some other tricks advised is to do a 'cut' down the middle of the mixture with the spatula and see if it merges back together quick enough; or to spoon a small amount onto a plate and shake the plate. The mixture should be viscous enough to spread out into a macaron shape on its own. 
Over-mix and the macarons will be flat and feet-less. Under-mix and they may crack and won't be smooth on top. 
 Scoop the mixture into a piping bag (or if you don't have one, use a plastic bag and snip off the corner) and pipe out the mixture into a circle. The size is entire up to you. You can even make some heart-shaped or hello kitty head shaped macarons!

As we did the mini ones, we ended up with 10 sheets of this. 280 macaron shells, which equals to 140 macarons! *faints*
After we're done with piping, we set them out on the tables to sit for 30 minutes (from the last sheet) before we sent our first sheet into the oven to bake at 150 degree Celsius for 20 minutes.

 That's our very first batch in the oven. We've done a bad thing here, opening the oven as they're baking. It changes the temperature drastically in the oven and makes the shells develop airy pockets. :(

To our disappointment, we noticed that our macarons are both feet-less and cracked on the surface. So did we undermixed or overmixed? No matter what, it's fully understood that macarons are really finicky and it'll take many trials and errors to find the ideal final mixed state for piping/baking.
In addition, we've forgotten that the recipe makes 40 large macarons and our mini ones will not need 150 degree C at 20 minutes. We took the cookies out when they started to brown (they should be pink!) at barely 15 minutes and found them in this burnt state.

Yeah, I know. They're not pink, they're brown. And it's because they're burnt. Obviously disappointed with ourselves, SY and I randomly picked one uglier looking one and popped it into our mouth and then simultaneously widened our eyes in surprise. They were surprisingly good! Nothing like macaron shells, which should be slightly crispy on the outside and softer on the inside, but totally crunchy inside out with a tinge of rose taste that was almost masked by the fragrant toasted taste of being almost burnt. The fact that we got the bad habit of opening the oven to look at the shells while they baked also made them develop airy pockets within, which made them tasted better as a meringue cookie. Frankly speaking, I have no idea what happened here.... We baked macaron shells and got some uniquely good meringue cookies instead.

Here's a cute picture to show you what i meant by airy pockets. It's a heart shape, aww!

And then, finally, towards our last 2 or 3 sheets (which has been standing for 2 to 2.5 hours instead of 30 minutes), we saw a miracle.
 Feets! They developed feets!

Now this is what I call macaron shells. :)


And of course, I exaggerated our success. 99% of our mini macarons actually looked more like pink dino eggs.

After this, I have 2 more to-bake items on my list:
1. Salted Caramel Macarons (I gotta find out on dulce de leche first)
2. Mickey Mouse Cupcakes

Stay around to find out if I ever succeed! :)

Till then,
Mia

Saturday, 31 August 2013

Mia's Update: Diamond Lash Workshop

Just last weekend, apart from going to the SEA Aquarium with my Uni mates, I've also attended this Falsies Application Workshop together with Airmeli, which was hosted by Watson.

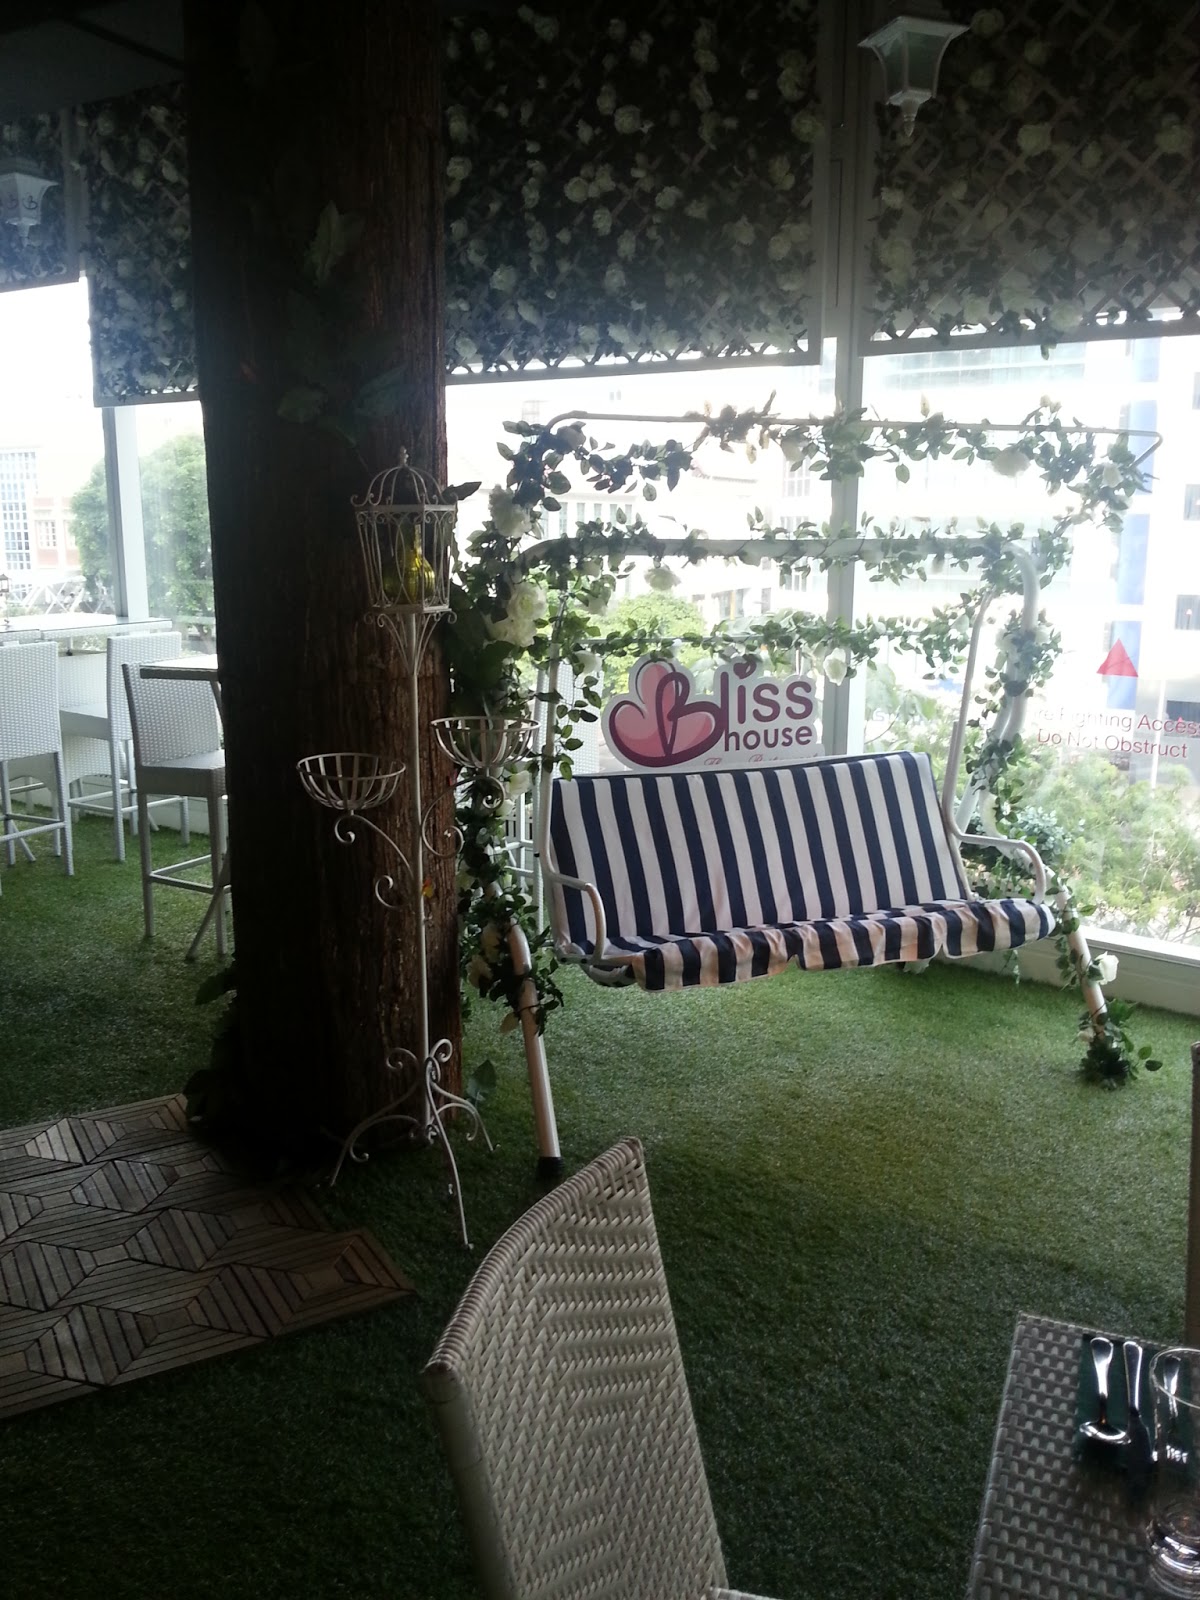
The event is hosted at the theme restaurant called Blisshouse located at level 3 of The Central @ Clarke Quay. When I stepped into the restaurant, my first thought was, "I must eat here one day!" and you shall see why....


The interior of the restaurant is amazingly pretty, filled with lovely decorations like a swing, a pumpkin carriage (made of metal, duh!), and even a fountain alongside a mini bridge! How cute is that! 
But my girlie spazzing aside, I've heard enough of how Full House (another brilliantly pretty theme cafe) serves food that ranges from being mediocre to bad, so I shall keep my fingers cross until I truly try out the food here, huh! If you've tried them, do leave a comment for me below. 

 Upon entering the event room, I was greeted upon by a table of food (the usual wedges, fries, and fried food) that I've promptly ignored, and this pretty wall table (or whatever it's supposed to be).
 And there at the corner, are two shelves full of pretty trinkets. And yes, that chair sure looked inviting.
 And that's the room within the room, which is basically a table full of diamond lash products. 

 And there's Larry Yeo giving his first lesson of the day. There was 2 sessions scheduled and we were in for the later slot.  

This is our work table. We were given scissors, eyelash curler, lash glue, mascara, and of course the usual mirror, cotton pad and Q-tips.  

The steps of falsies application is pretty much fixed, so I reckon there's really nothing much Larry Yeo can do for us if our intention is to learn how to put it on ourselves and not just to have falsies applied on beautifully (regardless by self or by others). 
As usual, we first curl our lashes. Tilt your head up slightly and look down to make the skin of your upper lids taut without the need to pull/tug at it. Then crimp on the curler onto your lashes as close to your lashline as it allows and hold for 5 seconds. Hold them longer and risk getting 90 degrees eyelashes. 
After you're done with the curling, simply apply your favourite mascara on in a zigzag motion. Remember, stick to only 1 coat as piling them on will weigh down the curls you've just painstakingly crimped out. You'll be applying on falsies, anyway. There's no need to achieve any dramatic lashes with the mascara. 
After we're done with the mascara, do the head tilt again and draw on a thin line of eyeliner as close to the upper lashline as possible. The ideal is to not see any skin between the line and your lashline. But of course, I can't achieve that. Not to worry, though. The falsies should cover up most of the blunders created. :p

And then the true hurdle came for the day. To apply the falsies. Diamond lash comes with a fishline spine, hence they're really flexible and soft. I have to admit I'm a total falsies-noob, but I've played with a pair of those cheap falsies I got online before and the difference between their "mallebility" is significant. I had to snip of a little less than 1/6 of it due to my big fold on the inner corners of my eyes. I have a horrible eyelid shape and due to the big fold, my double eyelids on start at the 2nd quarter of my eyes from the inner corners. If you have similar mono/double eyelid combination problem as me, do cut your falsies to a length such that they will end at the beginning of the fold. Else, the fold will just push the spine of the falsies into your eyes. Not something you'll want to experience. Another trick (apart from putting on the falsies from the outer corner of the eye in when the glue becomes tacky) is to push the falsies down from the spine, towards your lashline after you've just stick them on and the glue hasn't fully set. This allows the falsies to sit as closely to the lashline as it can ever be and then with a quick swipe of the fingertip across the lashes (both the natural and falses lashes should somehow be together but not fully interlocked), we can get both the natural and false eyelashes to 'merge' together to avoid having double-decker lashes. 

And after a good 30 mins battle, I finally got both the upper falsies on just as they started distributing the lower falsies. Nah, I gave up on them. They just look way too unnatural for my liking. Can't conjure up a picture? Think of Rain's Back to Basic album cover. Yes, that. 

And now let the pictures do the talking. :)

 After falsies - front shot.

After falsies - lower up side shot. 

And that's me without any falsies. Spot the difference? 

Diamond Lash are on sale at Watsons at $23.90 for a pack of 5 pairs. 

Till then,
Mia