MollyMia Aspire to Inspire before we Expire

Friday, 4 October 2013

Mia's Review: Tim Ho Wan @ TPY

And so, we also did the number 1 favourite pastime of Singaporeans: Crazily queuing up for food, by visiting Tim Ho Wan!

Even though the branch at TPY is rumoured to be less crowded, CL and PS were still very sweet to offer queuing up for the 6 of us as early as 930 in the morning, when the restaurant opens at 11am! And even so, they were the 4th in line! When I reached at about 1050, there was already a snaking queue ending right at the escalator, of which 1 round of the restaurant seating is insufficient to manage.
So my point is, be it PS or TPY, be ready to queue for an avg of 2 hrs. 

Upon getting the order list from the staff while in queue, the girls literally went on a crazed ordering spree, ordering 2 sets of erm, almost everything. Alright, I exaggerated. But still...

Tell me this is manageable by 6 frail damsels.

That aside, let's get down to business. Here's my take on Tim Ho Wan. :)

First up, got to be their famous chair siew bun. The most easily understood description of this bun for those who haven't had the chance to try it yet, will be a polo bun styled char siew bun.

If you can see, the top of the bun is covered by this layer of crispy flakes, just like a polo bun, albeit less buttery. The bun itself, apart from the crispy flakes on top, is soft and relatively thin with the insides filled with a generous amount of sweet tender char siew. Having char siew as one of the food listed under 'I will rather not eat' and definitely no fan of a char siew bun, I can still easily conjure up a GOOD for this bun. 
But, to queue 2 hours for it? Nay.....

Next up, is the must eat 3-combo at every dimsum place I visit. The fried carrot cake, the har gao, and the siew mai. (Not a fan of pork, yes. But somehow siew mai must tag along with har gao. There's no other way to it.)
My verdict on this three: Common. 
The fried carrot cake is actually nearly crossed the line of disappointment, in fact. It's soft, yes. Very soft in fact. But it's also pretty bland, not flavourful enough, and not crispy at all on the outside. I might even have disliked it if I didn't find the container of chilli sauce right beside me at the table. 
The har gao and siew mai are pretty much just any har gao and siew mai we can find at other restaurants that need not queue 2 hours to get seated (For example, The Cathay, Crystal Jade or DTF). I'm sure this tells you everything you need to know.

 Next up, cheong fan. We ordered a total of 4 variations of cheong fan: Char Siew, Prawn, Liver, and the remaining one that I coudn't really remember but it's a plain one with some sesame oil. (Liver and plain ones not in picture)
These cheong fan, once again, were good but not fantastic. Just, commonly good. The rice flour skin were very soft yet not mushy and the filling were tasty.
But, can you get cheong fan of the same standards elsewhere without the need to queue for 2 hours? Yes, you can. 

 Next up, is this rather unappealing glutinous dumpling, which I have no idea what it's called. Asked the girls, but those who made the order couldn't remember. Nevertheless, it's just a glutinous rice ball with some meat filling inside. However unattractive, this is quite good. the Glutinous rice skin was fried till crispy and yet still sticky and very chewy. The meat filling inside is moist, tender and a blend of sweet and savoury. I didn't really enjoy the filling that much, but I really liked the dumpling skin. :)

These prawn dumplings were fried till amazingly crispy with real prawns wrapped within. However, the additional toppings that made these fried prawn dumplings slightly more special were the wasabi mayo and ebikko. The wasabi mayo tasted pleasantly minty rather than the 'stinky' pungent odour I hated wasabi for. However, in my opinion, they didn't really bring out the taste of the prawn dumplings. I'll still prefer them with just a good quality chilli sauce.

 This Ma Lai Gao is extremely soft, fluffy and sweet! It simply melts inside your mouth and releases their distinctive brown-sugar caramel-ly sweetness. However, it was a tad too sweet for my liking, and the sweet flavour of it kind of clashes with the rest of the dim sum. Nevertheless, I can totally see myself enjoying this Ma Lai Gao with a cuppa good kopi siew dai. :)

Lastly, how can we miss out my favourite dessert, Osmanthus (Jelly) Cake? Every piece of the soft, 'crumbly' jelly is stuffed generously with the osmanthus bits and wolfberries, making it very sweet and yet not 'artificial'. To be honest, I enjoyed this the most and if I weren't so full by the time this was served, I could have easily gobbled down all 3 pieces in mere seconds. I can never get enough of osmanthus flavoured stuff! :)

So to sum up my verdict on Tim Ho Wan, I'll say it's good for an 'experience'. Even though I'd actually only queued for 10 minutes this time round, and regardless of how much I love their osmanthus jelly cake, I will never consider queuing another 2 hours to get them, ever again. 

So was Tim Ho Wan a yay or nay for you? Drop me a comment and let me know!

Till then,
Mia.


Tuesday, 1 October 2013

Mia's Recipe: Japanese Cotton Cheesecake

On Sunday, I totally went on a crazed baking spree and baked 2 kind of cheesecakes. One of them is the Japanese Cotton Cheesecake (Cupcakes). Sounds good? So let's get on with the ingredients so we can get started. 

We will need: 
Cream Cheese - 200g (I may experiment with the usual 250g tub another time)
Milk - 200ml 
Butter - 60g
Eggs - 6 nos.
Sugar - 140g
Flour - 60g (I used AP, but I believe cake flour is the best choice)
Corn Starch - 20g

First, heat up the milk in a pot over heat and melt in the cream cheese and butter until mixture turns smooth and leave it to cool.
Separate the egg yolks from the whites (make sure absolutely no traces of yolks get into the whites) and beat the whites till frothy. Add in sugar in 3 batches, beating in between each additions and then continue beating on high until meringue stage (peaks formed). 

I beat mine for 20 minutes in total, on mid-high speed. 

By this time, your cream cheese mixture should be cooled. Add in the egg yolks and mix until well combined. 
Sift in the flour and corn starch and mix well. 
Next, temper the cream cheese mixture by adding in 1/4 to 1/3 of the meringue and stirring until well combined (very important!) 
Pour the tempered cream cheese mixture back into the meringue and fold lightly to combine. 
Take note not to over mix this final mixture, if not your cakes will not come out fluffy and 'cottony'! 
 Scoop the batter into your muffin tins lined with cupcake liners (I did 2.3 tbsp for each no. 8 sized liners) and bake them over a hot water bath at 160 to 170 degree celsius for 20 to 25 minutes, or until the top is nicely browned. 

Baking over hot water bath simply means pouring some boiling water in your baking tray before sitting your muffin tins directly into the water, but making sure they're not immersed. 
I baked my cupcakes at 160 degree celsius for the first 20 minutes before turning up my heat to 170 degree celsius when i realised my top were still pretty 'white'. I want to get my top nicely browned and was worried that continuing to bake them slowly at 160 might dry out their centre. 

As you can see,  my cupcakes shrank pretty bad. This was because I baked mine in 2 batches and I must take out this first batch before I can put in my 2nd batch. They immediately collapsed and shrank when i set them out on the cooling rack, due to the sudden drop in temperature. 
For my 2nd batch, I decided to off the mains after 22 to 23 minutes (instead of 25 minutes) and let the cupcakes cool slowly in the oven itself. The shrinkage was less obvious.

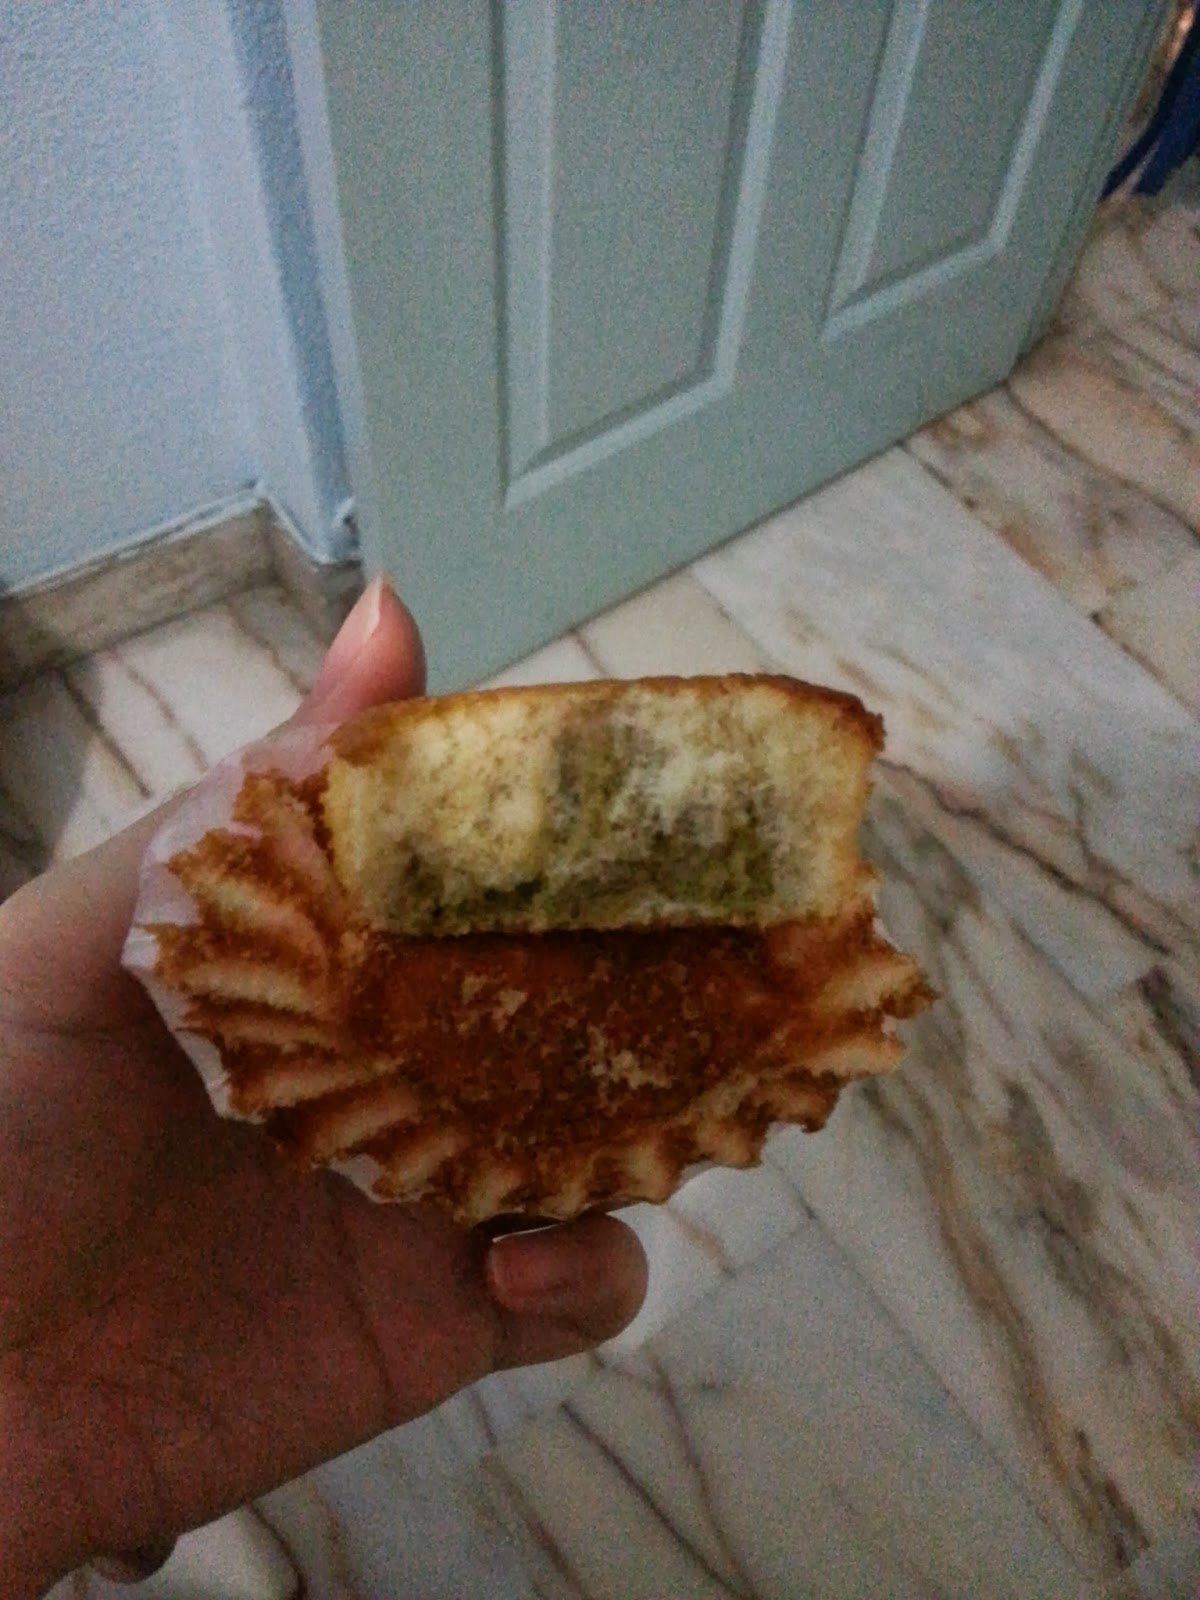
 And here's a shot of how the middle looks like. Extremely fluffy and moist. :)

Till then,
Mia

Saturday, 28 September 2013

Mia's Review: Kaixo

Middle of this month, I successfully planned a surprise birthday celebration for J at Kaixo by gathering all the girlies at a rather short notice. And yup, J and I settled for Kaixo because somehow we were having the same craving for Churros and Paella. Plus, Kaixo is just one street away from her workplace. So I guess, why not? :)

 Menu can be found here without pricing. 

In case you're unfamiliar, Kaixo is a Spanish restaurant that offers mainly cuisine influenced by the Basque region (Northern Spain) and their dishes are generally tapas. 

We didn't even wait for J to confirm our order (because if there were only J and me, we only need to order Paella and Churros) and we went ahead to get a black paella for 2 and risotto off the main menu to share. We also ordered a Kurobuta (black pork) Pork Collar with Pisto Bilbaina and Raxor Clams in sauce Vierge off their special menu. Not forgetting two servings of Churros with hot chocolate dip! 


Just showing the interior of the small restaurant and the cute candle table lamp! 

Ginger Ale - $4.50

The difference between Ginger Ale and Ginger Beer is that Ale is more dry as compared to Beer, that's all (as according to the server). And as per their explanation, this glass of ginger ale is a mixture of slight sweetness, tangy-ness of the lemon, a pleasant subtle spiciness of the ginger and the distinctive dryness of the ale. Coming from someone who enjoys a can of Asahi Super Dry from time to time, this $4.50 is a well spent. :)

Razor Clams - $16

I can see that the rest of the girls has the exact same "Huh!" look that was on my face when the dish was served. We've all overestimated the servings of tapas. It seems that there really is just ONE clam's serving in this dish. (Yikes!)
The clams were cooked to an extremely chewy texture, yet not 'rubbery' at all. You can guess from the generous amount of chopped tomatoes that they tasted sour, pleasantly sour, and makes a very good appetizer course. The only thing bad about this for me was, why so little? :(

Kurobuta Pork Collar - $18

Looks like beef, eh? But it's really pork collar! 

The pork is cooked to amazing tenderness, yet still has the chewy texture that gives the meat a very good bite. Every bite is flavourful and savoury with a hint of spices, brilliant. I'm not going to deny that I'm really not a fan of pork, but this is good! 

Risotto (Creamy Bomba Rice with Mushrooms & Peas) - $18

I shan't deny that I got pretty turned off when this was served. Look at the amount of peas! When I dug my spoon in, I was further turned off because it seemed extremely mushy and gooey. Alright, by now you should know I was never a fan of risotto.... But my views changed upon the first bite. Although it seems mushy and gooey, the rice were actually still pretty hard, which added on a very distinctively bite and gave a great contrast to the gooey cream sauce the rice was generously drenched in. Very creamy, with a subtle savoury flavour to it. I've carefully avoided all the peas so please don't ask me how they tasted, yeah? And erm, because a small serving for 1 was actually shared among the 6 of us, I didn't manage to fish out any piece of mushroom. However tasty, I can forsee myself being unable to finish even the small serving due to the creaminess of the dish. I'm not exactly a cream person, that's why.

Black Paella for 2 (My apologies for the blurred picture) - $20 per pax ($40)

First impression, serves 2? Really? The serving of this paella is almost like the risotto for 1! 
However, the rip-off serving aside, first bite of the paella was heavenly. The rice was cooked till the point whereby those rice crusts are forming (think of claypot rice, those last bits of rice at the bottom?), hence it's a brilliant blend of soft mushiness with crusty hardness, all in a mouthful of rice. The pleasant surprise of the texture is further sweetened up with a flavourful savoury taste that was slightly peppery. Just now I liked it! However, the seafood were less promising. They're generally overcooked, with the squid so terribly done I felt I was chewing some rubber tyres. In the end I totally gave up and swallowed it all, almost choking on the huge chunk of unchewable squid.
The strong flavour of the rice also got to me after a while, so much so that I felt they're too salty to stomach with my final bite. I guess this is why they're meant for two. The strong flavour makes it impossible to finish this plate of paella alone. 

Churros - $14

Yes, $14 for 5 sticks of fried dough covered in cinnamon sugar and a watery chocolate dip. MAJOR RIP OFF. 

If you're interested, you can check out my post on churros recipe, which I've done recently. This $14 Churros basically just looks prettier than mine, made thicker than mine, more generously coated with cinnamon sugar than mine, and comes with an additional dish of a very watery chocolate dip.
Major disappointment here. Need I say more?

All in all, the 6 of us spent $160 in total at Kaixo, and left the place still very hungry and heading directly to a dim sum place over at Chinatown for 2nd round. 
The food was tasty, no doubt, but the price was too high for comfort. I guess I'll go back to Medz for paella for now, and will make my own churros. :p

Kaixo is located at 96 Tanjong Pagar Road and is closed on Sundays and Mondays. 

Till then, 
Mia

Monday, 23 September 2013

Mia's Update: Orbis Focus Group

Just recently, with the help of Airmeli, I managed to get a place in the focus group by Orbis. 

For those who find this name extremely unfamiliar, ORBIS Inc., established since 1984,  is a leading company in mail-order cosmetics and is also involved markets such as health food and women's lingerie. ORBIS Inc. is well known for its 100% oil-free skin care and has seen its customer's numbers increase dramatically beyond 8.5 million since the introduction of its popular 100% oil-free skin care. Currently, Orbis has sucessfully entered the Korean, Hongkong and Taiwan market and is finally coming to Singapore this October!

And yes, you didn't see it wrong. We're given a $55 worth goodie bag for attending this focus group! If you have no idea what's a focus group, it mainly is some kind of a 'market survey' whereby the staff will introduce their range of products to us and let us try out a sample before asking us to state our feedbacks. And now I'm going to share with you some of the products that made a strong impression on me. :)

First up, we were introduced to the 5 ranges of their basic skincares. The AquaForce range for hydration, Clear range for acne prone skin, Whitening range that is pretty much self-explanatory, Excellent Enrich range for anti-aging, and Excellent White for a combination of whitening and anti-aging. We were given the lotion and moisturiser to test out and I really like the Clear and AquaForce range, especially their moisturisers. The texture is like a clear gel lotion, and is extremely spreadable and light. I need barely a pearl size sample to spread thoroughly over the back of my hand. And while spreading the moisturiser, it gets absorbed into my skin very quickly, leaving a non-sticky and refreshing feel to it. For the other 3 ranges, although slightly heavier in comparison to Clear and AquaForce, are still considered very light and non-sticky as compared to most of the skincare products currently in the market. 
We were also given their aqua peeling gel and bubble masks to try out, out of which I really liked the peeling gel. It's very thin and near watery texture makes massaging the product into the face extremely easy, no tugging on the skin at all. Best of all, despite the watery texture, it took out a great deal of dead skin from the back of my hand (rather embarrassing with the Orbis staff staring at it) and left my skin visibly brighter, softer and smoother to the touch.
Moreover, with their products priced at a very affordable range of $20s, I'm definitely running to the Orbis retail store once I'm out of my current skincare products. 

Next up, we were introduced to their Special Care series, which is basically sunscreen.
We were given both to try, and I really love the UV cut foundation! Even though labelled as a foundation, it's extremely lightweight and blendable, reminding me of a tinted moisturiser, and with SPF50 PA+++! Even though I cannot be sure of it's coverage, Daisy, the Orbis staff, assured us that it can cover some slight blemishes. The other product, Sunscreen on face light, is supposedly one of their best sellers and we even had the product-maker seated in with us, coming over all the way from Japan! The texture is even lighter than the foundation (like, duh!), is slightly tinted and doesn't give a sticky feeling at all, unlike many sunscreens available in the market right now. In addition to these, we were also introduced to their sun powder pact (two-way foundation) and loose powder compact.

And after stacking literally a ton of product on the back of our hand, we were finally given their cleansing liquid to try out. Unlike a normal cleansing oil, which cannot be used with wet hands and required to be emulsified with water (massaged with water after first dry application) before it can be washed off, Orbis's cleansing liquid needs nothing of those burdensome steps. Just pump into our hands (regardless wet or dry), massage onto our face to dislodge all the makeup, dirt and grime, and wash off with water. Viola, cleansed skin! There, another Orbis-must-get added to my shopping list. 

And then, we finally moved on to the diet and health supplement range, and we were given the full range of their diet Petit Shake to try out. 
And as stated, there's 5 other flavours apart from strawberry and I vaguely remembered them as white grape & aloe vera (my favourite because there's aloe bits inside!), peach, orange, pink guava and banana (my least favourite).
The shakes are recommended to be mixed in milk and drank cold. The consistency served to us are like a mix of yogurt and smoothie. Or perhaps you can simply call them, smoothie with very smooth texture. No doubt, very tasty and offers 6 flavours for you to have them throughout the week with 1 day of indulgence. However, I can't advise on how filling these shakes are, I can only confirm on their tastiness. :)

Finally, we were given a small sample cup of Orbis 12,000mg marine collagen to try out, pineapple flavour. First sip and I cringed at the acute sourness. However, the entire group of us later on concurred that we got used to the sourness pretty quickly and it's actually quite an enjoyable acquired taste. I'm not a collagen supplement fan, but after hearing from Airmeli that Kinohimitsu's collagen taste nothing but fishy, I'm pretty sure I'll turn to Orbis if I decided to take collagen supplement one day. :p

And then, to show off my $55 worth goodie bag from Orbis!

This is the paper bag of goodies given to us.

 And within, I found a full sized Cleansing Liquid, one full sized bottle of 6,000mg collagen drink

 Travel sized pack of AquaForce basic skincare (to my choice), kept in a super cute not-for-sale travel pouch!

A sample sachet of their best selling UV Cut Sunscreen on face light


And a redemption voucher for 1 box of Petit Shake and a coupon for redemption of a mini Aqua Peeling Gel with $30 spent.

Orbis will be having their first pop-up store at Ion Orchard B4 (before Muji) from 25th - 30th September, and there will be a FREE sampling bar for ALL petit shake flavours! So drop by and check them out for yourself! 
Do check out Orbis's facebook HERE!

Till then,
Mia

Sunday, 22 September 2013

Mia's Recipe: Maccha Marble Castella Cupcakes

Oh yes, it's Sunday again. Which means, baking time! :)
This time, I've decided to give kasutera (AKA Castella) a go, a honey flavoured sponge cake from Nagasaki, Japan. I've also decided to give it a twist and add some Maccha flavour to it and give it some marbling details (even though I kinda failed at that). 
Nevertheless, let's get down to the ingredients we'll need. 

We will need:
1. Eggs at room temperature (very important) - 3 Nos.
2. Caster sugar - 90g
3. Flour (Preferably Bread flour, if not, AP Flour) - 90g
4. Milk - 2 Tbsp. (30 ml)
5. Honey - 1 Tbsp. (15ml)
6. Green Tea powder - 1 Tbsp. (or up to personal preference)
7. Honey glaze (Some honey dissolved in water)


Very simple, right? I bet many of you have all the necessary ingredients lying in your kitchen already! :) This recipe should give you 10 to 12 cupcakes (I got 11). So let's get down to the procedures. 

First, pre-heat your oven to 160 degree Celsius. 

Warm up your milk and dissolve the honey and set them aside. You can do so in a pot over heat or just a simple double boiler (immersing the bowl of milk and honey in a bowl of boiling water). 

Sift your flour 2 to 3 times (I did mine thrice) and set them aside. You can choose to sift once or twice first, then sifting the final time directly into the wet mixture later on. 

Next up, crack your eggs into a large bowl and whisk them until frothy. Make sure your eggs are at room temperature, and make sure your bowl is large enough. The end product of the beaten eggs can be 4x the volume and if your bowl isn't big enough it'll be really hard folding in the dry ingredients. 

Heat up a pot of water until it boils. The pot should be big/small enough for your bowl to sit inside snugly and the water level shouldn't be touching the base of your bowl. This will be your double boiler.

Add in the sugar, bit by bit (I did so in 3 additions) and continue whisking until the sugar has dissolved and the mixture turns pale yellow and frothy. Then, add in the honey milk mixture and sit the bowl over the double boiler and continue whisking at high speed until soft peaks form. The point of heating the egg mixture is to allow it to form stable peaks, so do not try to skip the double boiler. The reason why heat is required is because unlike pure egg white mixture, the presence of yolk acts as an emulsifier and it'll be tough to beat the mixture until stable peaks form. Brace your arm and whisk away, I did mine with my hand-held mixer for about 15 minutes at least, in total. 

Add (or sift, if you haven't completed 2/3 times) in the flour and fold the mixture until well combined. Do not stir or overmix as it'll deflate the peaks too much and you might end up with dense, bread like cakes. Remember, there's no butter in this recipe and all the fluffiness is going to depend on the meringue you've beaten up.

Add 1 tbsp. of hot water to the green tea powder and stir to dissolve. 

Separate out 1/3 of the egg/flour mixture into a smaller bowl and add in the green tea mixture. Fold well until fully combined. 


Line your muffin tin or sillicon cups with cupcake liners and spoon the mixtures in tbsp by tbsp to create the layered effect. For lazy people (like me) you can choose to do a maccha surprise centre castella cupcake too, by just adding a dollop of the maccha batter into the centre. 

When all liners are filled up, insert a skewer stick and run it around to get ride of any air pockets within. It can also help to give your layers a pretty marbling effect. Tap the tin/cups on the table for a few times to let the bubbles rise and send them to bake at 160 degree Celsius for the first 5 minutes, before turning down the heat to 150 degree Celsius and bake for another 15 minutes. 
Do tweak either the baking time or the baking temperature depending on your cupcake sizes and oven specifications. I find that my cupcakes are slightly overbaked (lost quite a bit of the distinctive moistness of a castella cake) and I might try 140 degree Celsius the next time I make them, instead of 150 degree Celsius. 

The idea of baking them first with higher temperature is to allow the top to brown first before finishing up with the rest of the baking process. However, if you find that your top has gone too brown and your cake isn't fully baked yet, cover the top with some parchment paper and continue to let them bake until a toothpick inserted comes out clean. 

Once out of the oven, glaze the top of each cupcakes with some honey glaze for more flavour. 

 
Lay your cupcakes out on a wire rack to cool until they're warm enough to handle. Then, wrap them up with cling wrap and let them cool down completely in the refrigerator, preferbaly overnight or at least for 2 hours. This helps the flavour to set while the cake cools. 


And that's how my castella cupcakes turned out, rather spongy with a springy bite, and with strong sweet honey taste and a slight hint of green tea fragrance. I could have doubled my portion of green tea for stronger maccha taste, so if you're planning to try this out, do take note. :)

Till then,
Mia

Saturday, 21 September 2013

Mia's Review: Mooncakes!

Even though I'm not a fan of mooncake at all, I still do buy them every year. :p 
and this year, I decided to splurge a little to buy one box for myself on top of the box I'll buy my grandma every year. 

No brownie points for guessing that I've gotten myself chocolate mooncakes. 

I first came across Chocoelf on bongqiuqiu's instagram, whereby she posted on their sugar-free snowskin mooncakes. Obviously attracted by the name chocoelf, I did some research and also asked for opinions online and got some really head scratching reviews, claiming that they're 100% sugar and sugar substitute free, is not sweet at all, and yet taste very nice. 
Giving up on these reviews, I decided to grab a box and try them out for myself. My verdict? Read on.

 A box of their chocolate skin mooncake comes with 3 round mooncakes and 10 small rectangular ones, priced at $58. Even though labelled as sugar-free, and claimed as free of substitutes by some people online, I've confirmed with their sales person (twice) that Chocoelf uses a sugar alcohol, Maltitol, as their sugar substitute.
The 3 round mooncakes consist of Dark Lotus, Vanilla Lotus, and Cabernet Red Wine Lotus. The minis are supposedly filled with a blend of cranberry & macademia nuts white lotus.
Sounds really good, with an awesome variety, yeah? Sadly, no. Perhaps in terms of appearances and supposed ingredients, chocoelf chocolate skin mooncakes offer us an awesome variety. But focusing plainly on taste, none. I'm sorry to say that all 4 flavours of mooncake tastes almost exactly the same, crumbly lotus paste filled pralines. 

I'm not sure if it's because the lotus paste is sugar-free, but they are really very crumbly and significantly rougher in texture as compared to any other normal mooncakes in the market, which basically kinda 'cheapen' the taste. 
As opposed to reviews stating they're not sweet, I'm sorry to refute them as a load of crap. 
THEY ARE SWEET, just not horribly sweet like some mooncakes in the market that makes you cringe. The chocolates skin basically just taste like any other good quality chocolate, with the dark chocolate being short of the bitterness I was expecting (and would have enjoyed) and the white chocolate being sweeter than the rest. As for the sugar free lotus, they're just rougher in texture, more crumbly, and significantly blander and less sweet in taste compared to a normal lotus paste.

 Cabernet Red Wine Lotus
 Dark Lotus
Vanilla Lotus

As seen from the pictures, all different flavours comes with nuts (all macademia, i reckon) with only the minis and the cabernet red wine lotus having extra cranberries. Even so, there are a good amount of minis I've eaten with no taste/findings of cranberries at all, with meagre amount of chopped macademia nuts within. I can hardly taste the difference between them as well, with the Vanilla Lotus being slightly easier to differentiate due to the white chocolate taste. The Cabernet red wine lotus somehow tasted the best out of the 4 flavours, however with the taste being so remotely similar to the dark lotus that I couldn't put the taste into words at all. And nope, even though named as Cabernet Red Wine Lotus, I didn't pick up any hint of wine taste in the mooncake. It's really just normal chocolate taste combined with some very much less sweet lotus paste, same for all the 4 flavours. 
In addition, the mooncakes are also extremely small. Minis aside, the round mooncakes, which I've expected them to be a 'standard' mooncake size, are slightly smaller in diameter and less than half the thickness.

So, $58 for a box of pralines with 'cheap tasting' lotus paste filling? 
You'll be the judge. 

 Aside to Chocoelf I've bought for myself, I've also bought Peony Jade's Teochew Orh Nee Mooncake for grandma, after seeing their brilliant review on Channel 8 TV show. 
I guess the show really worked its wonder, for when I went to Taka Atrium, they're completely sold out. Undeterred, I made my way to Century Square Atrium and they were only left with plain ones, no yolk no pumpkin paste. :(
I didn't try these out for myself, because it's for my grandma and I'm not a fan of yam paste either. However, feedback from my grandma is that their skin is very thick, which she didn't like. Nevertheless, the yam paste is not too sweet and is relatively smooth. 
She gave me 1 brownie point for buying the plain ones and not the yolk ones (actually is because there's only plain ones left...) for her because according to her, yam paste and yolk makes a horrible combination. 

Grandma has already requested that I buy her Tai Chong Kok baked skin mooncakes for her next year. *rofl*
Helped my parents buy their baked skin from there (my mum asked me buy cheap bengawan solo ones, but I went ahead to buy TCK ones because it's really just a few dollars more with my 20% card discount promo) and my mum was raving about how fragrant they were. It's also a rare chance my dad actually did eat a bit of the yolk inside for TCK's one. He detests yolk because of the raw 'fishy' smell but TCK's yolks apparently were well-done to be able to get rid of that smell.

Now my question is, I know TCK has split up and branched into 2 different shops. So all those hardcore mooncake fans out there, which branch is the better one?
Do leave your opinions in the comment box for my mooncake shopping next year! :)

Till then, 
Mia