Day 7 of our trip started off with a pretty chill start as we're booked for a guided tour at Whakarewarewa Maori Village at 9am and it wasn't a very long drive away from the hidden "overnight-parking" spot by Lake Rotorua, where we battled millions of sandflies last night. But oh well, looking at this amazing scenery filled with seagulls and swans, I guess the horror of last night was still worth it?


So after a quick, simple breakfast, we set off for Whakarewarewa Maori Village to make sure that we will reach the place by 845am for proper checking in (we learnt our extremely pricey lesson at Waitomo Cave) for our 9am guided tour.
In case you didn't know, the Whakarewarewa Maori Village is a REAL community of Maori people living around a geothermal area, and your guide probably also stays in the village itself. But for us, our friendly and engaging guide, although does own a house in the village, has moved out to the more urban areas instead. Our guide also mentioned that the 9am tour is always the smallest group, hence feeling more personal and private. True enough, the BF and I were the only participants of the guided tour.

The village tour will begin just beyond the Wahiao meeting house, at the intersection of Hinganoa Drive and Huarere Street, and will only take you 45 minutes to 1 hour, after which you can easily wander around the village on your own, with a few other self-guided walking trail for you to check out.
One good thing about staying in a geothermal village means you can cook your food without needing to use electricity or any man-made fire source.

Another good thing about staying in a geothermal village means you have your hot water bath right outside your house.


Whakanuia Track
This short 15-20 minute stroll traverses through Manuka scrub, past boiling mud pools and steaming bores. Our newly renovated boardwalk crosses over the colourful Te Roto A Tamaheke (Lake of Tamaheke), whose hot spring-filled waters honour a chief who lived in the area long ago.
Whakanuia Track Church Loop
Extend your walk by following Huarere Street before turning onto the Whakanuia Track and you will be rewarded by a look out point over Te Roto A Tamaheke.
Return to the trail and continue on to loop back around and view a large mud pool and the Whakarewarewa Anglican Church. From there, this scenic loop rejoins the original Whakanuia trail and carries on along toward the lake boardwalk.
Hot Lakes Scenic Track
For a longer journey and exceptional views, our extended scenic track past Roto Kanapanapa (Green Lake). Infused with a mixture of geothermal minerals, this lake is green in colour and has a warm temperature. This pool was formerly used by the Tohunga (priest) in ceremonial funeral processes. Continue to along the track past several hill top lookout points for views of Rotorua city, steaming lakes and two Pa (fortified village) sites of the Tuhourangi Ngati Wahiao people.

But unfortunately, it was raining during our visit and very cold (and windy), so we didn't explore the place much on our own, instead we went to the souvenir shop and picked out some gifts for our friend back home and then went next door to the cafe for some hot coffee and warm date scone to pass the time with some much needed warmth while waiting for the cultural performance at 11:15am.
But before that we ran into a cat and decided to follow it...


Anyway, sorry for sidetracking, let's get back to what's planned on the itinerary.

Due to poor weather, the performance was relocated indoor, at their mini-theatre, and the BF and I managed to snag the "VIP seats" right in front. HAHA! If you do appreciate traditional dances and singing, then this performance show will be right up your alley. I truly enjoyed the dances and singing of the performers, and one of the ladies has such a beautiful, captivating voice.
After the performance, we left the theatre and headed straight for the cafe for our Hangi Pie meal! The meal was actually pretty good & hearty, though I can't say the same for the dessert (it tasted so bizarre I didn't even want to snap a photo of it). I have NO idea what was that supposed to be, but I decided it's not worth the calories just after 1 tiny bite and got nearly drowned in sweeten condensed milk. Nevertheless, just judging on the Hangi pie (& corn on cobs) alone, this meal was still worth topping up for.


Whakarewarewa Maori Village is open daily (except Christmas Day) from 8:30am - 5:00pm.
For more information on guided tour booking, visit their website HERE
After leaving the Maori Village, it was a quick 15 minutes drive over to the Whakarewarewa Redwood Forest (which we didn't manage to visit for the nightwalk last night due to poor weather).


 There's quite a handful of free walking trails (on the ground level) that ranges from as short as 30 minutes (short walks) to as long as 8 hours (tramping route), and a trip up to the lookout will give you views of Rotorua. Other than walking trails, there's also trails for mountain biking and even horse-riding! But since I've planned for the nightlights walk last night, the BF suggest to just go for the treewalk instead of checking out the free walking trails.

The Redwood Treewalk (daytime) and Redwood Nightlights (night time) is an award winning attraction at 700m longs, consisting of a series of 28 suspension bridges, which traverse between 27 majestic 117-year-old Redwood trees. This treewalk sits at 20m above the ground, at the peak of the forest and the walkway has been specially designed and constructed to preserve the trees, plants and the surround natural environment by using a uniquely constructed New Zealand-first technologically designed sling, which is suspended from the Redwood trees.


The Whakarewarewa Redwood Forest is open daily, with main gates for vehicles access open at 5:30am till late. However, if you're planning to visit for the free walking/biking trails, do visit in the daytime. For more information, visit their website HERE.
The Redwood Treewalk is open daily from 9am - 1030pm (last entry at 10pm) and the Nightlights are turned on at dusk. For more information and tickets booking, visit their website HERE

After the treewalk, we bid Rotorua goodbye and hit the road again to Huka Falls at Taupo, which is roughly 1.5 hours' drive away. But before getting to Huka Falls, we decided to do a small re-route and went to Huka Honey Hives first, as we're worried that we might not make it in time before they closes at 5pm. According to some travel websites, Huka Honey Hives is actually reachable on foot from Huka Falls with only a 23 minutes walk, whereby you can get to the Huka Falls Lookout and a cafe enroute, but our drive over from the carpark of Huka Falls is alarmingly long for the distance to be comfortably manageable on foot, so I'll leave this (to walk or not to walk) to your discretion.

At Huka Honey Hives, expect to be offered free tasting of honeys and mead (honey wine), along with some other food products like lemon curd and fruit spreads, wine jellies, cookies, chocolates and etc. There's also a selection of skincare products and a gelato ice-cream bar located at a corner of the store.
 YUMMY!
It was also mentioned in various travel websites that visitors can get to see their bees at work in glass hives, but we saw no bees, nor any glass hives anywhere during our visit but there's a signboard put up just outside the store for it, so I guess you can only get to see the bees if you book their tour for it, which is priced at NZD $25 per person.
Not sure if I would want to be paying $25 to see bees though.
Huka Honey Hives is open daily, 9am (summer) or 10am (winter) - 5pm.
For more information, visit their website HERE
After having a milk-honey gelato cone added to our tummies and our bag full of meads, lemon curds and wine jellies, we headed off to Huka Falls to "walk off the gelato calories".
But the "falls" ended up being rather anti-climatic.
I'm not saying that The Huka Falls looks bad, but after reading that The Huka Falls are a set of waterfalls on the Waikato River that drains Lake Taupo (which is almost the size of Singapore before we did land reclamation) , I was expecting it to look something like...
THIS

But it ended up looking like....
THIS
 Which, resembles more of a set of rapids to me.
Do not get me wrong here, I'm not saying that The Huka Falls is not worth a visit, but do manage your own expectations before visiting. The surprisingly "vertically-challenged" waterfall aside, the speed and volume at which the water isfalling flowing down, complemented by the surrounding lush greenery still makes a rather scenic and picturesque view for one to enjoy.


If you wish to spend a little more time around here, do consider taking up a 1 hour and 20 minutes long river cruise, that's supposedly an excellent cruise for photography that operates all year round and in all weather.

For more information for The Huka Falls, visit their website HERE
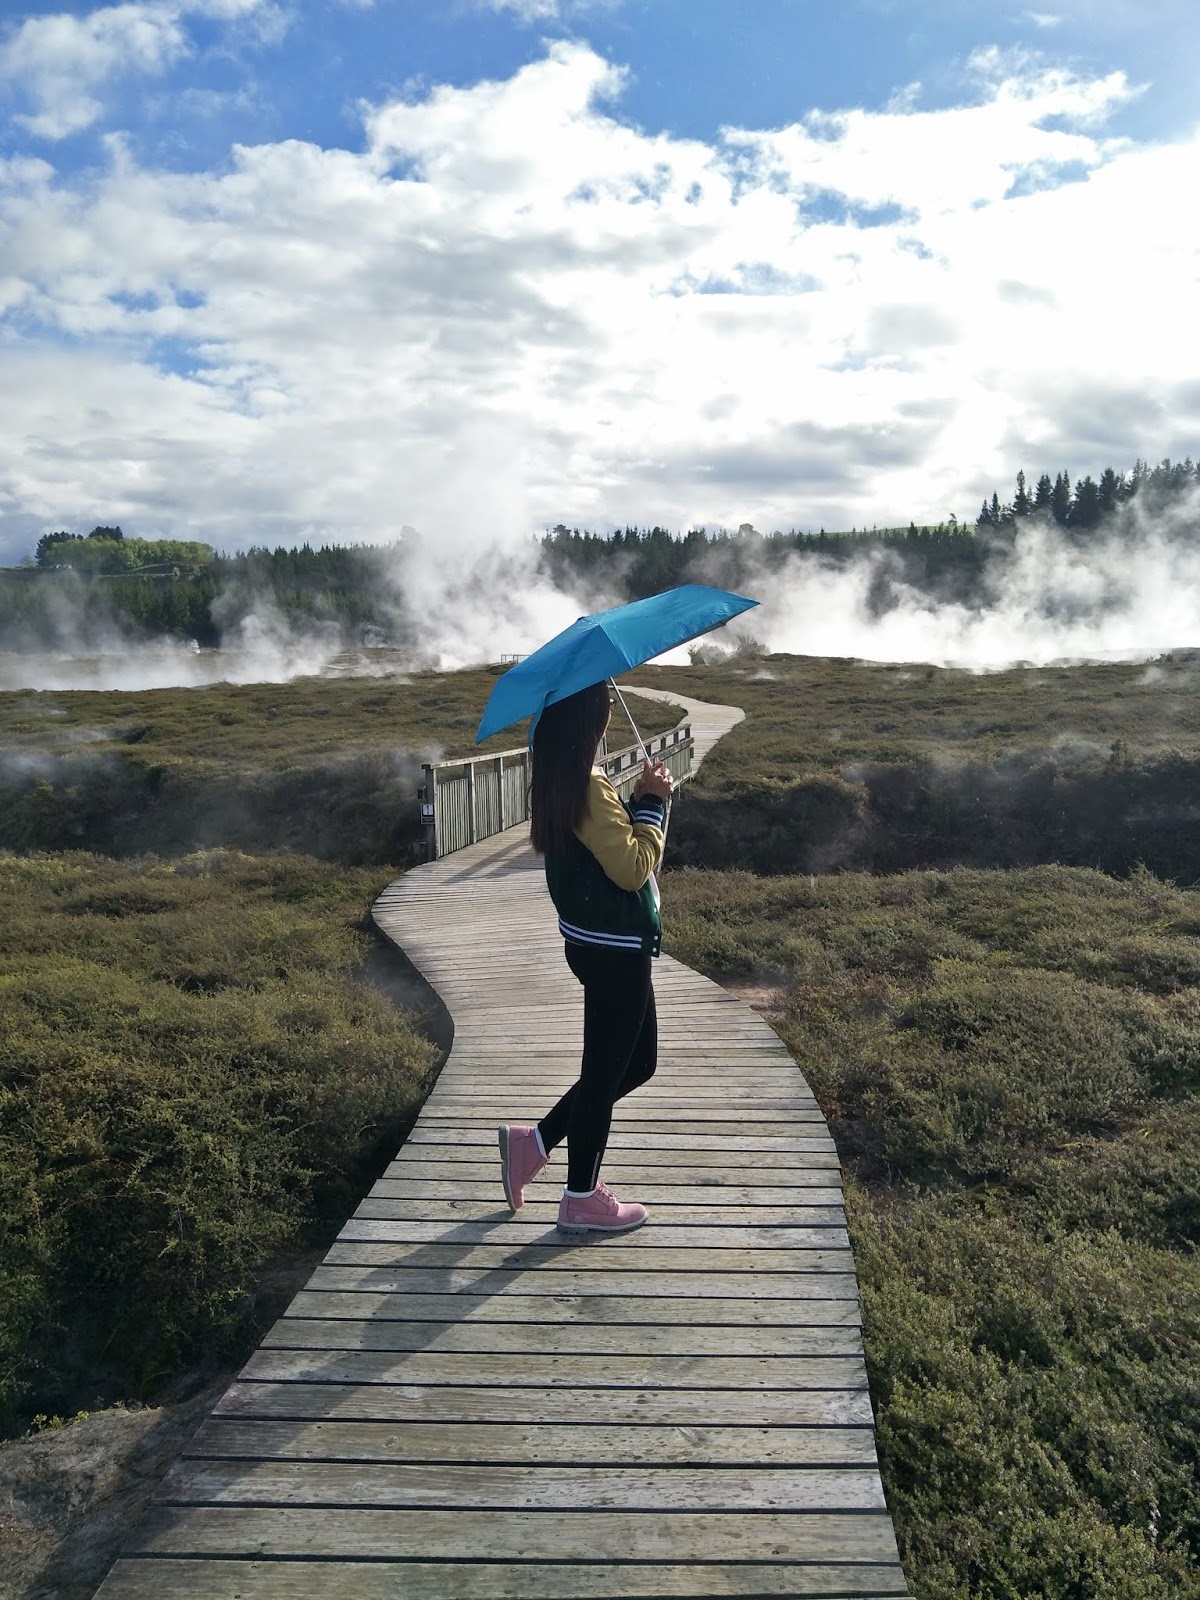
Seeing that we still have some time left, we decided to drop by Craters of the Moon, a park that is supposedly bubbling with volcanic activity, mud pools and steaming craters, and is accessible from The Huka Falls walking trail with around an hour's walking time from the base.
But, we decided to take a 6 minutes' drive over instead.
 The park is MASSIVE, and consist of two walking tracks, a 45 minutes loop (stated on paper only) Main Track and a 20 minutes Top Track that takes you to the upper lookout for a better view of the park.

As mentioned, the walking time of 45 minutesfor the main track is probably a very optimistic estimation for someone walking quickly throughout the park without doing any pit-stops along the way at all. We took 1 hour to clear just the main track, starting the 1st half at a leisure pace and taking photographs here and there, and then rushing through the 2nd half of the park by brisk-walking all the way to make it out of the park in time. And we didn't even have any time left to go anywhere near the Top Track, and looking at the gradient of the slope leading up to the upper lookout for this track, a 20 minutes walk is probably only for a pretty fit individual. So while the stated last entry is at 5pm, I suggest that you do not attempt to make a rushed visit at 5pm because you won't get to fully experience the entire park.


Craters of the Moon is open daily from 830am - 600pm (time when main gate closes, which is a 5 minutes' drive from the actual park entrance)
For ticketing and more information, visit their website HERE


But before that and while in Taupo, we ABSOLUTELY HAVE TO STOP BY THIS PLACE.

At All Seasons Kiwi Holiday Park, you can get an overnight stay at their powered sites for only NZD $44 - $50 per 2 pax, and I like that they grow bush hedges to separate out the CV parking slots so that we can get more privacy. Fresh water tap is also located together with the main power hook up point at each parking slot so you need not queue in line to top up your fresh water tank.
There's also an outdoor pool, labelled as thermal, that's pretty tiny and doesn't really seem that inviting. I mean, the park was pretty crowded but there's absolutely NOBODY near the pool.
Other than powered sites, the holiday park also provides tons of other accomodation types ranging from the basic tent site, to caravan site, cabins, cottages and motels.
Their bathroom is spacious and clean, with decently hot water at good water pressure for a nice shower. And I exceptionally enjoyed their big and very well equipped kitchen.
In fact, their kitchen looked so inviting that we decided to cook our dinner there and also ate at their communal dining area.

And so, some cream of chicken, french toasts, fish fingers, chicken franks, and a pot of cheesy mashed potatoes (the BF cooked some steak too).... dinner is served!
Day 8 recount is now up!
Till then,
Mia Foo


Surrounded by seagulls, geese and swans!

There's a black mama swan with her cute and fluffy cygnet too!
And did you know the cygnets ride on the back of the mother swans?
So after a quick, simple breakfast, we set off for Whakarewarewa Maori Village to make sure that we will reach the place by 845am for proper checking in (we learnt our extremely pricey lesson at Waitomo Cave) for our 9am guided tour.
In case you didn't know, the Whakarewarewa Maori Village is a REAL community of Maori people living around a geothermal area, and your guide probably also stays in the village itself. But for us, our friendly and engaging guide, although does own a house in the village, has moved out to the more urban areas instead. Our guide also mentioned that the 9am tour is always the smallest group, hence feeling more personal and private. True enough, the BF and I were the only participants of the guided tour.

The village tour will begin just beyond the Wahiao meeting house, at the intersection of Hinganoa Drive and Huarere Street, and will only take you 45 minutes to 1 hour, after which you can easily wander around the village on your own, with a few other self-guided walking trail for you to check out.
One good thing about staying in a geothermal village means you can cook your food without needing to use electricity or any man-made fire source.

This is one of their in-ground steam boxes (it's communal and they have two!), which the village residents use to steam-cook their meals. And yes, these two box of food really do belong to one (or two) of the residents.

This is their "public" bathhouse, but it was still under construction during our visit. According to our guide, one of her neighbours (or ex-neighbour, since she has moved out) refuses to install a electrical water heater in the house all these years and resort to taking the hot water from one of the hot spring source manually using a pail to make their own hot water bath.
Why pay when you have a free source right at your doorstep, right?

Staying here means you can get extremely cool #ootd shots all day err day with the IG-worthy misty background. HAHA!

Was hoping that we could get to see one of the geysers "erupting", but nope. We're not that lucky.
And here's some free walking trails you can follow after completing the 45 minutes guided tour.

Whakanuia Track
This short 15-20 minute stroll traverses through Manuka scrub, past boiling mud pools and steaming bores. Our newly renovated boardwalk crosses over the colourful Te Roto A Tamaheke (Lake of Tamaheke), whose hot spring-filled waters honour a chief who lived in the area long ago.
Whakanuia Track Church Loop
Extend your walk by following Huarere Street before turning onto the Whakanuia Track and you will be rewarded by a look out point over Te Roto A Tamaheke.
Return to the trail and continue on to loop back around and view a large mud pool and the Whakarewarewa Anglican Church. From there, this scenic loop rejoins the original Whakanuia trail and carries on along toward the lake boardwalk.
Hot Lakes Scenic Track
For a longer journey and exceptional views, our extended scenic track past Roto Kanapanapa (Green Lake). Infused with a mixture of geothermal minerals, this lake is green in colour and has a warm temperature. This pool was formerly used by the Tohunga (priest) in ceremonial funeral processes. Continue to along the track past several hill top lookout points for views of Rotorua city, steaming lakes and two Pa (fortified village) sites of the Tuhourangi Ngati Wahiao people.

But unfortunately, it was raining during our visit and very cold (and windy), so we didn't explore the place much on our own, instead we went to the souvenir shop and picked out some gifts for our friend back home and then went next door to the cafe for some hot coffee and warm date scone to pass the time with some much needed warmth while waiting for the cultural performance at 11:15am.
But before that we ran into a cat and decided to follow it...

And ended up intruding on their lunch! HAHA!

But they were all so adorable, lined up side by side and eating together!
Anyway, sorry for sidetracking, let's get back to what's planned on the itinerary.

Due to poor weather, the performance was relocated indoor, at their mini-theatre, and the BF and I managed to snag the "VIP seats" right in front. HAHA! If you do appreciate traditional dances and singing, then this performance show will be right up your alley. I truly enjoyed the dances and singing of the performers, and one of the ladies has such a beautiful, captivating voice.
After the performance, we left the theatre and headed straight for the cafe for our Hangi Pie meal! The meal was actually pretty good & hearty, though I can't say the same for the dessert (it tasted so bizarre I didn't even want to snap a photo of it). I have NO idea what was that supposed to be, but I decided it's not worth the calories just after 1 tiny bite and got nearly drowned in sweeten condensed milk. Nevertheless, just judging on the Hangi pie (& corn on cobs) alone, this meal was still worth topping up for.


Whakarewarewa Maori Village is open daily (except Christmas Day) from 8:30am - 5:00pm.
For more information on guided tour booking, visit their website HERE
After leaving the Maori Village, it was a quick 15 minutes drive over to the Whakarewarewa Redwood Forest (which we didn't manage to visit for the nightwalk last night due to poor weather).

But before that we somehow missed a turn and ended up at a random.... lake?

The scenery here isn't all that stunning, but at least I've learnt something, that catfishes here are considered more like a pest. Probably because they create dirty and murky waters.
Anyway, back to the Redwood Treewalk.


The Redwood Treewalk (daytime) and Redwood Nightlights (night time) is an award winning attraction at 700m longs, consisting of a series of 28 suspension bridges, which traverse between 27 majestic 117-year-old Redwood trees. This treewalk sits at 20m above the ground, at the peak of the forest and the walkway has been specially designed and constructed to preserve the trees, plants and the surround natural environment by using a uniquely constructed New Zealand-first technologically designed sling, which is suspended from the Redwood trees.


The Whakarewarewa Redwood Forest is open daily, with main gates for vehicles access open at 5:30am till late. However, if you're planning to visit for the free walking/biking trails, do visit in the daytime. For more information, visit their website HERE.
The Redwood Treewalk is open daily from 9am - 1030pm (last entry at 10pm) and the Nightlights are turned on at dusk. For more information and tickets booking, visit their website HERE

After the treewalk, we bid Rotorua goodbye and hit the road again to Huka Falls at Taupo, which is roughly 1.5 hours' drive away. But before getting to Huka Falls, we decided to do a small re-route and went to Huka Honey Hives first, as we're worried that we might not make it in time before they closes at 5pm. According to some travel websites, Huka Honey Hives is actually reachable on foot from Huka Falls with only a 23 minutes walk, whereby you can get to the Huka Falls Lookout and a cafe enroute, but our drive over from the carpark of Huka Falls is alarmingly long for the distance to be comfortably manageable on foot, so I'll leave this (to walk or not to walk) to your discretion.

At Huka Honey Hives, expect to be offered free tasting of honeys and mead (honey wine), along with some other food products like lemon curd and fruit spreads, wine jellies, cookies, chocolates and etc. There's also a selection of skincare products and a gelato ice-cream bar located at a corner of the store.

It was also mentioned in various travel websites that visitors can get to see their bees at work in glass hives, but we saw no bees, nor any glass hives anywhere during our visit but there's a signboard put up just outside the store for it, so I guess you can only get to see the bees if you book their tour for it, which is priced at NZD $25 per person.
Huka Honey Hives is open daily, 9am (summer) or 10am (winter) - 5pm.
For more information, visit their website HERE
After having a milk-honey gelato cone added to our tummies and our bag full of meads, lemon curds and wine jellies, we headed off to Huka Falls to "walk off the gelato calories".
But the "falls" ended up being rather anti-climatic.
I'm not saying that The Huka Falls looks bad, but after reading that The Huka Falls are a set of waterfalls on the Waikato River that drains Lake Taupo (which is almost the size of Singapore before we did land reclamation) , I was expecting it to look something like...
THIS

-credits to www.rd.com-
But it ended up looking like....
THIS

Do not get me wrong here, I'm not saying that The Huka Falls is not worth a visit, but do manage your own expectations before visiting. The surprisingly "vertically-challenged" waterfall aside, the speed and volume at which the water is


Can you spot me? >.<

And of course, not forgetting to do another advertisement-worthy shot of my favourite drink while in NZ.
And that's the river cruise boat at the far end of the waterfalls....
If you wish to spend a little more time around here, do consider taking up a 1 hour and 20 minutes long river cruise, that's supposedly an excellent cruise for photography that operates all year round and in all weather.

-credits to mustdonewzealand.co.nz-
For more information for The Huka Falls, visit their website HERE
Seeing that we still have some time left, we decided to drop by Craters of the Moon, a park that is supposedly bubbling with volcanic activity, mud pools and steaming craters, and is accessible from The Huka Falls walking trail with around an hour's walking time from the base.
But, we decided to take a 6 minutes' drive over instead.


As mentioned, the walking time of 45 minutesfor the main track is probably a very optimistic estimation for someone walking quickly throughout the park without doing any pit-stops along the way at all. We took 1 hour to clear just the main track, starting the 1st half at a leisure pace and taking photographs here and there, and then rushing through the 2nd half of the park by brisk-walking all the way to make it out of the park in time. And we didn't even have any time left to go anywhere near the Top Track, and looking at the gradient of the slope leading up to the upper lookout for this track, a 20 minutes walk is probably only for a pretty fit individual. So while the stated last entry is at 5pm, I suggest that you do not attempt to make a rushed visit at 5pm because you won't get to fully experience the entire park.


Craters of the Moon is open daily from 830am - 600pm (time when main gate closes, which is a 5 minutes' drive from the actual park entrance)
For ticketing and more information, visit their website HERE


And here's the amazing view at one of our random pit-stop area after making our way out of the park before they closes the gate on us, while on our way to our last destination of the day, All Seasons Kiwi Holiday Park.
But before that and while in Taupo, we ABSOLUTELY HAVE TO STOP BY THIS PLACE.

This is a McDonald's restaurant, people. HOW COOL IS THAT?!
We didn't step inside to check out the interior though, not that keen on having more McDonald's after having them consecutively for 2 days upon touching down in NZ.
At All Seasons Kiwi Holiday Park, you can get an overnight stay at their powered sites for only NZD $44 - $50 per 2 pax, and I like that they grow bush hedges to separate out the CV parking slots so that we can get more privacy. Fresh water tap is also located together with the main power hook up point at each parking slot so you need not queue in line to top up your fresh water tank.
There's also an outdoor pool, labelled as thermal, that's pretty tiny and doesn't really seem that inviting. I mean, the park was pretty crowded but there's absolutely NOBODY near the pool.
Other than powered sites, the holiday park also provides tons of other accomodation types ranging from the basic tent site, to caravan site, cabins, cottages and motels.
Their bathroom is spacious and clean, with decently hot water at good water pressure for a nice shower. And I exceptionally enjoyed their big and very well equipped kitchen.
In fact, their kitchen looked so inviting that we decided to cook our dinner there and also ate at their communal dining area.

And so, some cream of chicken, french toasts, fish fingers, chicken franks, and a pot of cheesy mashed potatoes (the BF cooked some steak too).... dinner is served!
Day 8 recount is now up!
Till then,
Mia Foo