MollyMia Aspire to Inspire before we Expire

Tuesday, 14 January 2020

Bloom Studio - Preserved Flower Domes [Sponsored]


And I got bloomed... domed....(??), thanks to this beautiful preserved flower dome from Bloom Studio!

Bloom Studio is made up of a humble, small team of florists from Korea with big hearts. As an effort to minimise floriculture carbon footprint, Bloom Studio offers preserved flowers as an alternative to fresh ones. Preserved flowers, not to be confused with dried flowers, are 100% real flowers that have undergone preservation techniques to maintain its freshness, suppleness and shape. This non-corrosive, toxic-free, non-carcinogenic and non-chemical reactive process is definitely eco-friendly and allows the flowers to last from several months to years and it's almost maintenance-free!


Fresh flowers requires refrigeration to keep them fresh and alive in transit. This burns more fuel and thus emits more carbon dioxide into the atmosphere. Most people also tend to discard the flowers once they start to wither in matter of days or at best, weeks, which is extremely wasteful. All these ultimately contributes to climate change, and Bloom Studio wants to do good for the environment by starting small. After all, no effort is too little and every small change can lead to a great impact.
Preserved flowers are more economical because they require low maintenance; without the need for plant care products and need not be replaced from time to time. Moreover, Bloom Studio's bouquets are also wrapped in environmentally friendly packaging like butcher's paper.


Bloom Studio has very generously sent me Ashlyn, a preserved flower dome with a beautiful combination of sea-foam green and pastel pink roses, along with hydrangea and foliage. 

Two of my favourite colours paired together, and bundled up in a pink ribbon! How cute is that!

And as I've mentioned, Bloom Studio is a team of florists with big hearts, and they're donating 5% of their sales to their partnered local animal shelters. If you are unaware, our local animal shelters are facing challenges from limited space and finances, and are always facing risks of shutting down. So while you're making a purchase at Bloom Studio, you're also contributing to their cause to help our furry friends. 

And with Valentine's Day being just a month away, Bloom Studio has already started their Valentine's Day pre-ordering, which will save you up to 30%! 

For more information on Bloom Studio and to view their selection of preserved flower domes and bouquets, visit their website HERE

Till then,
Mia Foo

Wednesday, 1 January 2020

Mia Bakes: Burnt Basque Cheesecake

Yes, after contemplating about it for so so so long (I first came across a youtube video of this cake waayyy before it started appearing in our local cafes/bakeries, and had wanted to try it back then) I finally tried it. 

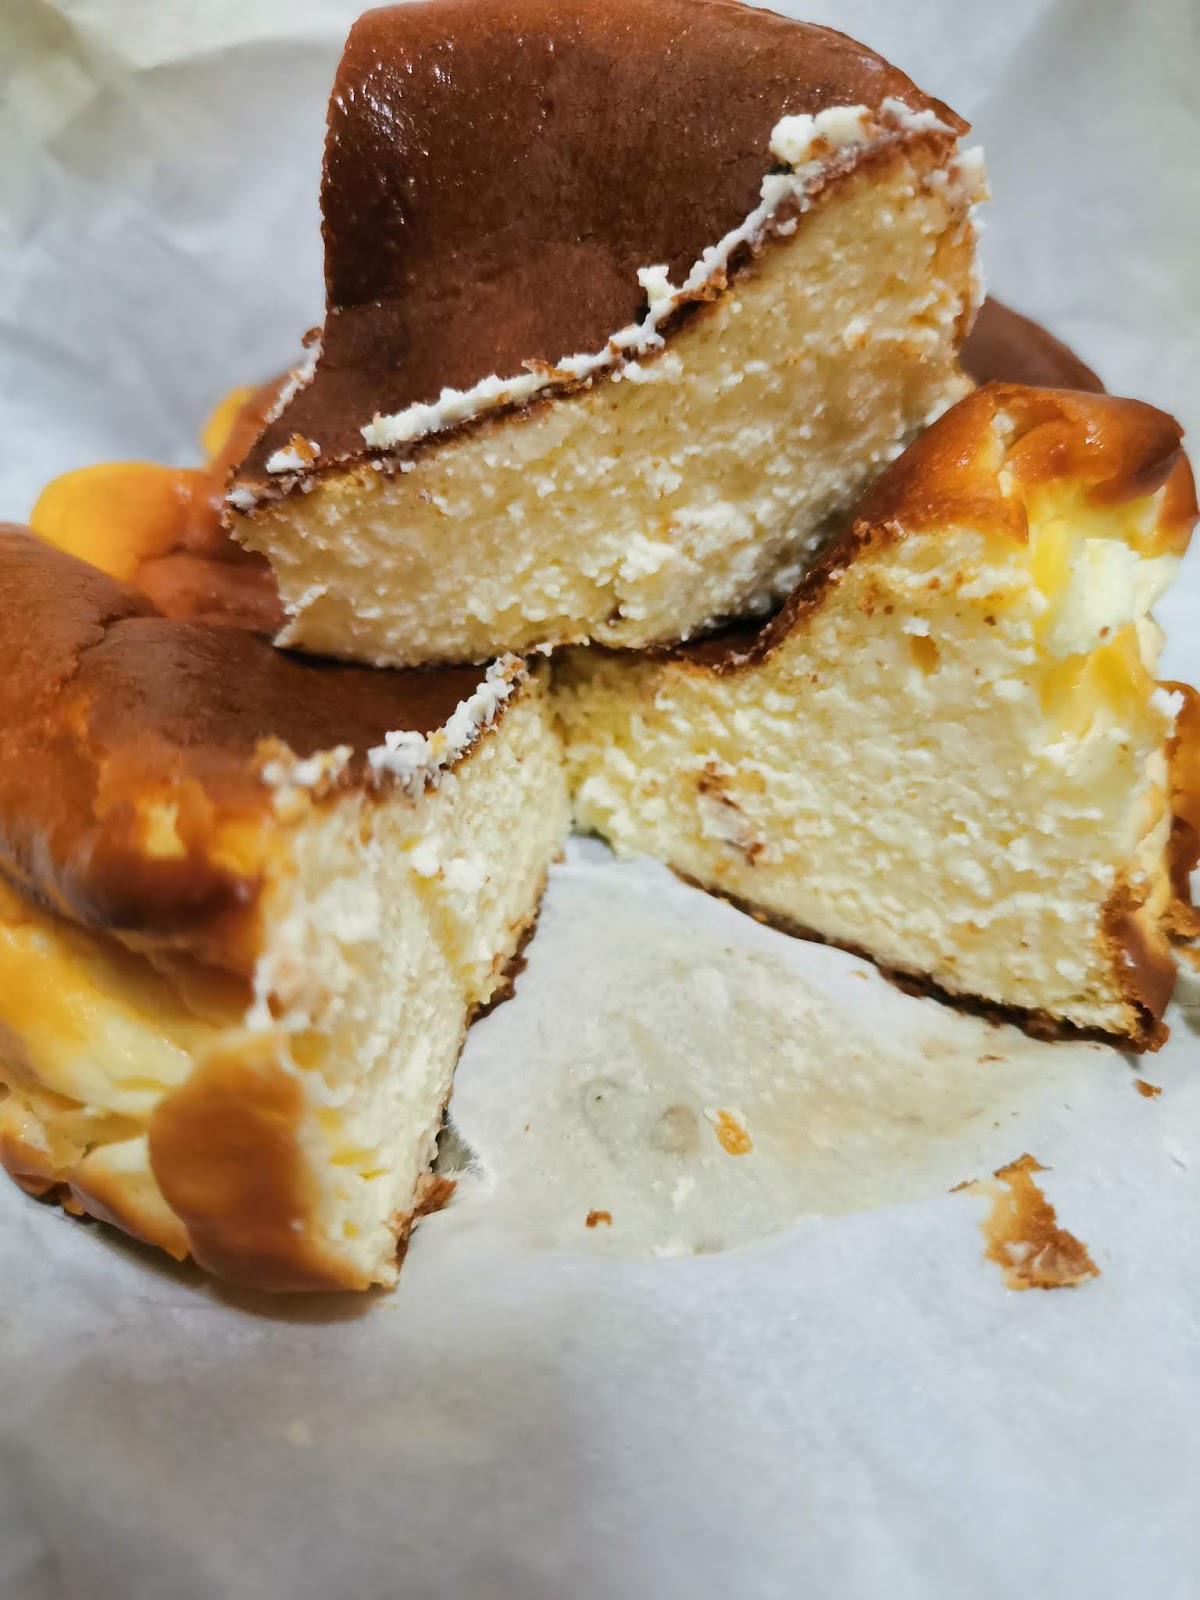
The (once very) trendy Burnt Basque Cheesecake, which ended up being more golden then burnt. 
But anyway, let's get over with the ingredients to get started!

To get 1 small 5' - 6' cake, you'll need:

227g cream cheese, soften
(I used Cowhead, if you're using Philadelphia then 250g is fine too) 
45g sugar 
(I mixed 15g stevia and 15g icing sugar) 
1 tbsp honey
100ml whipping cream
2 medium eggs
10g all purpose flour

First up, pre-heat your oven to 220 degree Celsius. It's very important that you pre-heat your oven first because of the higher than usual temperature you need to get, plus it takes literally just minutes to put your cake batter together. If you're quick enough, you might even finish the batter before your oven is pre-heated! >.<
Anyway, after getting the oven out of the way, line your cake pan with a piece of parchment paper. There's no need to line it to size, but just roughly push a square/rectangular sheet of parchment into your pan and let the edges fold onto itself at the sides of the cakepan.

Do keep around 3' of overhang upright (shown in picture)  to 'catch' the cake as it rises in the oven during baking.

Now, making this cheesecake can't get any easier, and you can easily make it in 1 bowl.
First up, beat your soften cream cheese in a large bowl to loosen it up before beating in the sugar until well combined. Then beat in the eggs, one at a time, until the mixture is well combined.
To the mixture, add in the honey and whipping cream and mix again before finally adding in the flour and mixing until you get a homogeneous mixture.
Pour the mixture into your lined cake pan and let it bake in the oven at 220 degree Celsius for 10 minutes, before reducing the temperature to around 200 degree Celsius and bake until the surface of the cake is browned/burnt to your liking.

After the cake is done, leave the door of your oven ajar and allow the cake to cool completely before letting it chill in the fridge overnight (or at least 4 hours) for the cake to set.
Do take the cake out from the fridge and allow it to come up to room temperature before eating though. 
Tadaa~ 

Rich and creamy with a slightly caramelised taste at the "burnt" edges, it's no wonder there's so much hype for this cake! 
If you're after the molten, lava centre effect, perhaps you can tuck into the cake once it's cooled and without chilling in the fridge, but don't quote me for this as I've not tried it. 
And I don't really understand why would you want a molten centre for this cake either, this is no cheese tart nor chocolate cake. 

edit: I've made a lower calorie version (and added biscuit base) using Ricotta HERE

Till then,
Mia Foo


Monday, 30 December 2019

NanoMD Bright [Sponsored]

And so, after trying out Dermagold's amazing New Elite Miracle C+ Serum, I'm really glad to be able to try out their newly launched skin supplement, the NanoMD Bright!

The NanoMD Bright is the world's newest and most advanced supplement for skin protection, nutrition and brightening. It represents the cutting-edge scientific discovery in the nutrition and nano technology in a one-tablet-a-day form. Although topical lotions provide an essential protection of the outer layers of your skin, this exciting new pill can do what no topical cosmetic skin agent can: improve the deeper structure of your skin
-www.mynanomd.com-

Sounds really amazing, right?
With ingredients such as Pygnogenol, Tomato Phytoconcentrate and L-cysteine, NanoMD Bright helps to brighten our skin tone, reduces pigmentation and improves our overall skin texture from within. Its nano formula not only addresses pigmentation, but also provides an additional sun damage reduction and systemic photo-protection (oral sunblock, YES!), which will build up slowly over several weeks of consumption. 
The fact that NanoMD Bright comes in the form of a pill, to be ingested and not applied topically, means that we will gain years of healthy and glowing skin, not just on our face, but all over our entire body.

I personally like how the tablets come in such handy-dandy packs, which makes it so much more convenient and easier to bring out in your smallest purse. 

NanoMD Bright now retails at dermagold.sg (HERE) at $179 for 1 month's supply.
For more information, visit https://www.mynanomd.com/

Till then,
Mia Foo

Friday, 1 November 2019

#siryweds - Qingdao Pre-Wedding Photoshoot (Part 2)

On part 1 of my Qingdao PWS post, I've already talked about my 2-days PWS with REVIVAL新生.
So why a part 2, you may wonder. Because we've had TWO PWS packages in Qingdao, making it a 3-day photoshoot in total.
How this 2nd package came about was because of my dearest relative, who had helped with settling the liaising with REVIVAL新生, decided to gift us another PWS package with a bridal studio as well, and also for us to gauge which one is better: "commercialised" bridal studio, or "more candid and natural" freelance photographer.

And so, we ended up with another package with 米蘭春天婚纱摄影 (Milan Spring) for a 1-day shoot.

Bridal studios, being more commercialised in a "mass-production" sense, will definitely be able to give us an even more competitive pricing.
So for roughly just SGD $800, we had:

1 full day of studio + outdoor shoots
5 outfits & 5 makeup + hair for bride
4 outfits + hair for groom

50 edited copies in 2 large albums + 1 mini album
5 table frames
all softcopies (226 shots) return

In comparison to 杜娟婚纱 & LOAFFER with REVIVAL新生, the selection of gowns and suits at Milan Spring were clearly more dated. not in an orbiang way, but just visibly worn out and not well maintained, and one of the suit jacket that the staff picked out for the hubs even had a huge tear at the inner sleeve.
And the coordinator told me, "The gowns look old but don't worry. We can post edit the photos and they'll look brand new."
Erm.... okay?

It was with Milan Spring when I finally came to realise how huge and commercialised this bridal shoot thing is in China. Early in the morning, we were whisk away to their 基地 (base) located at one of their local shopping plaza and was totally stunned at how this base operates. Turns out, this "base" is actually a huge collection of lavishly done up backdrops (two storeys of them!)  for indoor studio bridal shoots that's "shared" among all the bridal studios in the market, paying an hourly rate to the base. This also means that you may have to wait for the other couples to be done with their shoots before you can take yours, if you happen to want that particular backdrop that's in use.
There's many different such bases located all over Qingdao and the bridal studios will usually change the bases frequently.
Also located at the base is a HUGE make up and changing room (there's even a few "VIP" rooms)  that has rows of vanity tables and chairs for all the couples to do their hair and make up and change in and out of their outfits.
And since the base is located in a shopping plaza, it seems to be the standard process to finish up the indoor shoots by lunch, head down to the food court for lunch (in your gowns too, it doesn't matter because there'll at least be 10 other brides littered across the sitting area), before returning to the base to change into your next outfit and heading out for outdoor shoots.

Anyway, here's some of my favourite shots for each of the 5 outfits I've worn.


Unlike my other red Kua from 杜娟婚纱 that is a combination of both 褂 and 秀禾服, the one I've chosen at Milan Spring is a typical 秀禾服 (double layered sleeve and side collar) and I also loved it because a yellow/gold one is so unique!


The cream-white gown was also used mainly for indoor shoot at the base, and we just went out of the plaza (literally just out the door) to snap a few shots of the church. 


The black gown was used for outdoor shoot at the street just outside the shopping plaza and this has to be my favourite outfit out of the 5, and I like how the overall look feels super chic & trendy just by adding on a simple white baseball cap. 


I didn't really like this bubble-sleeved white gown because of ... well, the bubble-sleeves. But the bridal studio coordinator highly recommend that I choose it, saying that it'll look great in the beach/sea shoot, and I guess I should be glad I took her advice. 


Another gown which I didn't feel an exceptional liking to, but highly recommended by the coordinator. And I have to say it also turned out pretty well!

Till then,
Mia Foo

Thursday, 31 October 2019

#siryweds - Qingdao Pre-Wedding Photoshoot (Part 1)

On 12th October 2019, finally, #siryweds
And also with me being on medical leave for the rest of the week due to a dental surgery, I decided, why not do a series of #siryweds posts? I know this sounds really ambitious, judging that I took nearly 1 year to finish my 10 days New Zealand road trip travelogue, but nevertheless it's still a memorable event, a milestone in my life, that I wish to document in words; albeit just briefly
So, just bear with me yeah?

And to all the brides-to-be reading this series of posts, hopefully this can give you a teeny weeny bit of help with your wedding preparations. :)

First up, let's touch on our PWS. 

The reason why I wanted to do an overseas PWS is simple. 
I WANTED TO AVOID THE HEAT IN SINGAPORE, and of course having pretty things you can't find in Singapore (like Cherry Blossoms) in my photographs will be awesome as well, but the main reason was to avoid the heat. 
Dragging a heavy bridal gown, with my face slathered in thick bridal make up, my hair so stiff with tons of hairspray and heavy with dangling accessories.... UNDER THE SCORCHING SUN?
No! No, no no. NO WAY. 

And so, through a close relative who happens to be working in Qingdao, we settled on a 2-days shoot package with REVIVAL新生.
Now, the thing with buying things (even PWS packages, yes) in China is that everything is very flexible, and so with my relative's amazing haggling skills, here's what we've got for just barely SGD $1300

Day 1
half day studio shoot + half day outdoor shoots 
4 Outfits & Makeup + Hair for Bride
3 Outfits + Hair for Groom

Day 2 
(YES, we had TWO days of photoshoot!)
full day outdoor shoot
couple's own casual wear
(but in the end the photographer though my outfits were way too casual and so he lent me a little white gown instead) 

40 edited shots with 2 albums
4 table frames
a 2.5 minutes photo slideshow
all softcopies (a friggin 640 shots) return 

And if you're still thinking, huh China ah? Their gowns and suits must be damn outdated and orbiang lor. But nope, I have to say that this bridal shoot industry in China is ridiculously big, and actually they've much prettier and atas (classy) looking gowns as compared to the local studio I've engaged for my Actual Day package (which I will touch on in a separate post). 

REVIVAL新生 is actually a photographer working at his own one-man-show photography studio, unlike a typical bridal studio that has their own team of photographers, make up artists and collection of gowns and suits. So he actually works with 杜娟婚纱 for my gowns, LOAFFER for the groom's suits and Star-Makeup for my make up and hair. 

REVIVAL新生 photography style is a more candid, natural feel. So while we had it easier with just standing and posing in the more formal studio shoot, we were dog-tired at the end of the day after the outdoor shoot, having to be constantly walking back and forth, running, jumping around etc. 

And so, here are some of my favourite shots from each of the 4 outfits. :) 


This mauvey, champagne gown was my mum's favourite and the bridal studio's staff also told her that it's one of their more expensive (and latest) collection, having only recently flown in from France. And of course because it's the more expensive range, it's better off staying in a safer environment of an indoor studio shoot. 


It came across to me that most Asian brides do not appreciate such simple satin gowns, but I LOVE IT! I love how it's so simple, yet classy and elegant. If only it weren't so heavy (satin gowns are damn heavy can!). Most of the time the entire gown was nearly slipping off my body as I walk, probably also because the bodice (waist) portion of the gown wasn't tight enough.


REVIVAL新生 wasn't very familiar with taking oriental style PWS, but I really wanted to wear a red 裙褂 (Kua). And I love how this piece is a mix of 龍鳳褂 (top) and 秀禾服 (bottom), which makes it a super pretty set! :) 
For BTBs who can't differentiate between the two, here's a detailed explanation to set you in the right direction. 


And this is my final gown worn for Day 1 of our photoshoot, which is also super pretty looking, ending our tiring day at Huang Dao (Golden Beach). 

And for Day 2, it was half a day of casual shoot at Lao Shan! 


I know we look very happy playing with water in the river but you know what, it was just 11 degrees Celsius and that water was icy cold. 
Not fun, people. NOT FUN AT ALL. 


So while getting a PWS package in China might be ridiculously affordable with amazing quality, do note that they will require you to pay a deposit upon confirmation, only via alipay or wechat pay, which requires you to have a China bank account in order to perform cash transfer transactions. 

Feel free to drop me a comment, email or DM me on my instagram if you wish to know more details. 

Read about my other PWS shoot with Milan Spring HERE

Till then,
Mia Foo