MollyMia Aspire to Inspire before we Expire

Saturday, 29 August 2020

Sending my heartfelt wishes with Fav Florist [Sponsored]

 Amidst the gloominess of the recent Covid19 pandemic, there's a piece of great news to light up our (my #tkgirls clique) days. Our dearest A has recently gotten engaged and will be holding her wedding (albeit, just a private family function due to Covid19 restrictions) in a few months' time! 

So I thought, when's a better time than now to send a flower delivery over to convey my most heartfelt wishes to her? And so comes Fav Florist!

Fav Florist strives to be the stepping stone to create that special experience for their customers, to receive their flowers feeling loved and special. A bouquet (or other form of floral arrangement) is definitely a sentiment for any special occasion, and every recipient should receive nothing be the best. Hence, at Fav Florist, all their flowers are ethically sourced, of the top premium quality and freshness, and each intricately designed flower bouquets are all handcrafted by talented florists with at least a decade of experience. Their flowers are a proud assertion of what they hope to achieve in ensuring a 100% customer satisfaction, and their promise is for the recipient to receive a timely delivered and beautifully crafted flower bouquet. 

-picture credits to Fav Florist-

Initially, I was torn between their All Smiles ($49.90, as pictured) and their Surprise Weekly Bloom (prices starting from as low as $24.90!), the former being a bouquet arrangement with Baby Breath and Daisy, while the latter being a bouquet arrangement that's specially designed by their talented florists using either red/pink roses, carnations, gerberas or lilies as the main flowers. 

-picture credits to Fav Florist-

And then You & Me (prices starting from $43.90) started to grow on the ever so indecisive me. Somehow the arrangement of these red Kenya roses along with black wrapping just looks so classy and elegant, a good match to my dear friend A.  

But in the end, I decided to go with their newly launched Flower Domes. 

Made with preserved flowers, this flower dome, aptly named as Everlasting, is the perfect gift to my dearest friend. which represents everlasting love and beauty. And as they're made with gorgeous preserved flowers, there's absolutely no need for maintenance; and yet they last forever. 

All of Fav Florist's preserved flower domes boast a very rustic and timeless aesthetic, perfect for the 'old souls' out there. 

The LED lights in the dome also brings out the essence and features of the preserved flowers, making them the perfect art piece to display at home. 

Not only do Fav Florist provide highly affordable bouquets of premium fresh flowers, they're also providing free same day delivery for all of their orders! Do check them out via their website or facebook for more information!

Till then,
Mia Foo

Friday, 28 August 2020

Mia Makes: Whey Protein Pancakes (with 2-ingredients chocolate sauce)

 On a diet, but craving for pancakes? 
What if I tell you, you can get your pancake craving fixed (with chocolate chips!) at only 350 kcals and still get 27g of protein? Sounds too good to be true?


But it is! So let's get over with the ingredients, so we can get started!

25g whey protein powder (I'm using My Protein Impact Whey Isolate)
10g oat flour 
18g oat fibre (about 2 tbsps)
120g unsweeten applesauce
1 egg
1/2 tsp baking powder
1/4 tsp baking soda

Optional:
20g dark chocolate chips
a little sugar to taste, if your protein powder is unflavoured. 

First up, separate your egg whites from yolk. Nope, we're not going to whip the whites, but somehow adding the whites separately at the very end will give you thicker, fluffier pancakes. Try it!

In a clean bowl, add in the yolk and applesauce and whisk until fully mixed. Then, add in all the dry ingredients (except the chocolate chips) and mix until there's no obvious pockets of dry flour. Then, add in the egg whites and chocolate chips and fold the mixture until there's no more obvious streaks of snotty egg whites floating around. You need not fully incorporate (and risk over-mixing your batter) the whites into the batter. 

Cook the batter over the hob on a non-stick pan, as you would with any other pancakes (eg. flipping when bubbles start to appear on the surface).
If you still don't know, the trick to get an evenly browned pancake is to NOT add oil/butter to your pan (hence it better be non-stick). Just give it a quick spray with some non-stick cooking spray and be sure to wipe off any excess oil (if you can SEE the droplets of oil, that's excess) with a kitchen towel before pouring in your pancake batter. 


Tadaa~
I've used milk tea flavoured whey protein powder, hence I've a stack of Milk Tea Chocolate Chip pancakes, YUM!

Protein pancakes made with whey protein powder will always turn out rather dry, so while this recipe will give you thick and "fluffy" pancakes, do not expect them to be moist and tender. But, comparing to a "traditional" whey protein pancake (especially those from protein pancake premix), this fare a lot better as the applesauce helps to make it a little more moist, while oat fibre tends to create this moist-mushy texture in baked goods.


I usually eat my pancakes with some maple flavoured syrup or peanut butter, but this time I thought of trying out a simple recipe for some chocolate sauce. 

You'll need:
3 tbsp cocoa powder 
1 tbsp honey
water (add enough to get the consistency you desire)

adapted from wholeheartedlylaura.com

While the consistency of the sauce was perfect (drippy, yet not too runny), the taste was pretty.... "healthy". Perhaps it will work better with more sweetener, or to use drinking cocoa powder instead of the unsweeten kind I've used. If you've tried this recipe using drinking cocoa powder and it turned out well for you, do let me know in the comments section below!

Till then,
Mia Foo

Tuesday, 25 August 2020

Masons Home Decor: DIY Terrarium Kit [Sponsored]

Do you have friends with a talent for everything home decor related, and doing especially well in gardening? Have you ever visited their homes and got wowed by how they manage to create a whole new world of little animals and cute-as-a-button succulents in small (and some not so small) glass bowls? 
And when you lament out aloud at your lack of a green thumb and an aesthetic eye, you'll probably get an, "Oh, it's really easy to make one!" reply from them. 
And there's nothing else for you to do, other than to give them a awkward polite smile in return while inwardly going, "Sureeee...

And guess what? Now, regardless green thumb/aesthetic eye or not, you can make your own visually pleasing terrarium, with the help of these super easy to make DIY Terrarium Kits from Masons Home Decor
Kit consists of:
- 1 glass bowl
- 1 set of gardening tools
- 1 bag mix soil
- 3 pots of succulents
- 3 bags of decorative pebbles
- 1 drip bottle
- 1 bag of figurines

Basically, this kit comes with everything you'll need to build up your own terrarium, so there's absolutely no need for your to get anything else (unless you prefer to have other kind of figurines instead). As the plants included are all succulents, they're extremely hardy and easy to care for. You'll not need a green thumb to ensure their survival. How cool is that!
Building the terrarium takes only 5 super easy steps!

Step 1: Place a layer of small stones at the bottom of the container
Step 2: Add thick layer of soil mix over stones
Step 3: Dig up holes about 2 cm - 3 cm deep to add your plants in
Step 4: Arrange your plants as desired, cover up roots with soil
Step 5: Decorate the expose area with gravel, stones, rocks and ornaments

And that's it!
It's really so simple!
And as I've already mentioned that these succulents are super hardy, we only need to make sure that they're place in moderate (indirect) sunlight and watered once every week! 

And if you prefer not to get your hands dirty, but still wish to have a terrarium, Masons Home Decor also have a series of ready-made terrariums ranging from $54.90 to $89.90 too! 

For more information on what else Masons Home Decor (they have a huge selection of affordable furniture and other home decor items too!) have to offer, check out their website HERE

Till then,
Mia Foo


Friday, 21 August 2020

#siryweds - Yikeshu Bridal & Photography Studio

It's been almost a year since #siryweds and I guess I shan't procrastinate further on the posts I've promised myself to do any further.
So now let's get to (one of the) most important vendor (the other being my wedding banquet venue, duh) for #siryweds and that's our Actual Day (AD) bridal package, with Yikeshu Bridal & Photography Studio.

Without doing sufficient research on this whole bridal package thing, we settled on our overseas PWS in Qingdao, China. And it was only after the PWS is done with, when I was finally doing my research for bridal AD packages when I realised that bridal studios actually do not really do AD packages, meaning it's actually so much cheaper to go for all-in packages instead, as the price difference with and without PWS wasn't as significant as I've expected it to be.
And that seriously threw me off.
For months, I've been dreaming of wearing a lacey, Pronovias (style lookalike) gown during my AD, but after looking through the pricing of bridal studios like TWC and Rico-A-Mona, and even Queen of Hearts....
I decided it's better for me to abandon this financially impractical idea. 

Sorry, bridal vendors out there, no chance for you to take my money. 
I'm not the kind of girl who would spend big money (even if I can afford that sum of money comfortably) for a fancy dream wedding; my dream wedding, sans that Pronovias gown, is just supposed to be as simple and as no-frills as possible. 
I mean, I didn't even think I needed table-stylist, photobooth or even AD videography, even though I did ended up having them all because of the HB. 

I eventually found Fleur D'sign that does seem to have some pretty good deals for gown rental (apparently from SGD $388 and up), but ultimately with the need to get everything else (groom's suits, father's suit, AD make up, AD photography, bridal bouquet and etc) one by one in ala carte method just doesn't make sense to me. As I'll most probably be paying almost the same amount as I would, with a local bridal studio's AD package, but with twice or even thrice the headache from all the sourcing and liaising individually. 

And so, I switched my focus to over the causeway to JB. But found out that situation there is just the same as for our local bridal studios (not much price difference between all-in and AD packages), and with just barely SGD $1K price saving doesn't justify all the hassle of the drive-ins (recce, actual signing, 1st fitting and choosing of gowns/suits, final gowns/suits fitting & collection, returning of gowns/suits) and high chances of horrible jams every single time). Plus, getting a package with a bridal studio in JB means I got to find my own MUA, as they typically do not provide on in the package, and topping up (or rather, getting one ala carte from them) for one is ridiculously expensive, for you have to account for them travelling across the causeway. 

And then, I found Yikeshu through Facebook ads. Basically, every sponsored page FB showed me during that period if time were everything bridal related. Sometimes, getting stalked by FB algorithm isn't wholly a bad thing. HAHAHA....

What caught my eye was that they're having their 6th anniversary wedding sale with 25% discount off all their bridal packages, which are already at extremely competitive pricing compared to other bridal & photography studios. I shan't get into the exact details of how much we paid in total to Yikeshu for our packages, but for our AD Essential Package: 2 Bridal gowns, 2 Groom suits, 1 Father's suit, Makeup & Hairstyling (Morning & Dinner), Bridal hand bouquet, 6 corsages, Bridal car decoration + ribbons for following cars plus AD photography (10 hours), only chalked up to about SGD $1.7K (after the 25% discount), which is a great, great deal! 

And here's (probably) the most important part of Yikeshu's package; the thing that's either making or breaking the deal for many brides out there. Their gown selection!
While they do not have a large selection of gowns (there's only 1 rack of gowns with a few pieces of kua that have very obviously seen better days), they're still relatively new-looking and in very good condition. 

And the very first gown that I went for was the mermaid; a style I always wanted to wear but was unable to do so for my PWS in Qingdao. 

This was also the HB's favourite, but in the end I still decided to abandon mission as it's so restrictive and hard to move around in. I'm still going to be practical and stick to my topmost criteria for gown choosing: COMFORT (lightweight, easy to move around in). 

And so, after taking roughly 1 hour to try out another 9 more dresses, I decided to go with two white gowns (1 for morning, 1 for dinner reception) instead of the usual 1 white + 1 evening gown as I planned to wear kua for my 2nd march in during my dinner reception. Can you guess which are the two gowns that made my list?
It's 4 (for morning) and 7 (for dinner reception)! 

Other than being simple, I chose this gown for the morning schedule also because it's so lightweight! 

The length of the gown aside (I wore The Kate Spade x Keds Wedding Collection, no heels!), this gown is so light that I could have easily ran or jump around in it. HAHA!

The wedding reception gown, though slightly heavier, is still quite light and easy to move around in. I actually have a thing for satin gown (number 5) but they're SO HEAVY. 

And on their kua selection, I'll highly advise that you do not rent from them. Even if they've renewed their selection of kua by now, having to pay $100 - $120 for rental is really not worth it. It's so much cheaper to get yours off taobao instead. 

I bought a bright red one at around SGD $50 for my tea ceremony. 

And the fancy pink one, which I wore for my dinner reception was around $100. 

Both fits me really well and look EXACTLY like pictures. Just make sure that you go through the users' reviews and check through for the actual photos they uploaded along with their reviews. 

Makeup & hairstyling was good as well, especially my hair. But it's a shame that everyone was simply too busy to help take a clear shot of my hairstyles. The MUA did take, but apparently her phone had some problem and nothing was saved. T.T

So this candid shot ended up as the "best" hairstyle photo I'm left with....

Till then,
Mia Foo


Wednesday, 19 August 2020

BestInSingapore's Acai Bowl Delivery [Sponsored]

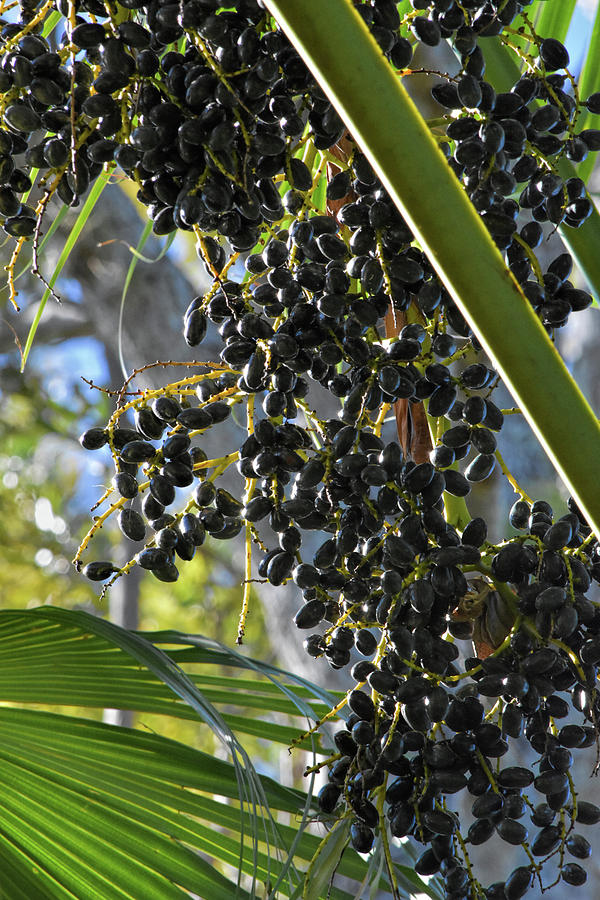
In recent years, the Acai berry has been one of the hottest trend in the #healthyeating culture, touted as one of the superfoods that is packed with tons of benefits. And even though they're called berries, the acai berries grows on a tree and contain pits like apricots and olives, making them a drupe. 

And the main reason why these berries-in-disguise drupes have joined the superfoods' team is due to their impressive list of health benefits that includes:
- Nutrient dense
- Loaded with antioxidants
- May improve cholesterol levels
- May have an anti-cancer effect
- Could boost brain functions


So I'm super elated when Best In Singapore sent over some of these delicious healthy treats from The Acai Lab, which was listed as one of the Best 7 Acai Bowl available for delivery in Singapore. 

Other than offering islandwide delivery in 60 minutes, and using only organic and non-GMO fresh fruits in their acai bowls; what sets The Acai Lab apart from the others is their special PurpleBlend Acai base, which was created with the vision of combining great taste, nutrition and aesthetics into one. Pure Acai puree was combined with various purple superfoods, along with bananas and almond milk to create a rich purple coloured creamy base that is used in every single one of their acai bowls, which supposedly boost immunity, improves brain and gut health, and also improves skin complexion. 
That's just what I need in a bowl of healthy treat! 

So let's see what I've chosen for my greedy self to feast upon!

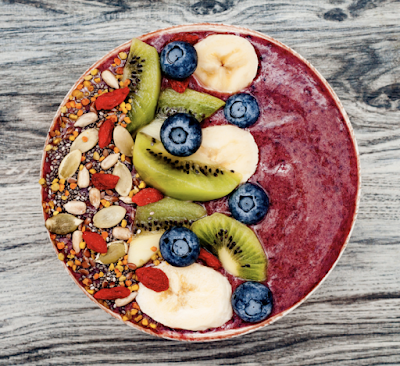
Featuring their signature acai base, along with 10 most popular toppings (granola, bananas, strawberries, blueberries, kiwis, raisins, pumpkin seeds, coconut flakes, cranberries, chia seeds), givine you the perfect mouthful all in one bite! 

Even though there's already so much topping given in the standard serving, I still very greedily added on some mangoes and nutella, YUM! 
But in the end, because this signature bowl is really packed with A LOT of ingredients, I ended up using the nutella for the other bowl (Berry Berries) instead. This is definitely the go-to if you're undecided on which bowl to go for; for this has literally everything. An order of the large bowl can easily make it a hearty meal for you than just a healthy snack. 

Berry Berries - $10.10 (med) / $15.20 (lrg)
Loaded with all the antioxidants you need (granola, blueberries, strawberries, raspberries, raisins, almonds), topped on their special Mango-Acai blend for a "berry-special" time!

Being a huge berry fan (strawberries, blueberries, raspberry, blackberries), I had to order this when I saw this. And of course, you can't have too much strawberries; hence the extra order of more strawberries for my Berry Berries bowl. HAH! 
The addition of mango to the acai base not only added a more subtle sweetness, but also gave the base a slightly less appealing, muddy brown colour. 
Initially I thought it was the nutella, and then I realised it wasn't. 
The berries aren't tart enough for my liking (and both the blueberries & strawberries are disappointingly neither tart nor sweet), not something that The Acai Lab can do anything about it though; but the generous amount of granola and almond flakes added a nice crunch to the overall mouth-feel and also a great nutty flavour.

Nutty Nature - $8.90 (med) / $12.90 (lrg)
A mix of dried fruits, pumpkin seeds, mixed nuts as well as kiwis, bananas and blueberries on their signature acai base. This bowl is well-loved by many for having just the right amount of sweet and sour while still being just as refreshing, chilled and tasty like other bowls. 

If you're a huge fans of nuts and prefer having more crunchy "texture" in your acai bowl, this is your jam! The HB had this whole bowl to himself and quite liked it (although he prefers the Signature Acai Bowl more). 

For more information on what other Specialty Bowls & DIY Acai Bowls The Acai Lab has to offer for delivery, visit their website HERE
Also check out bestinsingapore.com for more of what's the best of everything Singapore has to offer. 
All food styling photographs credit to Owari Photography

Till then,
Mia Foo

Thursday, 13 August 2020

Mia Bakes: Applesauce Walnut & Raisin Quick Bread (With Green Banana Flour)

 Frankly speaking, I don't really understand the logic of quick breads. Let's face it, you can't get bread without long proofing. The texture just ain't right. They're still cakes, albeit coarser and denser.... Muffins! Yes, they're muffins baked in a loaf. Are they not? But breads or muffins, they're delicious. And they're also super quick and easy to make. So let's make ourselves some (slightly healthier) walnut and raisin quick bread using applesauce and green banana flour!
This is also going to be an eggless recipe, as I was baking this for my grandma, who doesn't eat eggs in the morning (due to religion). Making this eggless will allow her to eat the bread for breakfast instead of having to wait till after noon to eat it. 


If you've not heard of green banana flour, it's a gluten free alternative to grain flour, having been made from green bananas. They're said to be high in resistance starch, with benefits such as:

1. Improving negative effects of metabolic syndrome
2. Promotes a healthy colon
3. Could reduce insulin sensitivity
4. Possibly aids weight loss
5. May reduce cholesterol levels

So let's get over with the ingredients so we can get started!
To get 1 loaf serving, you'll need:

250g unsweeten applesauce
80g dark brown sugar
135g plain flour
85g green banana flour (I used Edward & Sons)
75g unsalted butter, soften
70g honey
1 tsp ground cinnamon
1/4 tsp ground nutmeg
1/2 tsp vanilla extract
1/4 tsp almond extract (optional)
1/3 tsp salt
2 1/2 tsp baking powder
1/4 tsp baking soda
100g raisins (I mixed sultanas with yellow raisins)
50-60g walnuts, roughly chopped.


In a large bowl, cream the soften butter and brown sugar together. Then, add in the applesauce, honey and extracts and mix until well combined. There might be some "separation" of the butter, but it's alright. From 135g of plain flour, take about 1 to 2 tbsps and mix it into the raisins and chopped walnut mixture and toss till everything is well coated. This will prevent the walnuts and raisins from sinking to the bottom of the bread while it bakes. 
Then, add in all the of the dry ingredients (flours and leavening agents) into the wet ingredients and mix until there's just a few streaks of flour to be seen. Then, dump in the chopped walnuts and raisins and mix until just combined. You do not want to overmix your batter, as the green banana flour (along with applesauce) will make your cake quick bread slightly denser (and crumbly) than usual. Overworking the gluten in your plain flour will definitely give you a super dense and tough bread. 

Once there's no more streaks of dry flour to be seen, scoop the batter into a lined loaf pan and bake at 175 degree Celsius for 30 to 35 minutes, or until a toothpick inserted comes out clean with just a few crumbs. Leave the bread to cool down slightly in the loaf pan for 5 to 10 minutes before taking it out of the pan and letting it cool COMPLETELY on a wire rack. Do not try to slice it when it's still warm; things will get messy with all the crumbling. 

And tadaa~ 

The dark brown sugar and honey will add a lot of rich sweetness to the cake, and while the applesauce helps to make the cake quick bread super moist, the green banana flour helps to give the bread a denser and "coarser" texture, like a christmas plum cake. Well, as I've said, this is definitely more of a cake (rich and sweet) than a bread (bland). Try it and let me know what you think!

Till then,
Mia Foo


Friday, 7 August 2020

Mia Cooks: Chicken Breast Tofu Hambagu (Japanese Hamburger Steak)

Well, it's been months of working from home and likewise, months of eating either chicken breast or white fish for lunch (I've slowly added in chickpeas and tofu along the way). Nope, I'm not giving them up. Just thought of making something more... special? Something that doesn't screams CHICKEN BREAST at me straight from the serving plate.

And then I found the video for Tofu Burger Steak on MASA's Cooking ABC and I thought, this is it! I shall try to make my own version of chicken breast tofu hambagu!


So to get 4 small pieces of the hamburger steak (2 servings), you'll need:

150g silken tofu (drained, see below for procedure)
160 - 180g chicken breast
50g white onion, finely chopped
1 green chili, chopped 
(I used India Chili -Banji)
your choice of seasoning
(I used garlic salt, black pepper, ground ginger, light soy sauce and some rice wine vinegar)

Things will get a lot simpler if you have a mini food processor, but if you don't, a sharp chopping knife will do just fine. But first, we have to strain off the excess liquid in the silken tofu. Wrap your piece of tofu in some sturdy kitchen towel paper and place it over a sieve that is set of a bowl. Then, place some form of weight ( I put a bowl of water) over the kitchen towel wrapped tofu and leave it standing for 30 minutes to an hour. You can also use pressed tofu instead of silken tofu (and drain it the same way), but due to the difference in water content and texture, you might need to add an egg as a binder for the final mixture to shape well.

For chicken breast, if you're using frozen ones like me, I'll suggest that you defrost them in a bowl of salt water (as already mentioned in my previous recipe posts using chicken breast). I find that brining the chicken breast (especially frozen ones) not only make the meat less tough, but also helps eliminate the "frozen" taste that tends to linger in the chicken despite being fully cooked. If you've ever eaten a piece of "bad" (frozen) chicken, you'll know what I'm talking about.

Rinse your brined chicken breast clean under tap water and either cut them into chunks (if you're using a food processor) or simply chop them up into minced meat using a chopper, and set them aside. Next, the onion. If you're a fan of caramelised onions, I'll suggest that you fully cook the onions by stir frying them with a little bit of oil until they've caramelised before adding them into the other raw ingredients. Otherwise, just skip the pre-cooking part, it's fine. If you personally love the sweetness of cooked onions, feel free to add more into the mix.


In a large bowl, add in your minced chicken, chopped onions and chili, and mash up the tofu with your hands before adding them into the bowl. Add in seasonings of your choice and mix with a pair of chopsticks (or fork) by stirring in one direction vigorously until everything is well combined and starts to feel pastey and sticky. If you're using a food processor, simply dump everything into the food processor and process until you're left with a homogeneous meat paste.

Then, using clean hands, divide the mixture into 4 portions and shape each portion into palm size meat patty. Do try to throw (or drop) them from one hand to the other so as to remove any pockets of air trapped in between. Then, place the patties onto a lightly greased non stick pan and cook on low to medium heat for 5 to 7 minutes on each side, until browned. 


Even though I've used chicken breast, the addition of silken tofu not only reduce the overall calories but also makes the patty super soft and tender. And the bits of onions added a nice sweetness while the chili added a nice heat. 

Till then,
Mia Foo

Sunday, 2 August 2020

Mia Bakes: Yogurt Oat Fibre Pancakes

On a low calorie diet, need to hit your macros target for protein, but craving pancakes and hates those protein (powder) pancakes with a vengeance and would rather chew on cardboard instead?

Now, I got you covered.
With these, super low calorie, high protein, MOIST pancakes. 

To get a stack of 5 small pancakes, you'll need:

190g plain natural yogurt + a tiny pinch of salt
(or about 100g of plain Greek Yogurt)
1 egg
1 tbsp oat fibre
2 tsp stevia 
(or any amount of sweetener of your choice)
2 tbsp PB2 (powdered peanut butter)**
1/4 baking powder
1/8 baking soda
water or milk, if required (to tweak the batter consistency)

optional:
a few drops of vanilla extract
handful of chocolate chips

**feel free to substitute with plain flour and/or unsweetened cocoa powder if you do not wish to get peanut butter flavoured pancakes.

I used Farmer's Union 0.5% fat plain greek yogurt for the macros calculation and got the calorie count of the entire recipe (excluding optional ingredients) at only 193 kcals, with 20.1g protein, 6.8g fat and 24.2g carbs (total, not net carbs). Rather impressive, yes?
Do note that the PB2 added a substantial amount of protein to the recipe, hence if you were to swap it out for cocoa powder or plain flour, you should probably get a stack of pancakes with lower calories and lower protein count.


If you're using natural yogurt, you'll need to strain it overnight using a sieve with either cheesecloth, if you have one, or some coffee filter paper or tea filter paper will do the trick as well. Set your sieve over a bowl and lay the filter paper over it, spoon the natural yogurt into the sieve and sprinkle a tiny pinch of salt over it. Cover with a cling wrap and set in the fridge overnight. After 8 to 12 hours, it should be of a consistency that's even thicker than your usual greek yogurt. But of course, if you feel that this is too much of a hassle, you can simply use 100g of greek yogurt instead.

And to a clean bowl, add in the yogurt and crack in an egg and whisk until well combined, before adding in all of the remaining dry ingredients, mixing until the batter is smooth. There's no wheat flour in the recipe here, so no worries about overmixing your pancake batter. Depending on how big your egg is and how strained your yogurt is, feel free to tweak the consistency of your pancake batter with milk or just water to a thick, yet pour-able consistency.

Then, go on to heat up and lightly grease your non-stick pan. Pour the pancake batter onto the pan, it should spread out easily on its own. Do not try to make them too big, as they do not flip well (no flour, remember?). Cook the pancake over low to medium heat for 3 to 5 minutes, until bubbles starts to appear on the surface, and carefully slip them over to cook on the other side. As I said, these pancakes DO NOT flip well, so be extra careful when flipping them. Cook the pancakes on the other side for another 2 to 3 minutes, or until the top springs back slightly when you press lightly on them. They will also puff up considerably when just cooked, and deflates soon after leaving the pan (like souffle pancakes/baked cheesecake).

And tadaa~ My beautiful stack of 5 pancakes. 

If I'm adding chocolate chips to my pancake, I'll always make my first pancake without the added chips so that my stack of pancakes won't look spotty in the pictures. HAHA. 

But look at them! These pancakes are super, super moist and soft in the middle. Just like the gooey centre of a baked cheesecake. Well, it's almost just like eating cheesecake, but in pancake form, with the slight tartness of yogurt (you might want to add more sweetener if you're not a fan of the sourness of natural plain yogurt) and without the crazy calories. 
ENJOY! 

Till then,
Mia Foo


Saturday, 1 August 2020

Mia Cooks: Yogurt Sriracha Shredded Chicken Salad

You know what, I've been using sriracha sauce to spice up nearly ALL my stir fries for lunch these days (used up 1.5 bottles till date) and have also been snacking on greek yogurt as my mid-day snack for MONTHS. But never ever have I thought of mixing these two together to create a low calorie, diet-friendly salad dressing. 
But, better too late then never, right?

Anyway, the ingredients for the salad is really simple, and you can pair it with any type of vegetables you fancy, really. But here's what I used for mine.

For 2 servings, you'll need: 

For the salad:
1 half skinless, boneless chicken breast (about 150 - 180g, raw)
2 cloves of garlic, crushed (press down with the blade of your knife)
1/4 tsp ground ginger (or a few slices of fresh ginger)
1/4 tsp salt
1/4 tsp ground black pepper
Capsicum / Bell Peppers (I used red and yellow, half each)
Japanese Cucumber (1 small/medium, about 200g)
1 King Oyster Mushroom, sliced (about 70g)
1/2 white onion, thinly sliced (about 50g)

For the dressing:
2 tbsp plain Greek yogurt
1 tbsp honey lemon 
(I used the juice I have leftover in my jug of honeyed lemon slices, but you can mix honey and lemon juice in the ratio you prefer)
1 - 2 tbsp sriracha sauce
a pinch of salt
a dash of chili powder (optional)


First up, always brine your chicken if they're frozen. Immerse the chicken in a bowl of salt water and leave it to chill in the fridge for 2 to 3 hours. Then, rinse the chicken under a running tap for a few seconds and place it into a pot with just enough water to cover the entire piece of chicken. Into the water, add the crushed garlic, ground ginger, salt and black pepper and then bring the water to a boil. Allow to simmer until the chicken breast is fully cooked. Remove the chicken breast from the water and leave it to cool down before tearing the chicken into shreds with your hands; set them aside.

In a hot pan (make sure they're hot), put in the sliced mushrooms and roast them over high heat until they're browned and starts to smell roasty and fragrant. The trick here is to make sure that your pan is hot enough, if not the mushroom will start to produce moisture and they won't brown nicely. Once the mushrooms are browned, remove them from the pan and add in the sliced onions. Cook the onions over medium heat until they turn slightly translucent. Go ahead to cook them further until they're caramelised or even add them into your salad raw if you're a fan of either. Set the cooked mushrooms and onions aside to cool down. 

Then, cut your choice of vegetables into bite size strips and add them into a large clean bowl. Add in the cooled chicken, mushrooms and onions. Then, in a small bowl, add in 2 tablespoons of greek yogurt along with 1 tbsp of honey lemon water. As the consistency of greek yogurt differs across different brands, just add enough honey lemon water to reach the consistency of natural yogurt. Then add in sriracha until you get the desired amount of spiciness. Season with a tiny pinch of salt and some chili powder before adding the dressing into your bowl of salad. Toss well to combine.

Tadaa~

I'm not a huge fan of salad dressing in general, hence I used the bare minimum amount I need to get some taste in my raw vegetables. If you're the kind who loves to drench your salad in dressing, you may want to double the recipe for the dressing instead. 

Till then,
Mia Foo