MollyMia Aspire to Inspire before we Expire

Friday, 7 August 2020

Mia Cooks: Chicken Breast Tofu Hambagu (Japanese Hamburger Steak)

Well, it's been months of working from home and likewise, months of eating either chicken breast or white fish for lunch (I've slowly added in chickpeas and tofu along the way). Nope, I'm not giving them up. Just thought of making something more... special? Something that doesn't screams CHICKEN BREAST at me straight from the serving plate.

And then I found the video for Tofu Burger Steak on MASA's Cooking ABC and I thought, this is it! I shall try to make my own version of chicken breast tofu hambagu!


So to get 4 small pieces of the hamburger steak (2 servings), you'll need:

150g silken tofu (drained, see below for procedure)
160 - 180g chicken breast
50g white onion, finely chopped
1 green chili, chopped 
(I used India Chili -Banji)
your choice of seasoning
(I used garlic salt, black pepper, ground ginger, light soy sauce and some rice wine vinegar)

Things will get a lot simpler if you have a mini food processor, but if you don't, a sharp chopping knife will do just fine. But first, we have to strain off the excess liquid in the silken tofu. Wrap your piece of tofu in some sturdy kitchen towel paper and place it over a sieve that is set of a bowl. Then, place some form of weight ( I put a bowl of water) over the kitchen towel wrapped tofu and leave it standing for 30 minutes to an hour. You can also use pressed tofu instead of silken tofu (and drain it the same way), but due to the difference in water content and texture, you might need to add an egg as a binder for the final mixture to shape well.

For chicken breast, if you're using frozen ones like me, I'll suggest that you defrost them in a bowl of salt water (as already mentioned in my previous recipe posts using chicken breast). I find that brining the chicken breast (especially frozen ones) not only make the meat less tough, but also helps eliminate the "frozen" taste that tends to linger in the chicken despite being fully cooked. If you've ever eaten a piece of "bad" (frozen) chicken, you'll know what I'm talking about.

Rinse your brined chicken breast clean under tap water and either cut them into chunks (if you're using a food processor) or simply chop them up into minced meat using a chopper, and set them aside. Next, the onion. If you're a fan of caramelised onions, I'll suggest that you fully cook the onions by stir frying them with a little bit of oil until they've caramelised before adding them into the other raw ingredients. Otherwise, just skip the pre-cooking part, it's fine. If you personally love the sweetness of cooked onions, feel free to add more into the mix.


In a large bowl, add in your minced chicken, chopped onions and chili, and mash up the tofu with your hands before adding them into the bowl. Add in seasonings of your choice and mix with a pair of chopsticks (or fork) by stirring in one direction vigorously until everything is well combined and starts to feel pastey and sticky. If you're using a food processor, simply dump everything into the food processor and process until you're left with a homogeneous meat paste.

Then, using clean hands, divide the mixture into 4 portions and shape each portion into palm size meat patty. Do try to throw (or drop) them from one hand to the other so as to remove any pockets of air trapped in between. Then, place the patties onto a lightly greased non stick pan and cook on low to medium heat for 5 to 7 minutes on each side, until browned. 


Even though I've used chicken breast, the addition of silken tofu not only reduce the overall calories but also makes the patty super soft and tender. And the bits of onions added a nice sweetness while the chili added a nice heat. 

Till then,
Mia Foo

Sunday, 2 August 2020

Mia Bakes: Yogurt Oat Fibre Pancakes

On a low calorie diet, need to hit your macros target for protein, but craving pancakes and hates those protein (powder) pancakes with a vengeance and would rather chew on cardboard instead?

Now, I got you covered.
With these, super low calorie, high protein, MOIST pancakes. 

To get a stack of 5 small pancakes, you'll need:

190g plain natural yogurt + a tiny pinch of salt
(or about 100g of plain Greek Yogurt)
1 egg
1 tbsp oat fibre
2 tsp stevia 
(or any amount of sweetener of your choice)
2 tbsp PB2 (powdered peanut butter)**
1/4 baking powder
1/8 baking soda
water or milk, if required (to tweak the batter consistency)

optional:
a few drops of vanilla extract
handful of chocolate chips

**feel free to substitute with plain flour and/or unsweetened cocoa powder if you do not wish to get peanut butter flavoured pancakes.

I used Farmer's Union 0.5% fat plain greek yogurt for the macros calculation and got the calorie count of the entire recipe (excluding optional ingredients) at only 193 kcals, with 20.1g protein, 6.8g fat and 24.2g carbs (total, not net carbs). Rather impressive, yes?
Do note that the PB2 added a substantial amount of protein to the recipe, hence if you were to swap it out for cocoa powder or plain flour, you should probably get a stack of pancakes with lower calories and lower protein count.


If you're using natural yogurt, you'll need to strain it overnight using a sieve with either cheesecloth, if you have one, or some coffee filter paper or tea filter paper will do the trick as well. Set your sieve over a bowl and lay the filter paper over it, spoon the natural yogurt into the sieve and sprinkle a tiny pinch of salt over it. Cover with a cling wrap and set in the fridge overnight. After 8 to 12 hours, it should be of a consistency that's even thicker than your usual greek yogurt. But of course, if you feel that this is too much of a hassle, you can simply use 100g of greek yogurt instead.

And to a clean bowl, add in the yogurt and crack in an egg and whisk until well combined, before adding in all of the remaining dry ingredients, mixing until the batter is smooth. There's no wheat flour in the recipe here, so no worries about overmixing your pancake batter. Depending on how big your egg is and how strained your yogurt is, feel free to tweak the consistency of your pancake batter with milk or just water to a thick, yet pour-able consistency.

Then, go on to heat up and lightly grease your non-stick pan. Pour the pancake batter onto the pan, it should spread out easily on its own. Do not try to make them too big, as they do not flip well (no flour, remember?). Cook the pancake over low to medium heat for 3 to 5 minutes, until bubbles starts to appear on the surface, and carefully slip them over to cook on the other side. As I said, these pancakes DO NOT flip well, so be extra careful when flipping them. Cook the pancakes on the other side for another 2 to 3 minutes, or until the top springs back slightly when you press lightly on them. They will also puff up considerably when just cooked, and deflates soon after leaving the pan (like souffle pancakes/baked cheesecake).

And tadaa~ My beautiful stack of 5 pancakes. 

If I'm adding chocolate chips to my pancake, I'll always make my first pancake without the added chips so that my stack of pancakes won't look spotty in the pictures. HAHA. 

But look at them! These pancakes are super, super moist and soft in the middle. Just like the gooey centre of a baked cheesecake. Well, it's almost just like eating cheesecake, but in pancake form, with the slight tartness of yogurt (you might want to add more sweetener if you're not a fan of the sourness of natural plain yogurt) and without the crazy calories. 
ENJOY! 

Till then,
Mia Foo


Saturday, 1 August 2020

Mia Cooks: Yogurt Sriracha Shredded Chicken Salad

You know what, I've been using sriracha sauce to spice up nearly ALL my stir fries for lunch these days (used up 1.5 bottles till date) and have also been snacking on greek yogurt as my mid-day snack for MONTHS. But never ever have I thought of mixing these two together to create a low calorie, diet-friendly salad dressing. 
But, better too late then never, right?

Anyway, the ingredients for the salad is really simple, and you can pair it with any type of vegetables you fancy, really. But here's what I used for mine.

For 2 servings, you'll need: 

For the salad:
1 half skinless, boneless chicken breast (about 150 - 180g, raw)
2 cloves of garlic, crushed (press down with the blade of your knife)
1/4 tsp ground ginger (or a few slices of fresh ginger)
1/4 tsp salt
1/4 tsp ground black pepper
Capsicum / Bell Peppers (I used red and yellow, half each)
Japanese Cucumber (1 small/medium, about 200g)
1 King Oyster Mushroom, sliced (about 70g)
1/2 white onion, thinly sliced (about 50g)

For the dressing:
2 tbsp plain Greek yogurt
1 tbsp honey lemon 
(I used the juice I have leftover in my jug of honeyed lemon slices, but you can mix honey and lemon juice in the ratio you prefer)
1 - 2 tbsp sriracha sauce
a pinch of salt
a dash of chili powder (optional)


First up, always brine your chicken if they're frozen. Immerse the chicken in a bowl of salt water and leave it to chill in the fridge for 2 to 3 hours. Then, rinse the chicken under a running tap for a few seconds and place it into a pot with just enough water to cover the entire piece of chicken. Into the water, add the crushed garlic, ground ginger, salt and black pepper and then bring the water to a boil. Allow to simmer until the chicken breast is fully cooked. Remove the chicken breast from the water and leave it to cool down before tearing the chicken into shreds with your hands; set them aside.

In a hot pan (make sure they're hot), put in the sliced mushrooms and roast them over high heat until they're browned and starts to smell roasty and fragrant. The trick here is to make sure that your pan is hot enough, if not the mushroom will start to produce moisture and they won't brown nicely. Once the mushrooms are browned, remove them from the pan and add in the sliced onions. Cook the onions over medium heat until they turn slightly translucent. Go ahead to cook them further until they're caramelised or even add them into your salad raw if you're a fan of either. Set the cooked mushrooms and onions aside to cool down. 

Then, cut your choice of vegetables into bite size strips and add them into a large clean bowl. Add in the cooled chicken, mushrooms and onions. Then, in a small bowl, add in 2 tablespoons of greek yogurt along with 1 tbsp of honey lemon water. As the consistency of greek yogurt differs across different brands, just add enough honey lemon water to reach the consistency of natural yogurt. Then add in sriracha until you get the desired amount of spiciness. Season with a tiny pinch of salt and some chili powder before adding the dressing into your bowl of salad. Toss well to combine.

Tadaa~

I'm not a huge fan of salad dressing in general, hence I used the bare minimum amount I need to get some taste in my raw vegetables. If you're the kind who loves to drench your salad in dressing, you may want to double the recipe for the dressing instead. 

Till then,
Mia Foo


Friday, 31 July 2020

Mia Bakes: 44 Calories Chocolate Cake

Oh yeah, a 44 calories chocolate cake. 
Wait, WHAT? FORTY-FOUR calories, CHOCOLATE cake? 
Yes, you read that right. And that wasn't a clickbait title, nor some portion size reduction trick. I'm going to share with you a recipe I've found on Oat Fiber's youtube channel, for a friggin 44 calories chocolate cake of a decent portion size that WILL fill you up. 

And here's what's 40 calories of chocolate cake look like. 
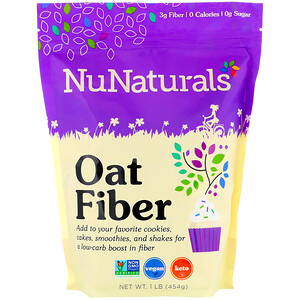
And the trick here, as I've said is NOT portion sizes, but oat fibre (I got mine from NuNaturals off iherb.sg)! 

Oat fibre comes from the fibrous husk of the oats, which is pure insoluble fibre and hence, virtually indigestible and therefore contains zero calories, carbs and nutrients. It helps to pack a load of insoluble fibre into our diet, which helps to reduce constipation (provided you're drinking enough water), promotes a full feeling for long periods of time and may even help to reduce over LDL cholesterol. 

Okay, the "health benefits" of oat fibre aside, the bigger benefit of oat fibre (for fellow ladies watching your calories), is that it is ZERO calories and helps to add bulk to your food. For example, you can get your usual 4-pancake stack into a 6-pancake stack without any additional calories just by adding oat fibre! This is literally a godsend for me right now, being unable to do any form of legit exercise for the next 2 months due to a tailbone fracture.

Anyway, let's get over with the ingredients, so we can get started.

For 1 serving (I made mine in 2 silicon cupcake moulds): 
1 tbsp plain flour (27.5 kcals)
2 tbsp oat fibre (0 kcals)
1 tbsp unsweeten cocoa powder (10 kcals, I used Hershey's)
0.5 tbsp 0 calorie sweetener of your choice (0 kcals)
1 tbsp 0 calorie maple flavour syrup (0 kcals) 
1/8 tsp baking powder (0 kcals)
half of 1/8 tsp baking soda (0 kcals)
1 tbsp low fat milk (6 kcals, I used FairPrice housebrand)
1.5 - 2 tbsp water (0 kcals)

adapted from Oat Fiber

Making this can't be any easier, just dump all the dry ingredients into a small clean bowl (you can sift your cocoa powder if they're too lumpy), give it a quick stir with a fork to get them well combined before adding in the wet ingredients (except the water) and stirring until well combined. Then, add in enough water to get the batter to a pourable, cake batter consistency.

Then, transfer the batter into a mould of your choice and STEAM it, either in your steamer if you have one or in a large pot of boiling water, covered, for about 15 to 20 minutes, until a toothpick inserted comes out clean.

The thing about oat fibre, is that it gives a very dry and crumbly, yet also wet and mushy texture to baked goods, if you've replaced too much of the flour with it. So steaming this cake is the way to get your cake coming out tender, moist and fudgy, just like a fudgy brownie. 

If you're not hard up on saving the calories, I'll strongly suggest that you pop in a tablespoon of chocolate chips as well to add in more flavour to the cake. Otherwise, this will be an extremely healthy tasting cake. But hey, it's only 44 calories and it's of a decent serving size that will fill you up. What more can you ask for, right?

Till then,
Mia Foo

Wednesday, 29 July 2020

BestInSingapore's PizzaDelivery [Sponsored]

Pizzas, anyone?
Been craving for pizza during cheatday for a while; and it seems like Best In Singapore has heard my cheatday wish! Thanks to them, I was able to try out Pizza Delivery Singapore, which was rated the 13 Best Pizza Deliveries in Singapore. 

True to its name, Pizza Delivery focuses primarily on online delivery of the pizza experience, striving to provide us an authentic Italian experience with just a click away at our fingertips. An upscale fast-casual concept that serves up artisan-style Neapolitan pizzas and pasta made-on-demand, ready in minutes and delivered to our doorstep all under 1 hour! Neapolitan pizza, also known as pizza Napoletana, is a type of pizza that originated in Naples, Italy. This style of pizza is prepared with simple and fresh ingredients, with a very thin and airy crust at the base

Using air-flown Italian ingredients, coupled with their signature pizza sauce that's simmered for 8 hours and pizza dough that's fermented for 72 hours, the pizzas at Pizza Delivery are made on demand - right on the spot with each incoming order, unlike the usual mass-produced pizzerias, and fired up in their custom-made Italian stone oven replica. The ceramic material of a pizza stone is able to hold heat evenly, which absorbs moisture of the dough as it bakes, hence giving a crispier crust and a unique smoky flavour that a normal kitchen oven will not be able to replicate. 


At just $57.80, you'll get 2 large 12" pizza (8 slices) of your choice, along with 6 pieces of Crispy Chicken Wings & Mozzarella Sticks. 

And here's the two pizza flavours I've chosen for my bundle.

Le Amatriciana Pizza - $9.90 - $35.00

The all-time Italian favourite with tangy tomato sauce, streaky bacon, sliced yellow onions, red chilli, mozzarella cheese, and garnished with fresh parsley.

You definitely cannot go wrong with a thin crust, stone oven pizza topped with streaky bacon. The bacon bits gave so much savoury flavour to the pizza, while the chopped red chilli added a nice amount of heat to complement the tangy flavour of the tomato sauce and cuts through the creamy heaviness of the mozzarella cheese. 

This is the kind of pizza that do not require any added grated Parmesan cheese or chilli flakes; and you'll just reach for the 2nd, 3rd and possibly 4th piece until you're stuffed. 

The list of toppings definitely sounded very basic, but sometimes it's the most basic ingredients, when executed perfectly in a dish, which blows you away. 

Chicken Alfredo Pizza - $12.90 - $39.00

Take a bite into the ultimate chunky yet tender pieces of chicken breast with fresh cherry tomatoes, mushrooms, capsicum peppers, briny olives and mozzarella cheese in Alfredo cream sauce. 

Well, I'm always pro-tomato (over cream based sauces), so perhaps my rating here will be a little biased. I decided to go with this pizza instead of the safest choice of Hawaiian (pineapples belong on pizza, don't argue with me about that!) because an Alfredo pizza sounds pretty new and unique to me. But unfortunately, it turns out that this pizza only wow-ed me with its novelty. 

I'll definitely prefer the Le Amatriciana over this. Probably due to the choice of using chicken breast, the meat was a tad dry and tough. The combination of mozzarella cheese with Alfredo cream sauce also lacks the dimension that would have been easily accomplished with a tangy tomato sauce. Overall the taste profile of this pizza is rather flat, but I can totally see a cream-based sauce fan loving this pizza instead. 

Mozzarella Cheese Stick (6 pcs) - $11.90 

100% Mozzarella sticks battered with golden breadcrumbs and grated Parmesan cheese. 

As the food were merely lukewarm when delivered, you can no longer create a cheese-pull with the cheese sticks. But if you really desire to have one, I suppose a few minutes of reheating in the airfryer should do the trick? 

I totally appreciate that they've added Parmesan cheese to the breadcrumbs coating, which added tons of cheesy flavour to the cheese sticks. Well, we all know Parmesan is the MSG among cheeses, right? The grated Parmesan added so much flavour to the cheese sticks, that I could eat them without the marinara dipping sauce. And although lukewarm and lacking in the cheese-pull effect, the cheese was still chewy and had a great bite, similar to a QQ (bouncy) fishcake. 

Crispy Chicken Wings (6 pcs) - $10.90 (was $14.90)

Our house specialty - Juicy, tender and crispy wings fried to perfection!

Love how these battered wings are still crispy despite being lukewarm! While the outside remains crisp and crunchy, the flesh was still tender and juicy. Although the chicken wings themselves weren't exceptionally flavourful, the mayo dipping sauce complemented the subtle flavour of the marinate seasoning really well. 

Carbonara Spaghetti - $16.90

Silky white cream sauce accompanied with streaky bacon slices, white wine, garlic, freshly ground pepper and grated Parmesan. 
*also available in Linguine 

For just $16.90, you'll get A LOT of pasta and bacon bits. Both the HB and I are BIG EATERS, and as we both place our focus on finishing the pasta first, we ended up only finishing 6 of the total 16 slices of pizza, and left half of the chicken wings and cheese sticks untouched. 

Taste wise, once again you cannot go wrong with streaky bacon in.... anything. It's amazing how these small pieces of meat can add so much savoury goodness to any dish. However, I'm not sure if it's due to the time taken for delivery, but this was the driest carbonara pasta I've ever eaten. No wait, scratch that. This was the driest pasta (vongole, aglio olio included) I've ever eaten. It taste perfectly fine though, just way too dry. 


Another aspect of Pizza Delivery that I really appreciate, is how they not only tag a "best consumed by" time on every packaged order, but also clear stated the time the dish was ready to eat. 

Pizza Delivery offers free islandwide delivery with purchases over $60. For a limited time only, enjoy a 1 for 1 promotion deal for all medium and large pizzas. 
For more information, check out their website HERE

Meanwhile, also drop by bestinsingapore.com to check out more reviews on the best things Singapore has to offer! 

Disclamer: All food styling photographs credit to Owariphotography 

Till then,
Mia Foo

Tuesday, 28 July 2020

Mia Cooks: Healthy Oyako Don

Yes, as if oyako don itself isn't healthy enough (as compared to katsu don). But hey, it wasn't a cheatday and I just wanted to eat cleaner. 

So here's my #eatclean recipe for a healthy oyako don, using chicken breast and brown rice! 

For (relatively normal) 2 servings, you'll need: 
1 skinless & boneless chicken breast (about 200g raw weight) 
1 small/medium white onion (about 100 - 120g)
3 medium/large eggs (about 50-55g each, without shells)
1 tbsp milk
120ml chicken broth (I used Swanson)
30ml light soy sauce
30ml rice wine vinegar (or mirin)
1/2 tsp sugar (if you're using rice wine vinegar instead of mirin)
1 serving of cooked brown rice, or any other type of cooked rice preferred. 
(or even half portion of rice, if you're watching your diet)

Firstly, to get the sauce mix out of the way, it should always be in the 4:1:1 ratio, 4 parts broth to 1 part soy sauce and mirin/rice wine vinegar+sugar. So if you're halving or doubling the recipe, you can do your own maths. But do note that the ratio should be following the number of eggs you're using and not the amount of chicken you're adding. 

To prepare the chicken breast (especially if you're using frozen ones like I did), immerse it in a bowl of salt water and leave to chill in the fridge for 2 to 3 hours. Brining your chicken is very important, especially if you're using frozen chicken, or chicken breast. It not only make the breast meat more tender, but also help to eliminate the "icy frozen meat taste" that tends to be quite distinct in frozen chicken meat. Rinse the brined chicken under running tap for a few seconds and pound the meat slightly using a tenderiser or the back of your knife. Then, cut the meat into bite size chunks.
Wash the white onion and slice it into thin slices (or however thick you prefer). Spread the onions out evenly onto your lightly greased non-stick pan and turn on the heat. Allow the onions to cook until they're slightly translucent (I prefer to "roast" mine over medium to high until they're slightly charred) before adding in the chicken. Then, pour in the sauce mix and cover the pan with a lid and allow the meat to fully cook through on medium heat. 
In a clean bowl, first crack in 2 eggs and beat it with a tablespoon of milk. Add the mixture into the pan evenly and allow to cook until the egg is set. Then, crack in the last egg and just lightly stir it to break the yolk; do not beat the egg into a homogenous mixture. Pour the egg mixture over the set eggs and cook it until the eggs are set to your liking. 

If you're making just 1 serving (with just 2 eggs) in a smaller pan, you can just slide the whole "cake" off the pan and directly onto your bowl of rice and serve with a sprinkle of chopped spring onions. 


But since I was making 2 servings together in the same pan, I had to scoop them out bit by bit. Hence my final product wasn't that IG-worthy. HEH!

Till then,
Mia Foo

Wednesday, 22 July 2020

BestInSingapore's Pillow: Origin Mattress [Sponsored]

Getting an adequate amount of good sleep is definitely an important factor for living a healthy life, and one of the key factors in getting a good night's sleep is having a pillow that fits our needs. Resting our heads on the right pillows is not only comforting, but they also play an important role in supporting the intricate structures of our head, neck, shoulders, hips and spine. Pillows serve to keep our upper body in alignment during sleep, and when used well, will help in alleviating or preventing any common forms of back and neck pains, as well as shoulders, hips and other forms of joint pain. 

So glad to have Best In Singapore sending over a fabulous latest foam support pillow from Origin Mattress, the Origin Superior Coolmax Latex Pillow from Origin Mattress, that's rated as one of the 8 best comfortable pillows to buy in 2020. 


Origin Superior Coolmax® Latex Pillow - $129 (Usual price $159)
Sink into the ultimate plush pillow that cradles your head. The Origin Superior Coolmax® Latex Pillow offers a responsive Latex foam support and is completed with a removable Tencel fabric pillow cover. 


Latex foam has a denser material as compared to memory foam or fibre. A Latex pillow moulds to the shape of your head which gives you the right level of sleep support. Latex materials are extremely durable with hypoallergenic properties that have lesser dust, bacteria or mould issues. It is highly recommended for people with allergies to provide a good relaxing sleep. Being impression-resistant, it can also hold its shape for many years while still feeling soft.
Unlike many pillows, Origin Superior Coolmax® Latex Pillow has a removable pillow cover. Luxuriously threaded with Tencel fabric, this cover can be machine washed which helps to extend the pillow’s life in the long run. Tencel fabric is known for its natural comfort, environmentally responsible production process and being softer as compared to cotton. It is hypoallergenic, lightweight, and extremely ideal for hot weather climates.


Well, I guess I'm a little weird here. Even though the pillow comes with an easily removable (and machine washable) Tencel pillow cover, I still had to cover the cover with another pillow cover. I guess it's because the Tencel cover just looks so white and clean, I just cannot bear to lay my head (even though I've washed my hair and it's perfectly clean) directly on it. HAHA!

As I tend to toss and turn around in my sleep and hence, both a side sleeper and back sleeper (sometimes I even sleep on my tummy), I like how the pillow is also raised at the edges (as oppose to those which tends to tapers off into literally nothing but just bare fabric) such that the pillow has sufficient height all round to give adequate support to my neck no matter which way I'm snoozing. 


Cheers to no more stiff neck in the morning! 

For more information on what Origin Mattress has to offer apart from this amazing pillow, check out their website HERE. 
Meanwhile, also drop by bestinsingapore.com to check out more reviews on the best things Singapore has to offer! 

Till then,
Mia Foo

Sunday, 19 July 2020

Mia Cooks: Chickpea Toasties

Chickpeas fans, anyone? 
-credits to medicalnewstoday-

Chickpeas, also known as garbanzo beans, are a type of legume that's rich in fibre and protein. It contains a range of nutrients, which is necessary for bone, muscle and skin health. Chickpeas (both canned and dried) has been one of my main choice of protein sources (alongside tofu, chicken breast and white fish fillets) for my #stayhomelunch these days. 
I've been mainly stir-frying them with zucchini and tomatoes in sriracha sauce to go alongside a serving of rice or oatmeal porridge
And then I thought, why not make a toastie sandwich out of them? 

So let's get over the ingredients, so we can get started! Do tweak the amount depending on how generously you'll like to fill up your sandwich. I obviously prepared way too much filling, so much so that I had to do a "double-decker". 

100g boiled chickpeas or canned chickpeas, drained
30 - 40g white onion, chopped
a pinch of salt
25g natural plain yogurt
1 tbsp (~10g) sriracha sauce
a dash of black pepper
a dash of chili powder
a dash of ground ginger
two slices of bread according to your choice

optional toppings:
lettuce slices
tomato slices
cheese


First up, chop the onions as finely as you fancy and sauteed them over a lightly greased pan, with a pinch of salt, until they're slightly transparent (cooked). If you prefer your onions to be sweet, you can also cook them further until they're soft and caramelised. Then, dump the cooked onions into a bowl along with the chickpeas and mash them up with a potato masher (you can try using a sturdy fork as well, or even a food processor) until the mixture is mashed up to your liking. Add in the yogurt, sriracha and seasonings and mix well. Do give the mixture a taste test and add more seasonings according to your preference. 

Then, grab two slices of your choice of bread (I used wholemeal) and pop them into the toaster or oven, and toast them until they're browned and crisp to your liking. Assemble your toastie with the prepared filling, plus whatever toppings you like. 
I actually added some shredded mozzarella cheese onto my bread while they toast, but the chickpea filling will be quite flavourful and you won't be able to taste the mozzarella at all. If you'll like to have some cheese in your toastie, I'll suggest that you use a cheese with a sharper flavour. 


And tadaa~
My double-decker chickpea toastie, served with some pan roasted vegetables.

Till then,
Mia Foo